This guide explains how to create custom objects and fields in Salesforce and map them to corresponding QuickBooks objects and fields for seamless data synchronization.
Step 1: Create a Custom Object in Salesforce
Click Setup.
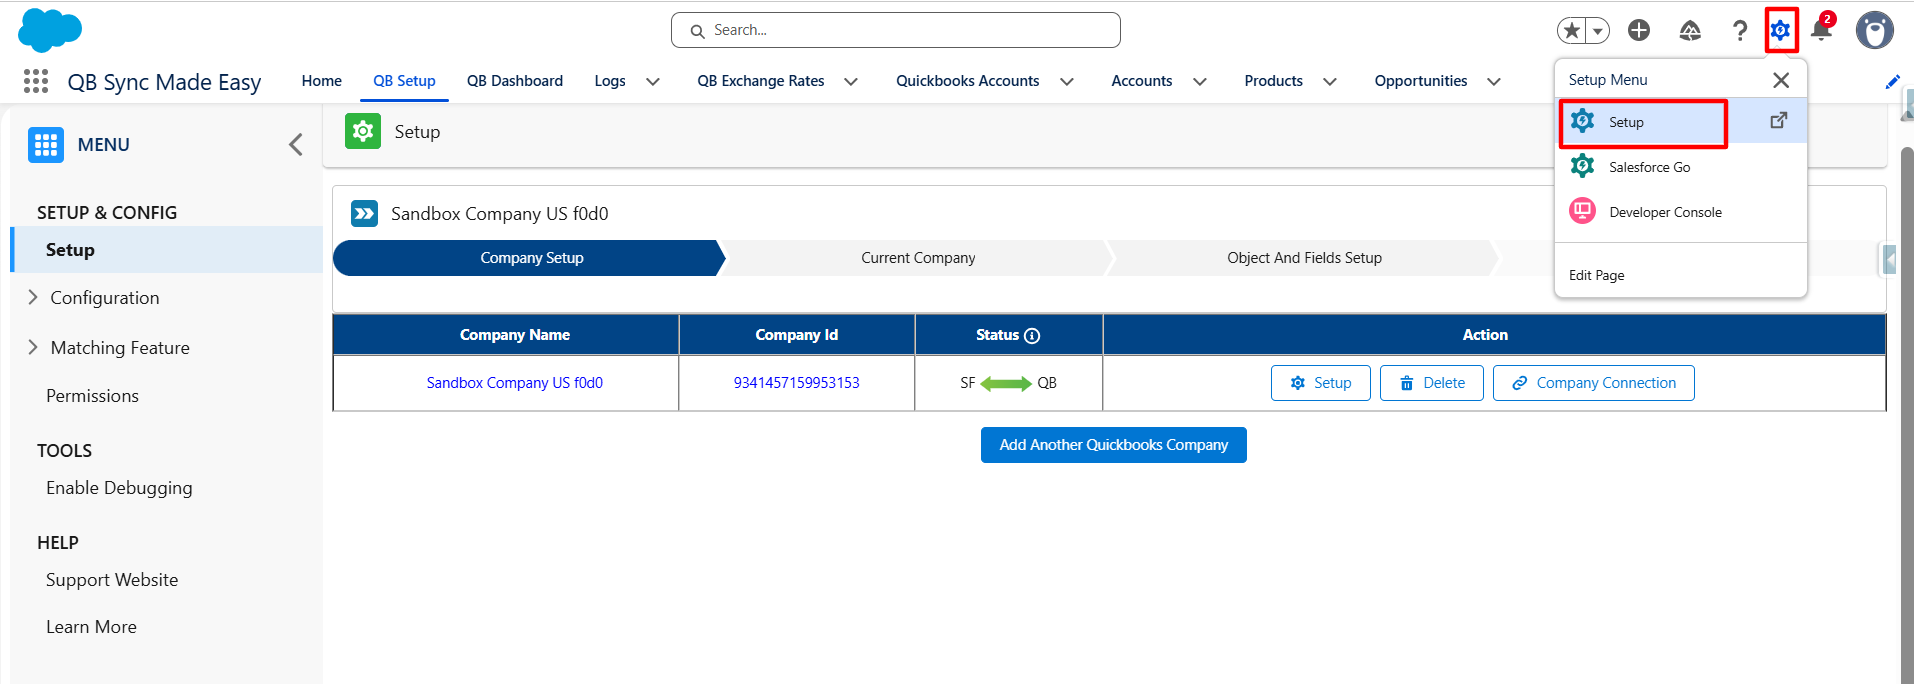
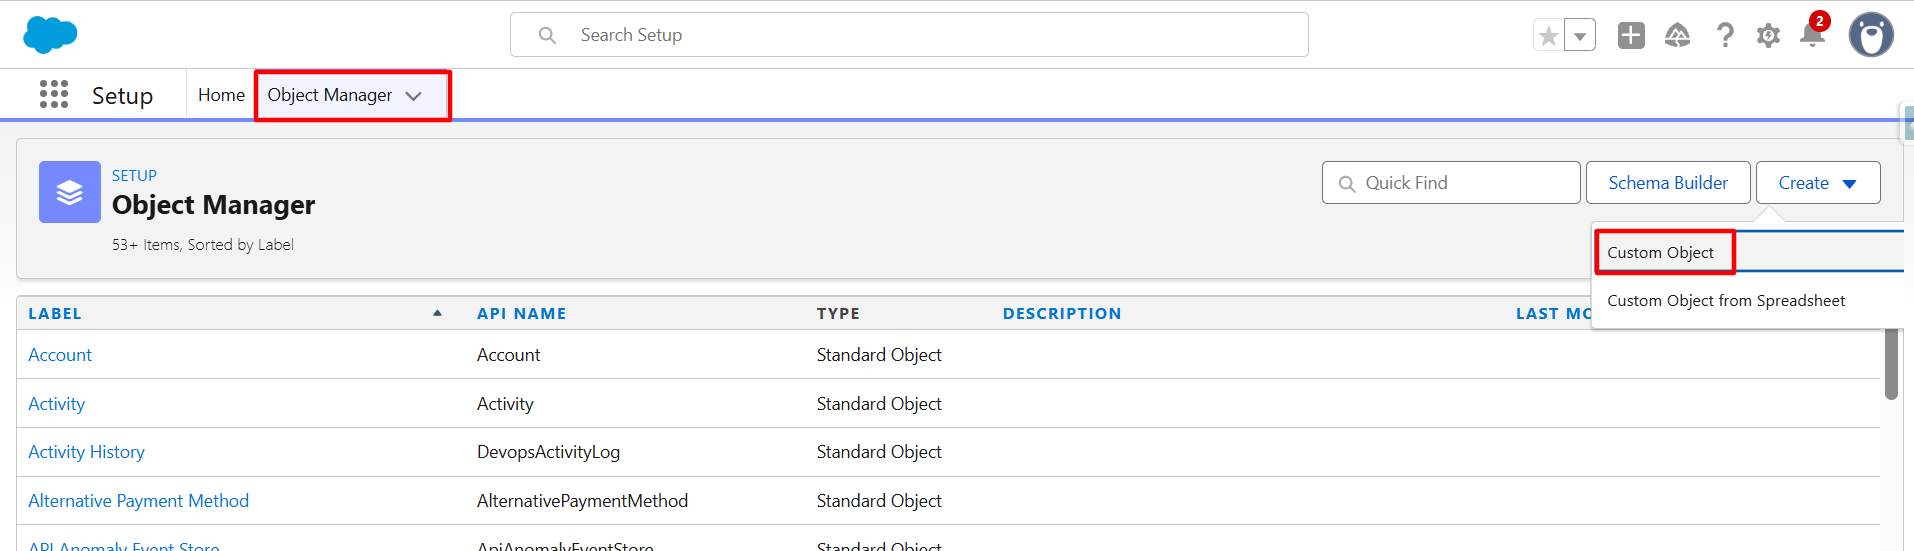
- Navigate to Object Manager.
- Click Create → Custom Object.
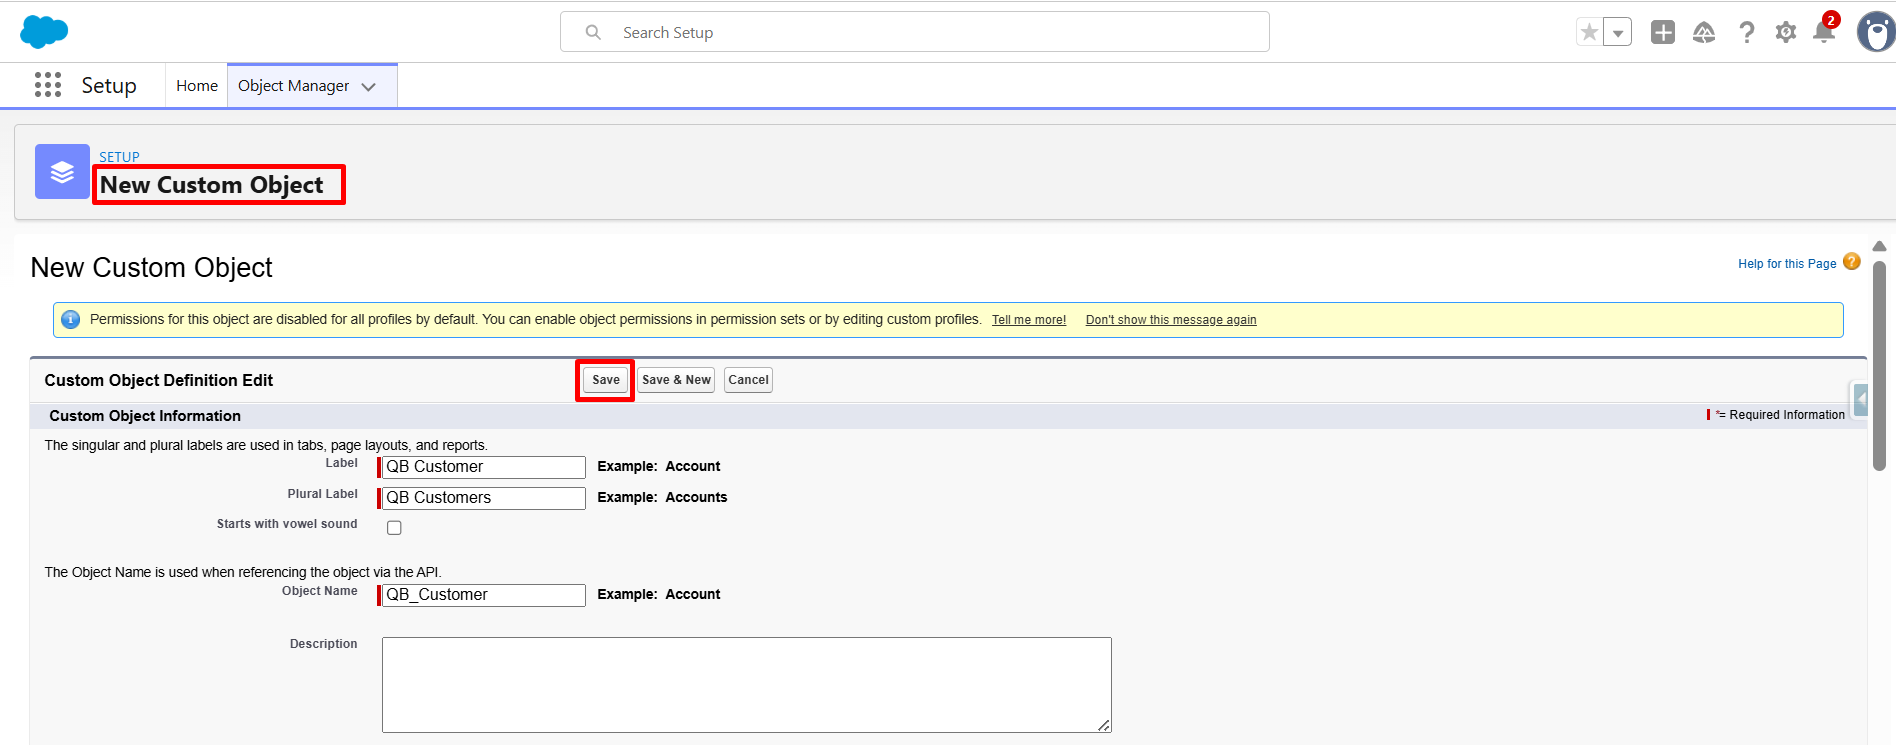
- Enter the required details:
- Label, Plural Label, Object Name
- Click Save.
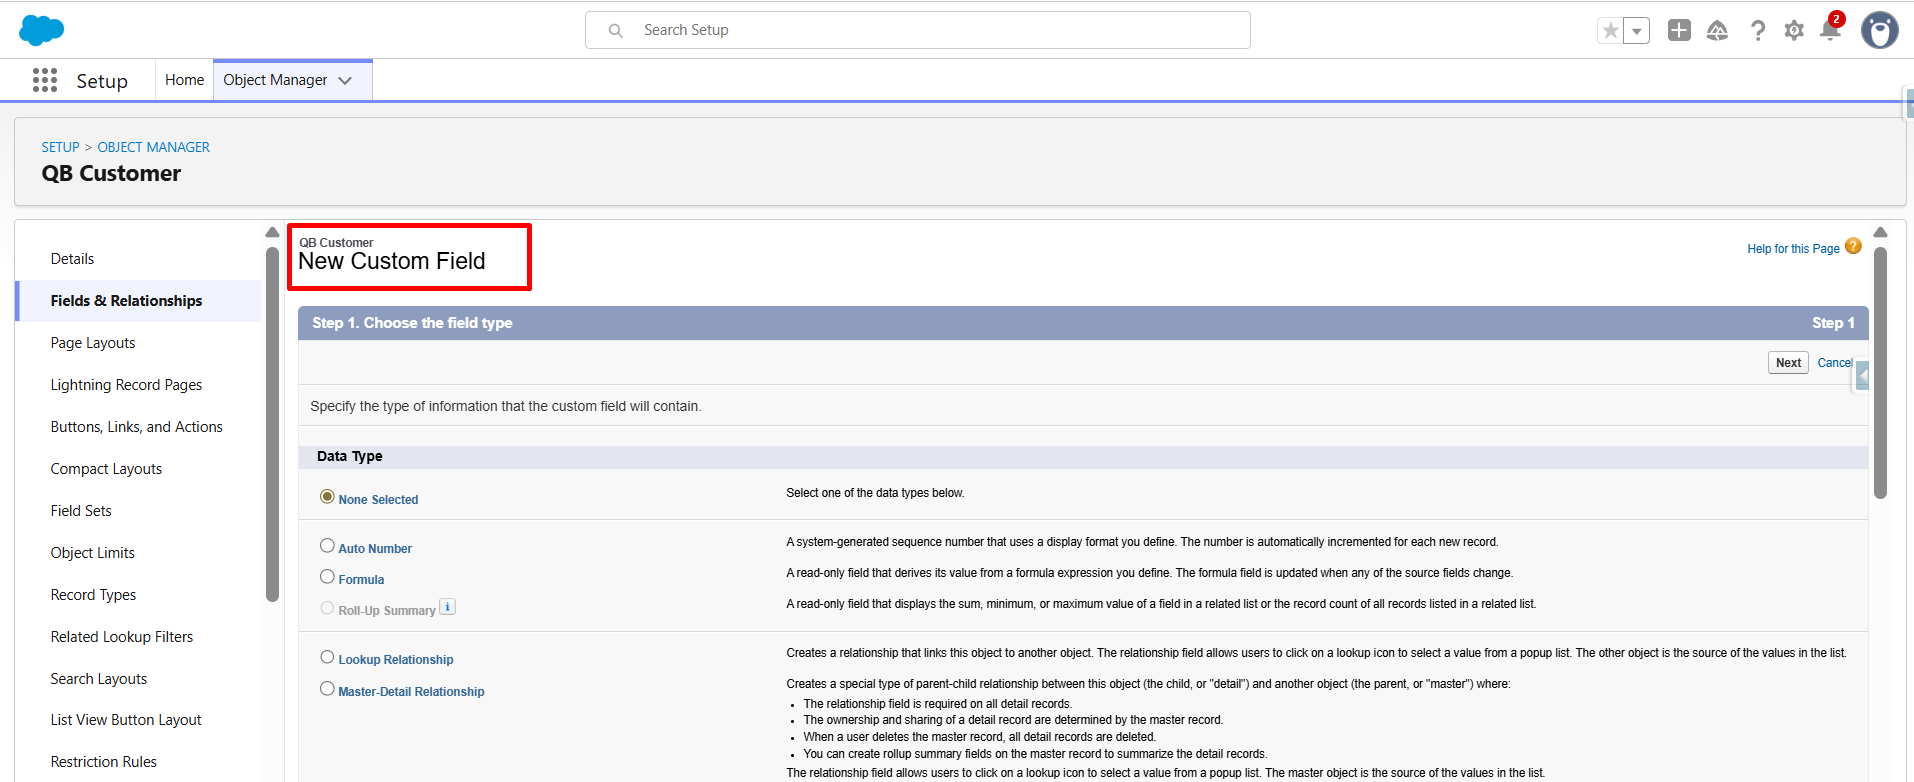
Step 2: Create Custom Fields
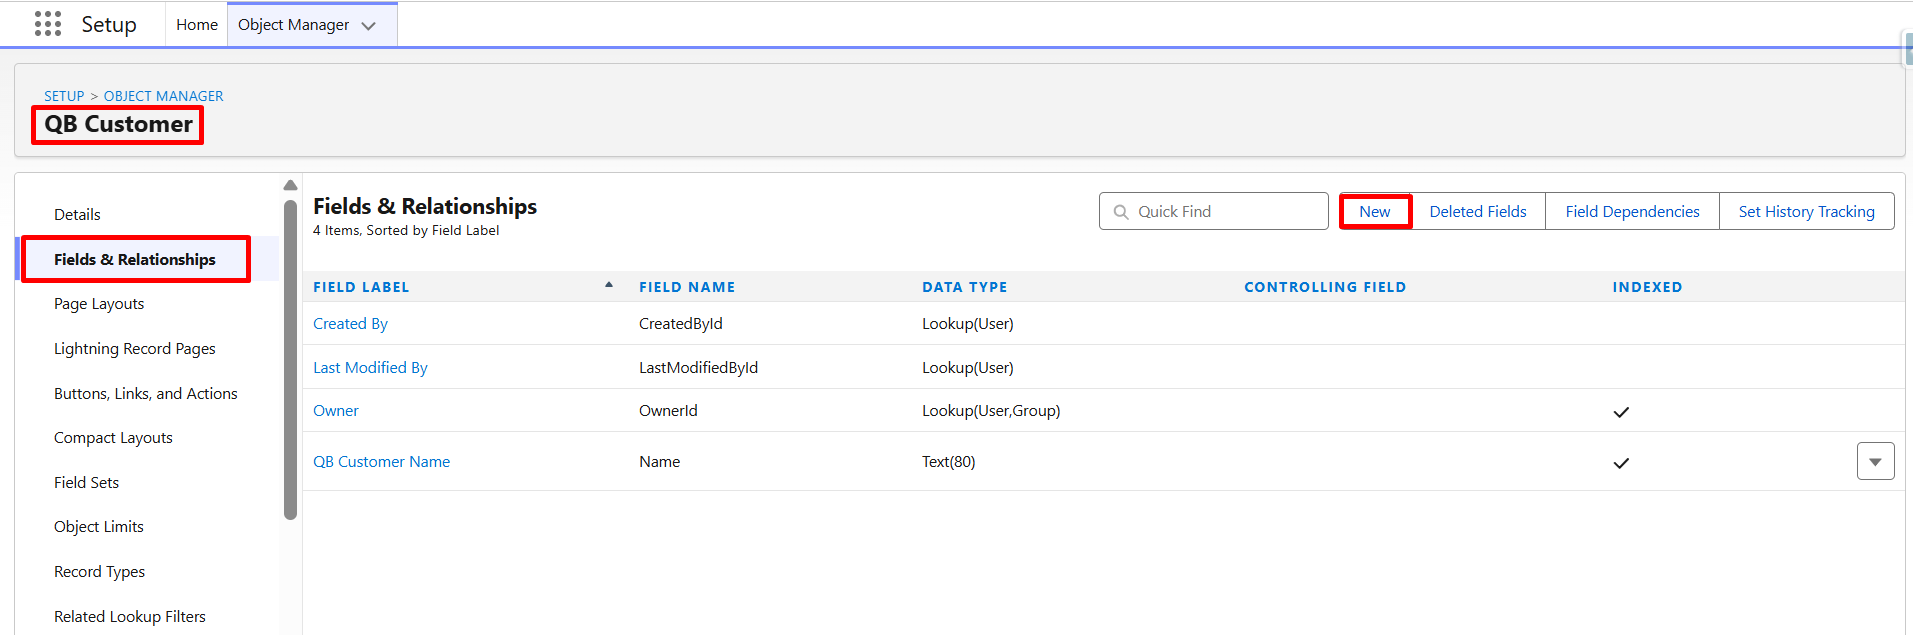
- Open the custom object you created.
- Select Fields & Relationships.
- Click New.
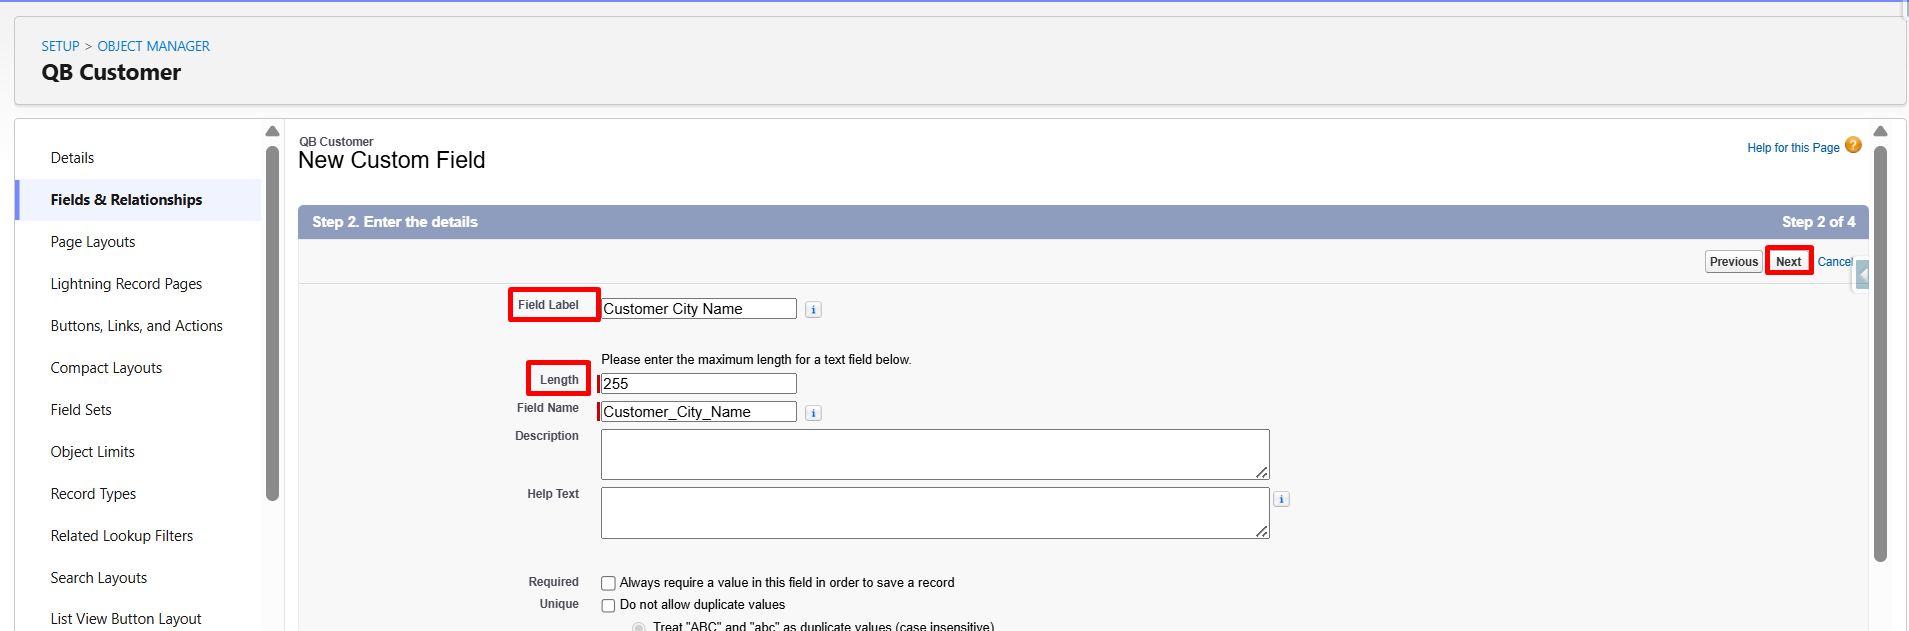
- Choose the field type (Text, Number, Date, Picklist, etc.).
- Configure the field details.
- Click Save.
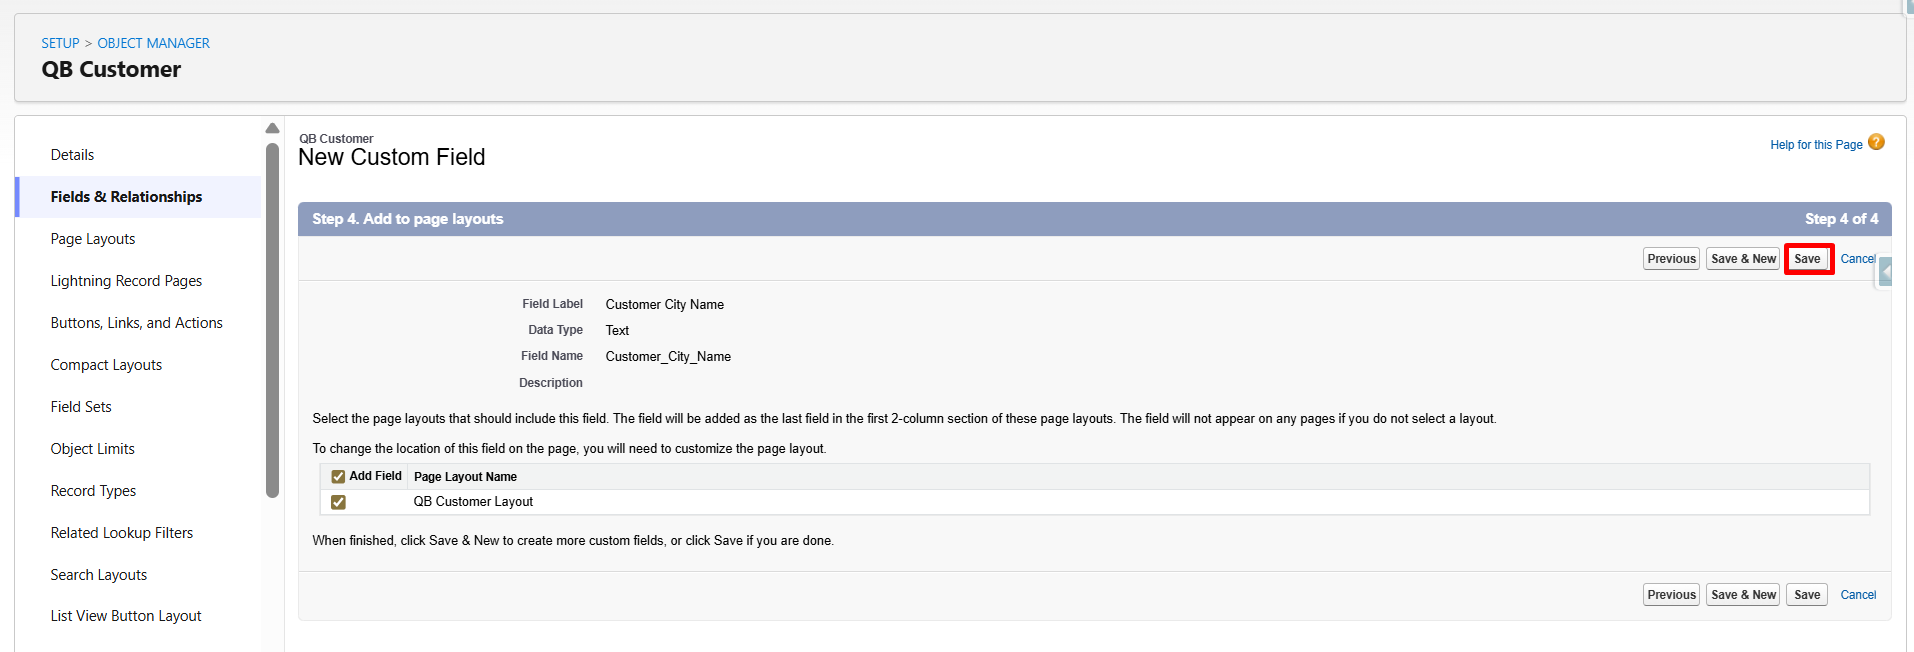
- Repeat these steps for all fields that need to be synchronized with QuickBooks.
Step 3: Open the QuickBooks Integration Setup
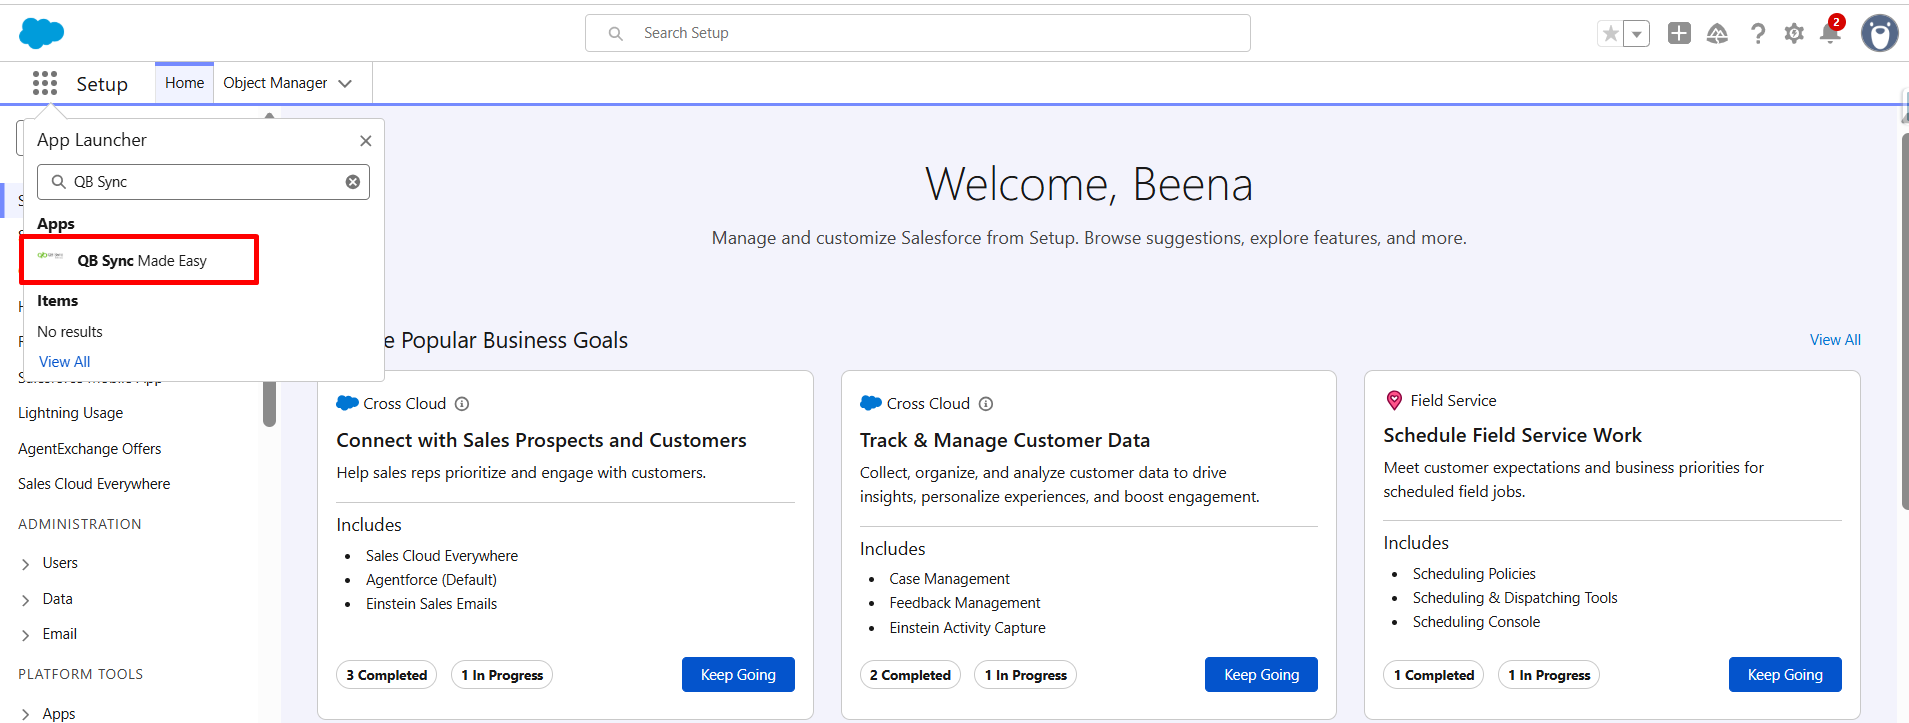
- Navigate to the QuickBooks Setup page within the application.
- Click on setup.
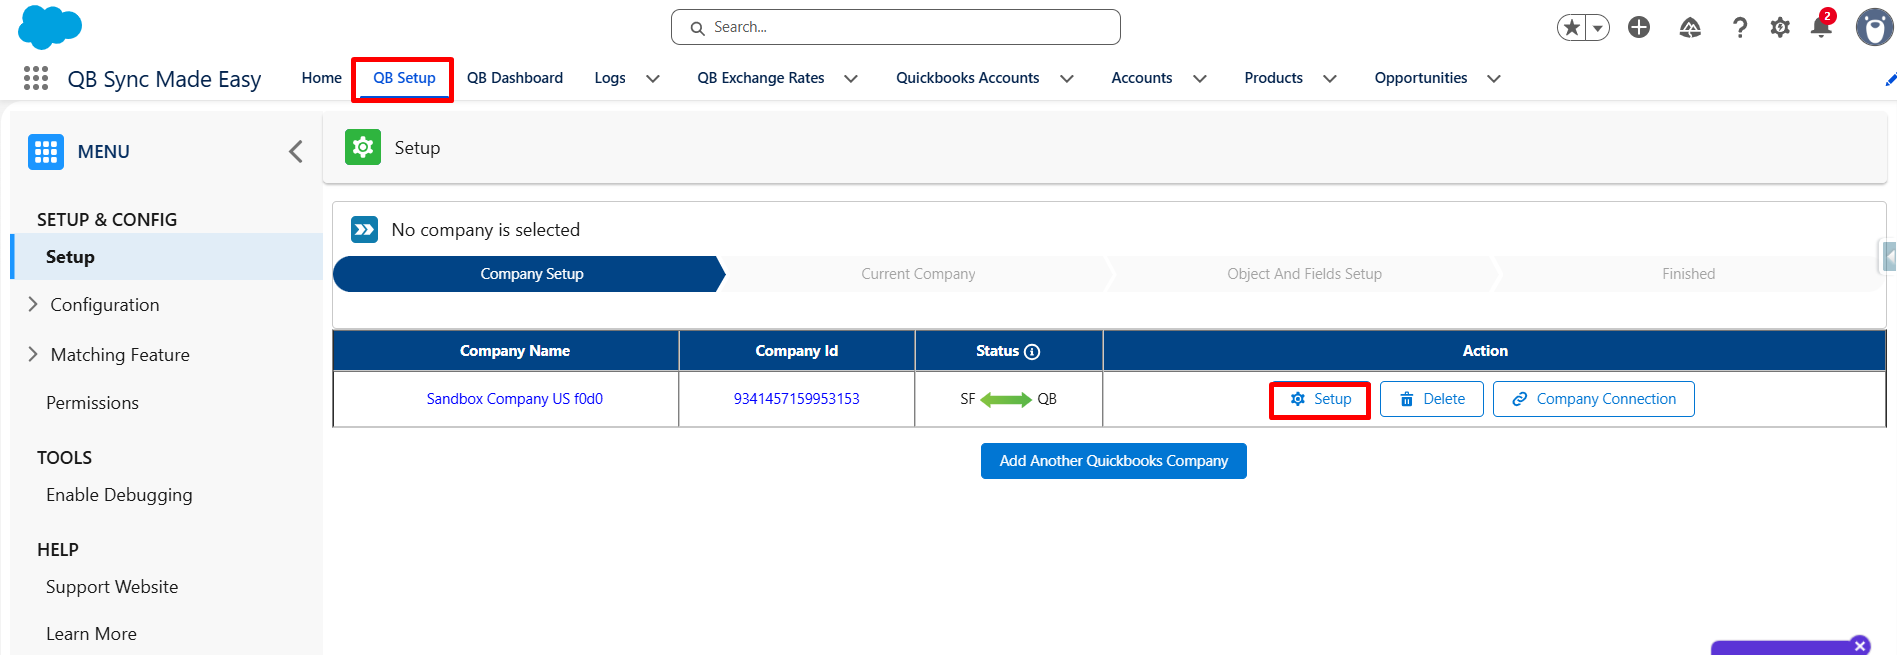
- Open the Object and Field Mapping section.
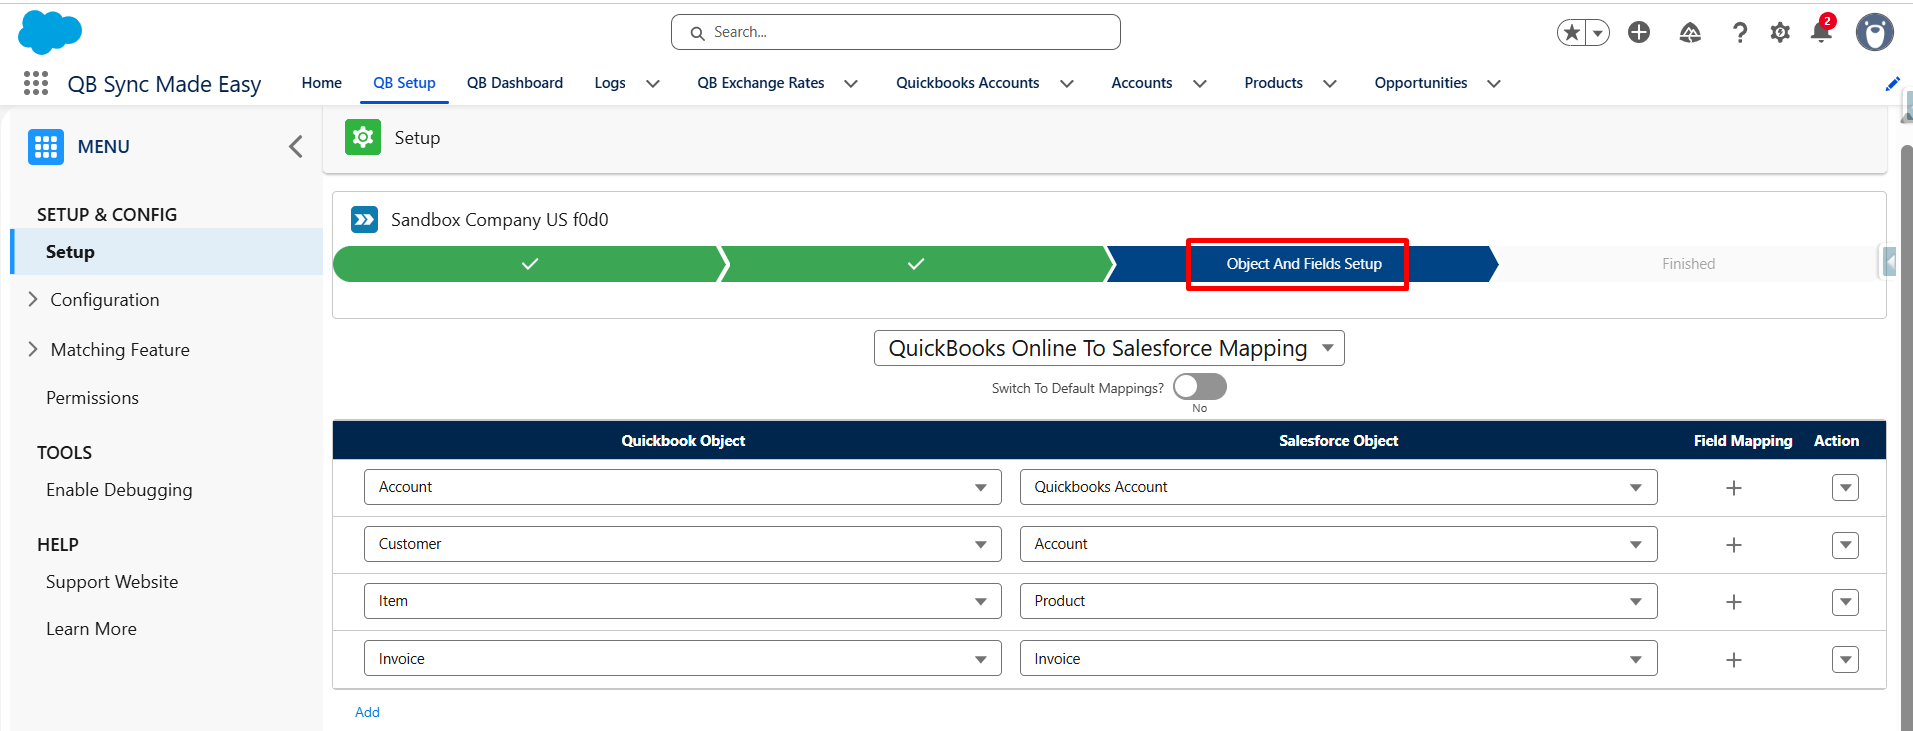
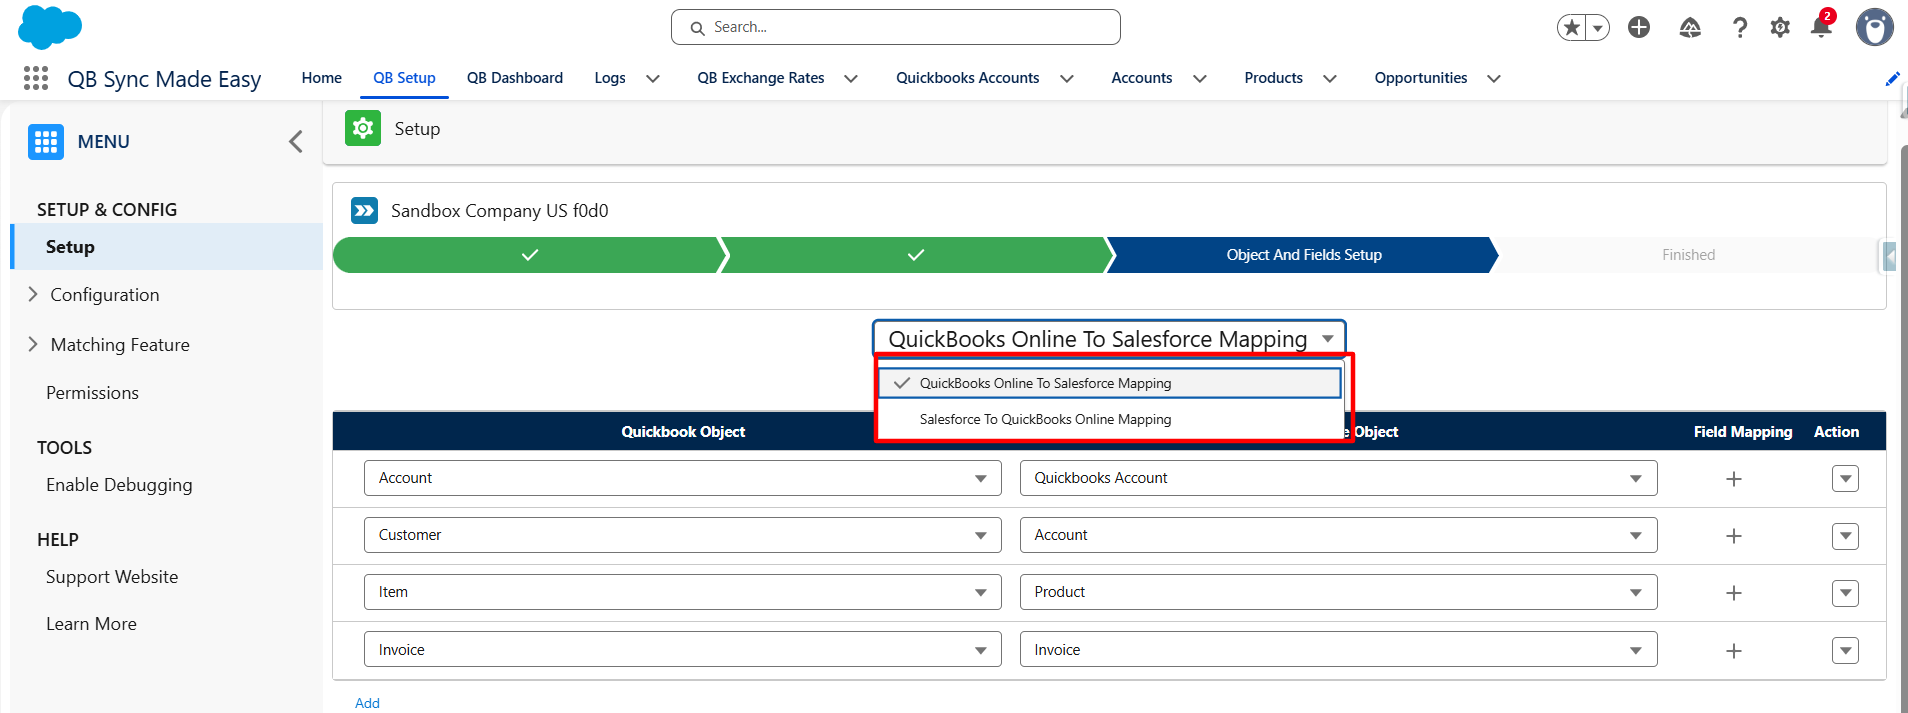
Step 4: Select the Synchronization Direction
Choose the direction from the picklist in which data should be synchronized:
- Salesforce → QuickBooks: Records created or updated in Salesforce are synced to QuickBooks.
- QuickBooks → Salesforce: Records created or updated in QuickBooks are synced to Salesforce.
Select the desired sync direction before creating the mapping.
Step 5: Create an Object Mapping
- Click the Add hyperlink/button.
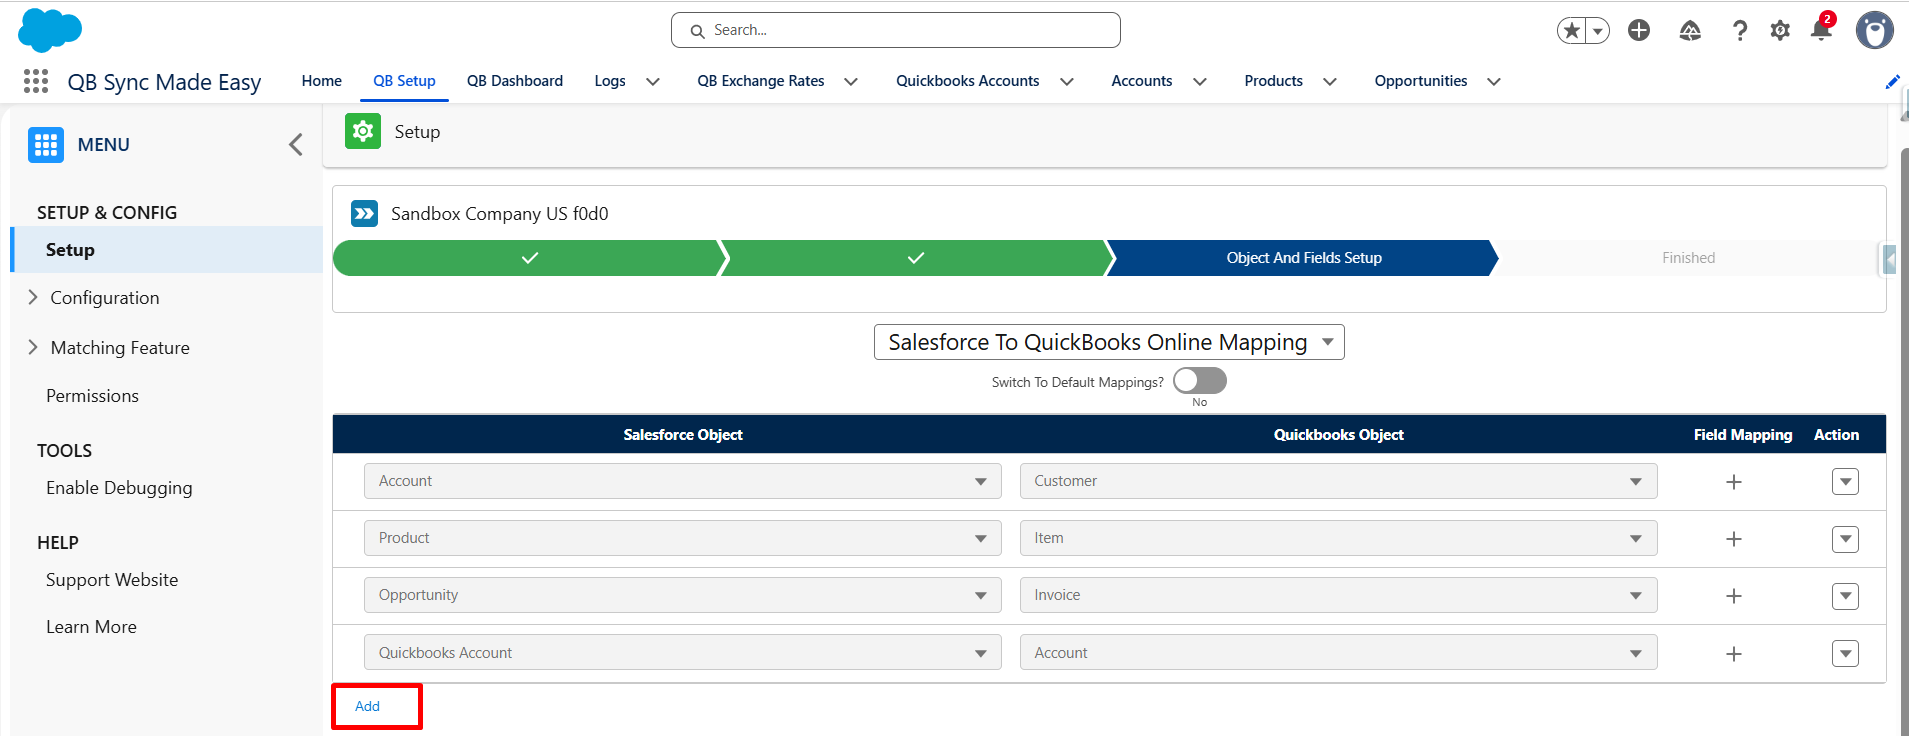
- In the Salesforce Object dropdown, select the custom Salesforce object.
- In the QuickBooks Object dropdown, select the corresponding QuickBooks object.
- Click the + (Add Field Mapping) icon.
- Select the Salesforce field.
- Select the corresponding QuickBooks field.
- Click Save to create the object-level mapping
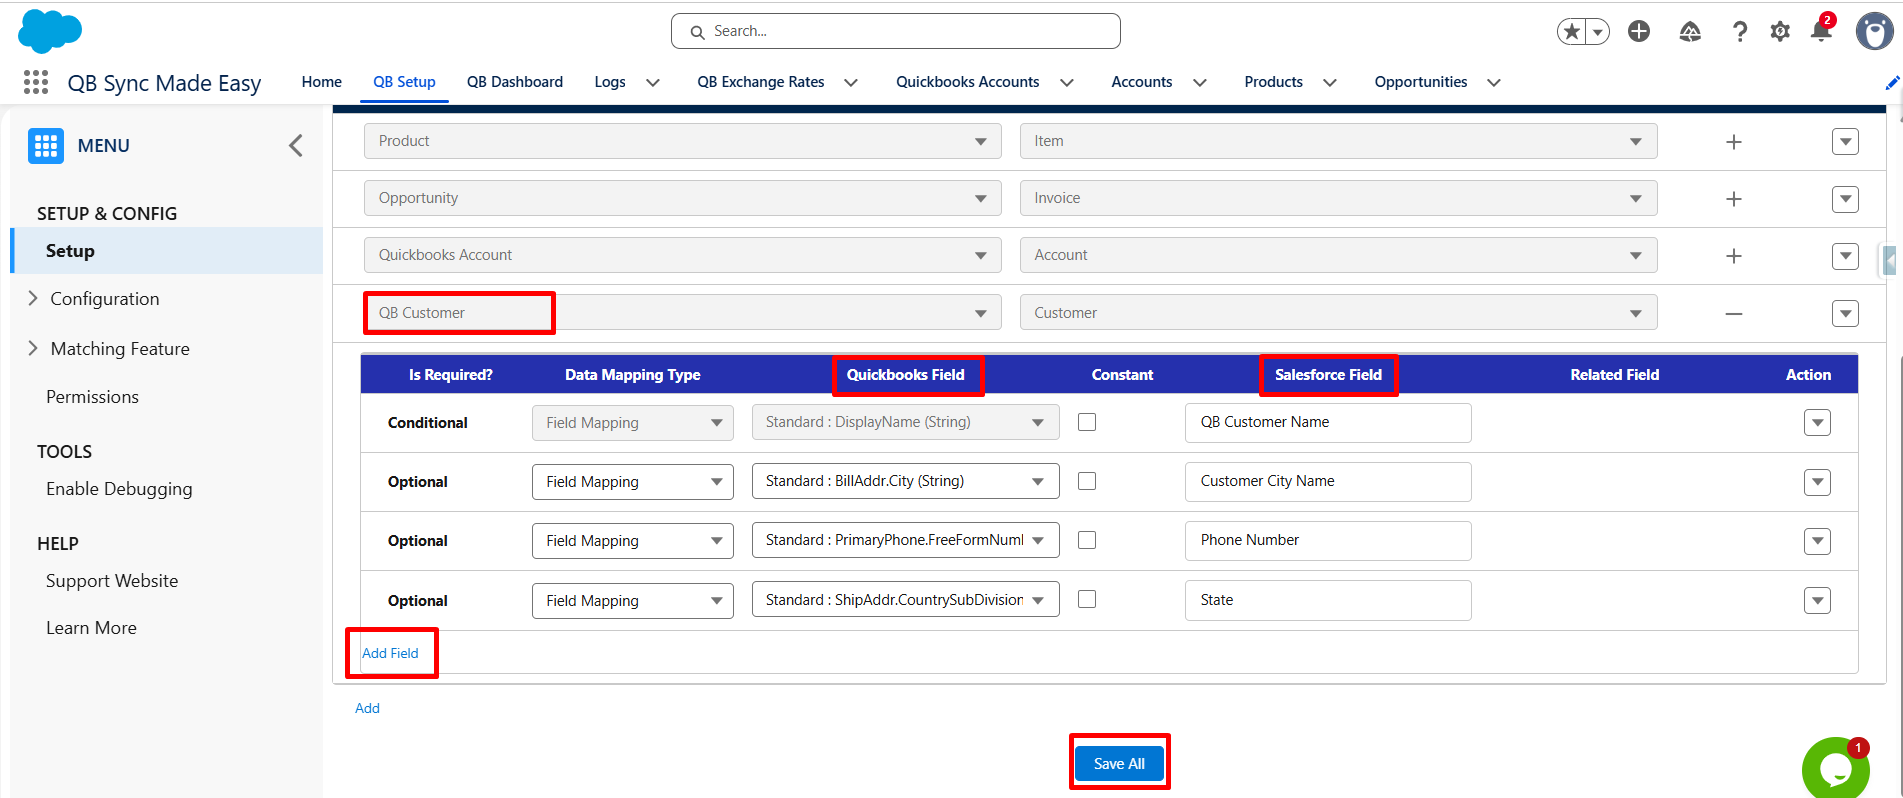
Repeat this process for all fields that need to be synchronized.
Step 6: Create a QuickBooks Customer Record
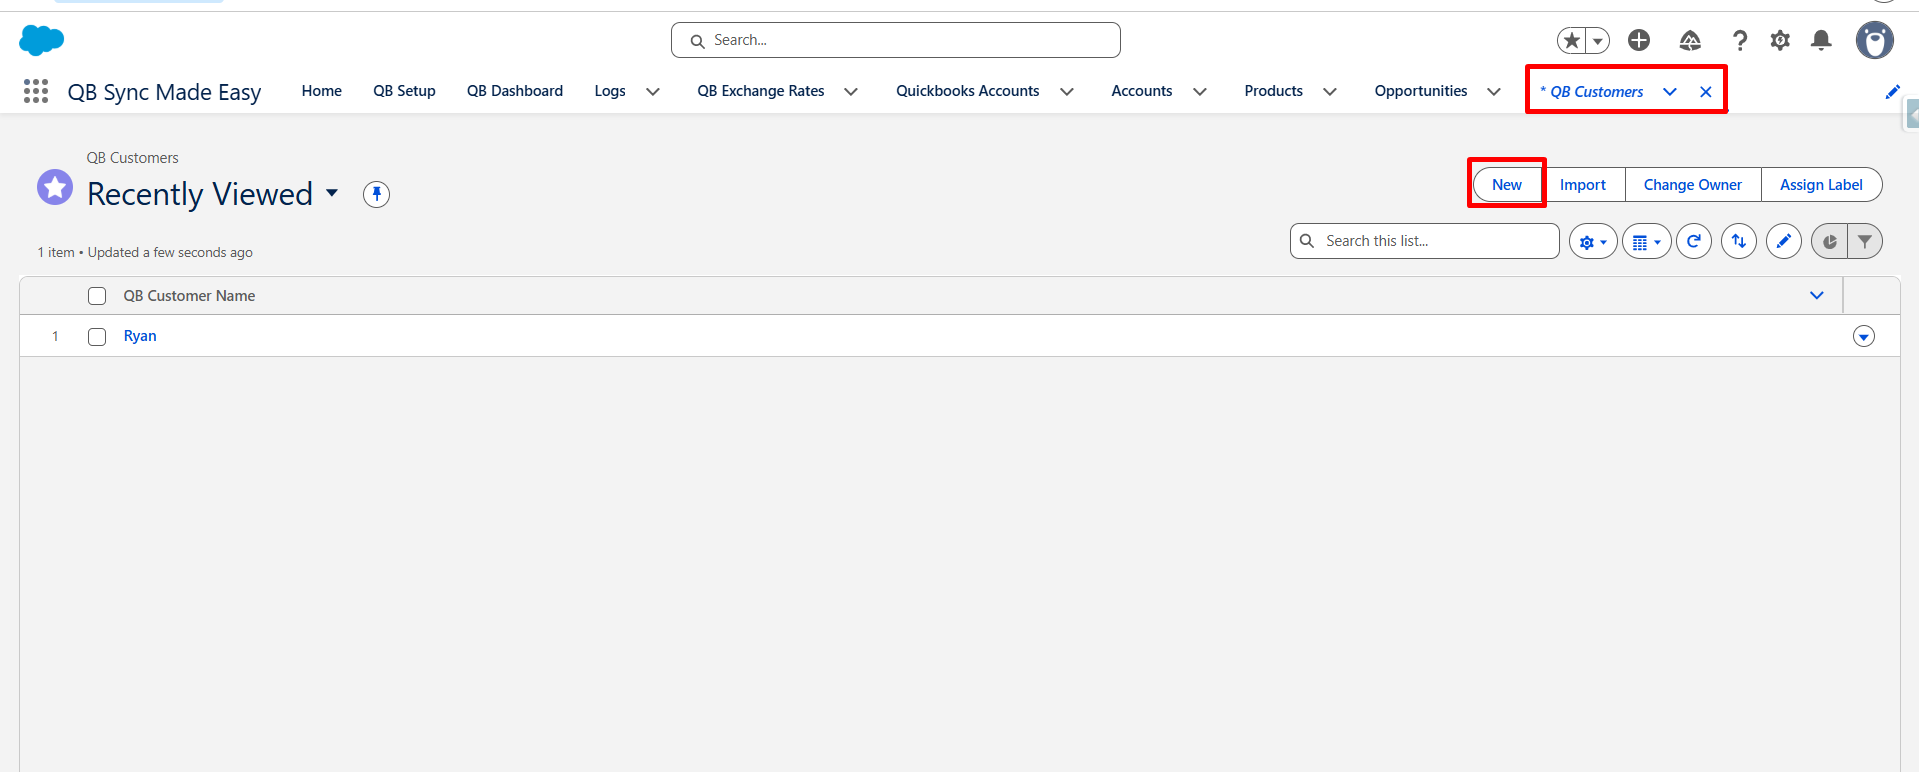
- Navigate to the QB Customer custom object.
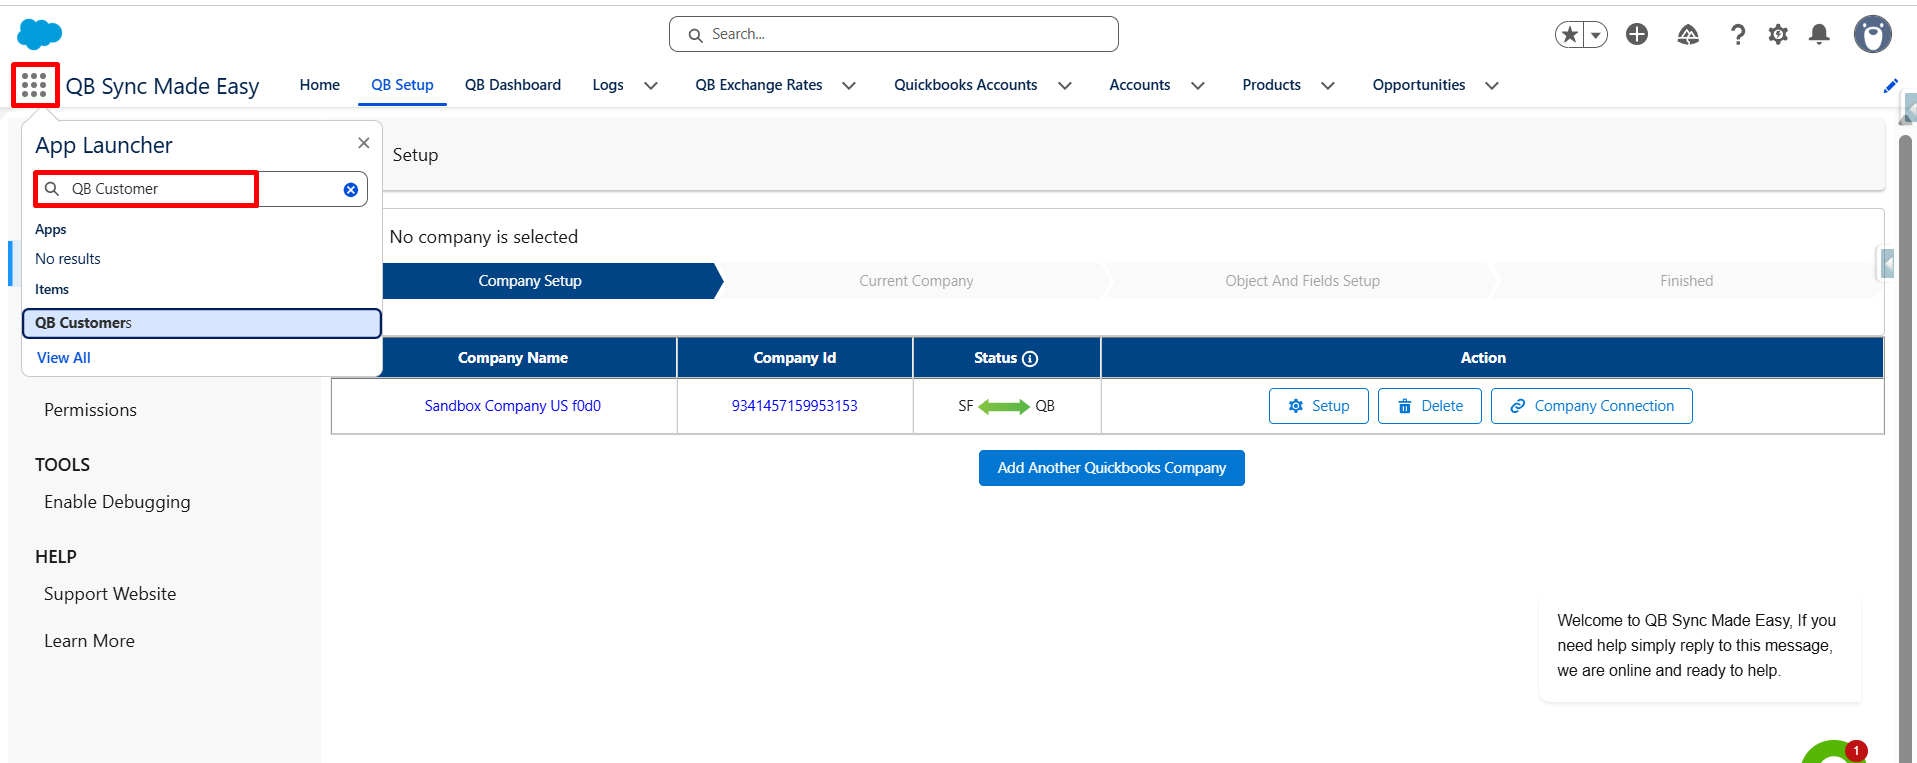
- Click New.
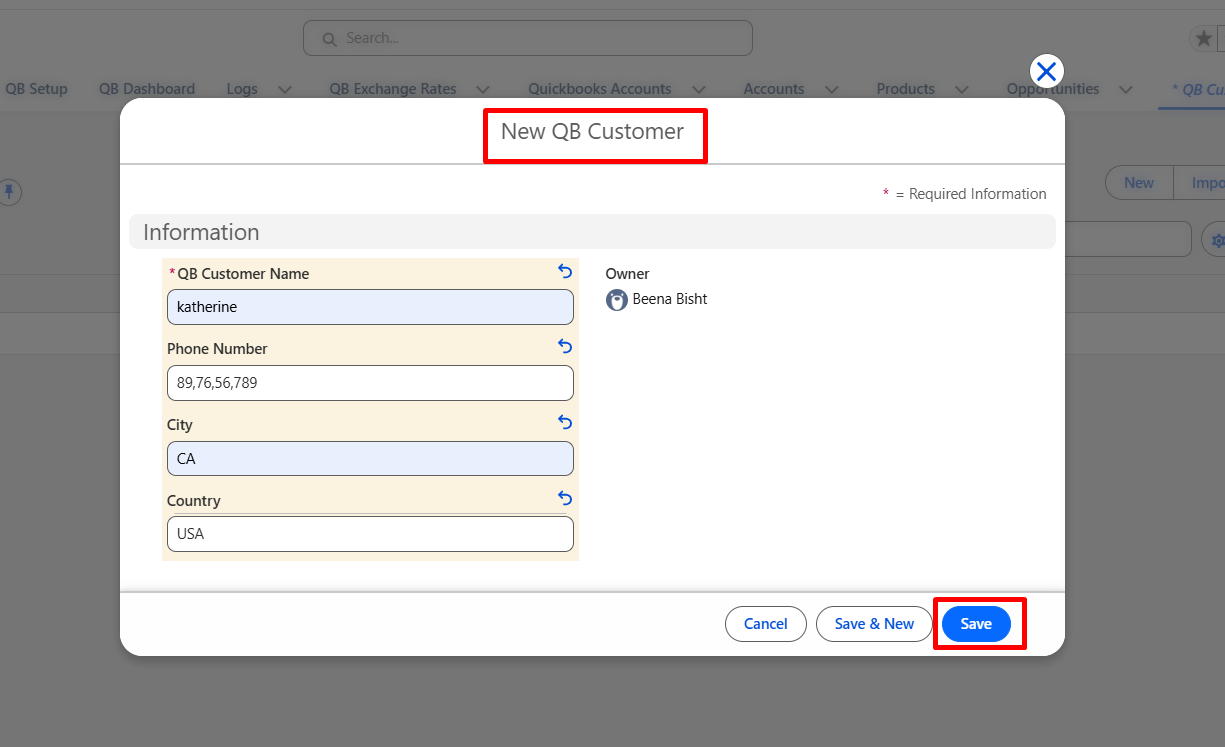
- Enter the required customer details.
- Click Save to create the record.
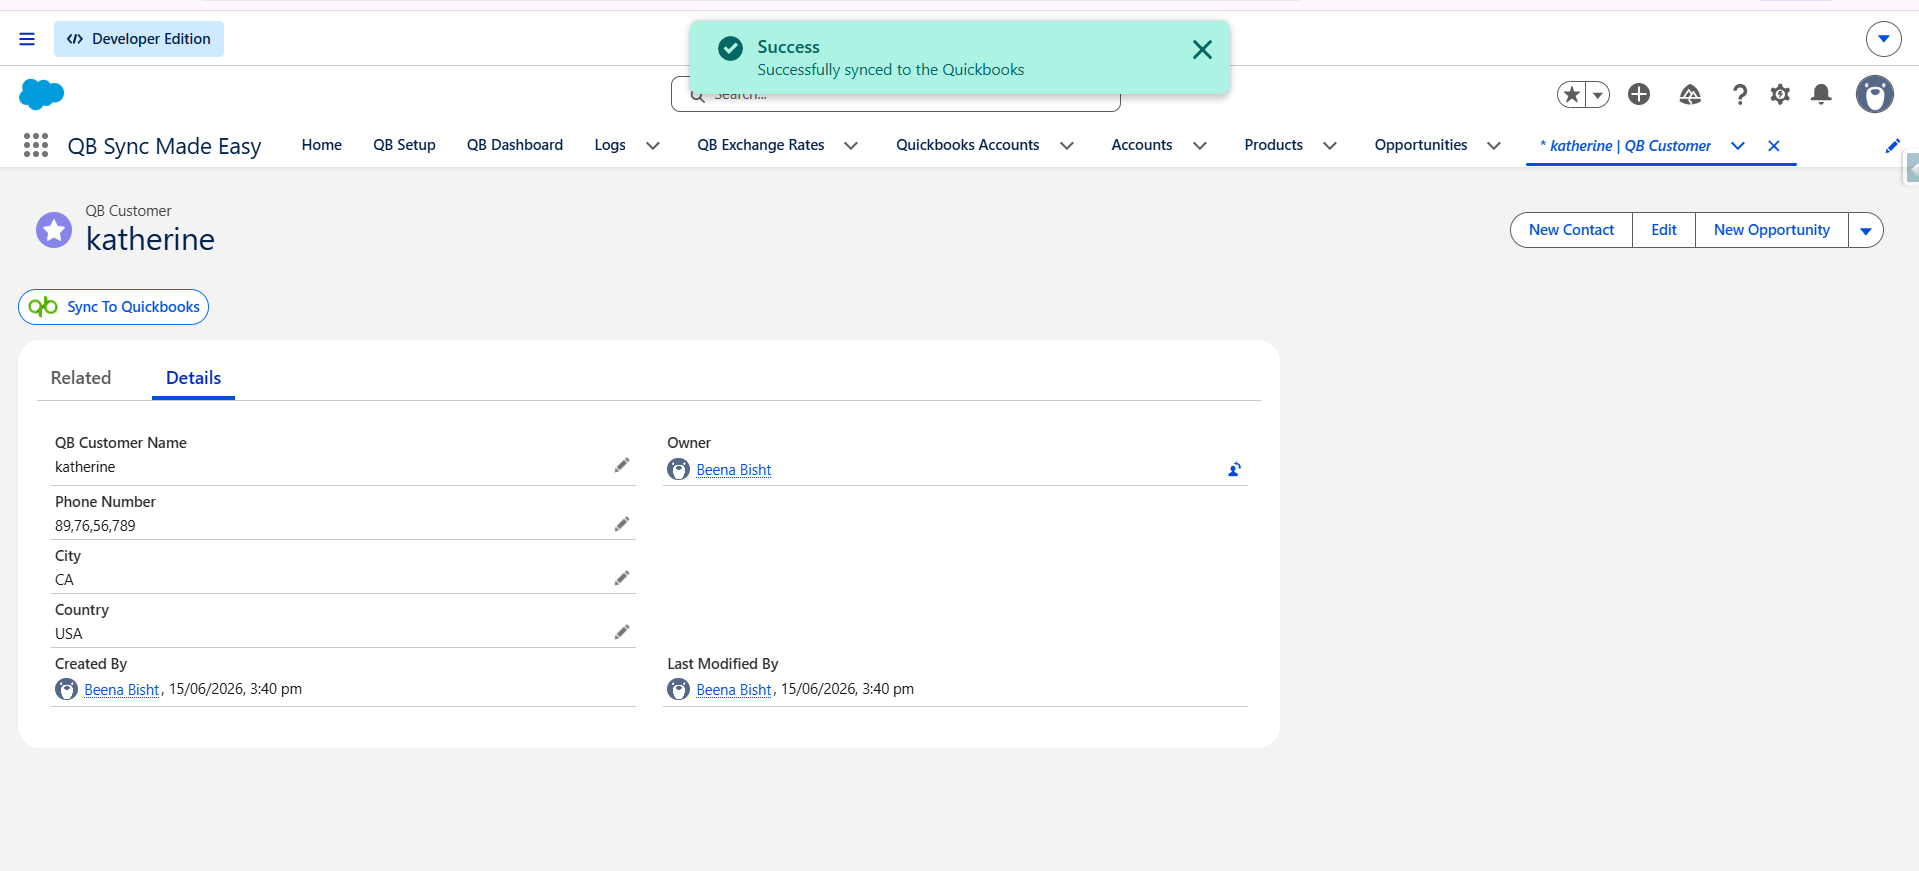
Step 7: Sync the QB Customer Record to QuickBooks
- Open the newly created QB Customer record.
- Click on Sync to QB Button to send the customer data to QuickBooks.
- Wait for the sync to complete successfully.
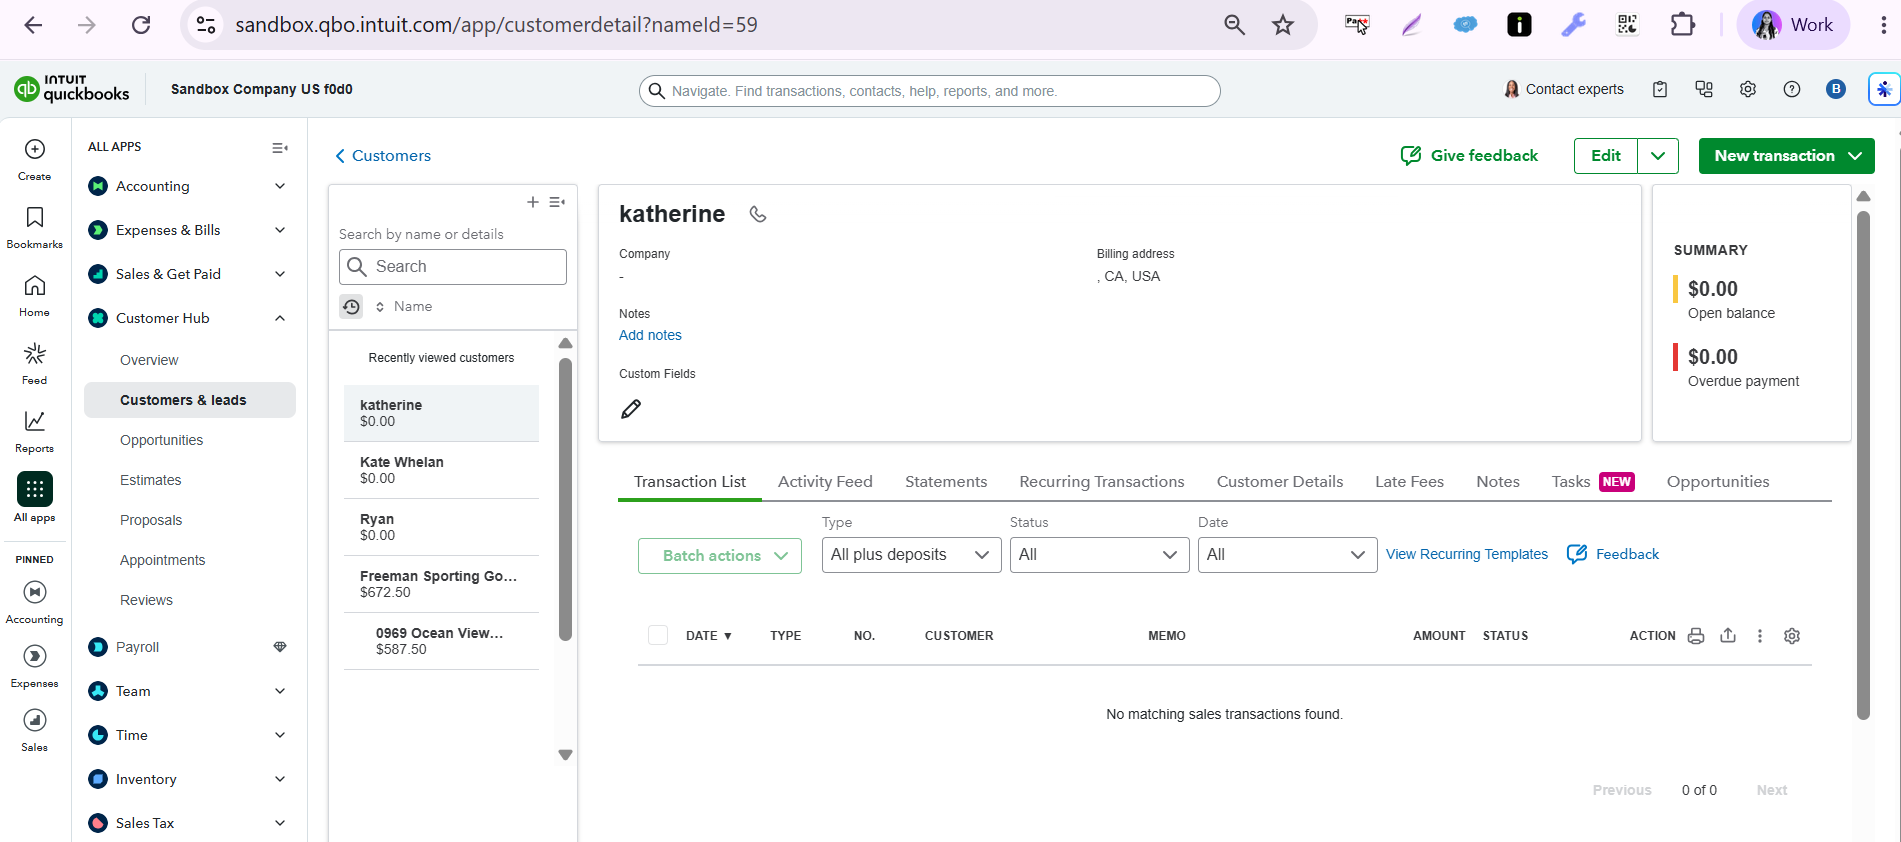
Step 8: Verify the Customer in QuickBooks
- Log in to QuickBooks Online.
- Navigate to the Customers section.
- Search for the customer that was synced.

Result
Once the object and field mappings are configured, records and field values can be synchronized automatically between Salesforce and QuickBooks according to the selected synchronization direction, ensuring consistent and accurate data across both platforms.
Was this article helpful?
That’s Great!
Thank you for your feedback
Sorry! We couldn't be helpful
Thank you for your feedback
Feedback sent
We appreciate your effort and will try to fix the article