QuickBooks ↔ Salesforce Integration Setup
Default Mapping allows you to automatically map standard Salesforce objects with their corresponding QuickBooks objects, reducing manual configuration and ensuring consistent data synchronization.
Follow the steps below to configure Default Mapping between QuickBooks and Salesforce.
Note: The Default Mapping toggle appears in two places during the setup process:
Global Configuration (Phase 1): Enables QuickBooks → Salesforce default mapping for the entire integration.
Object Mapping Configuration (Phase 2): Enables default mapping for a specific Salesforce-to-QuickBooks object mapping.
Phase 1: Enable Default Mapping Globally
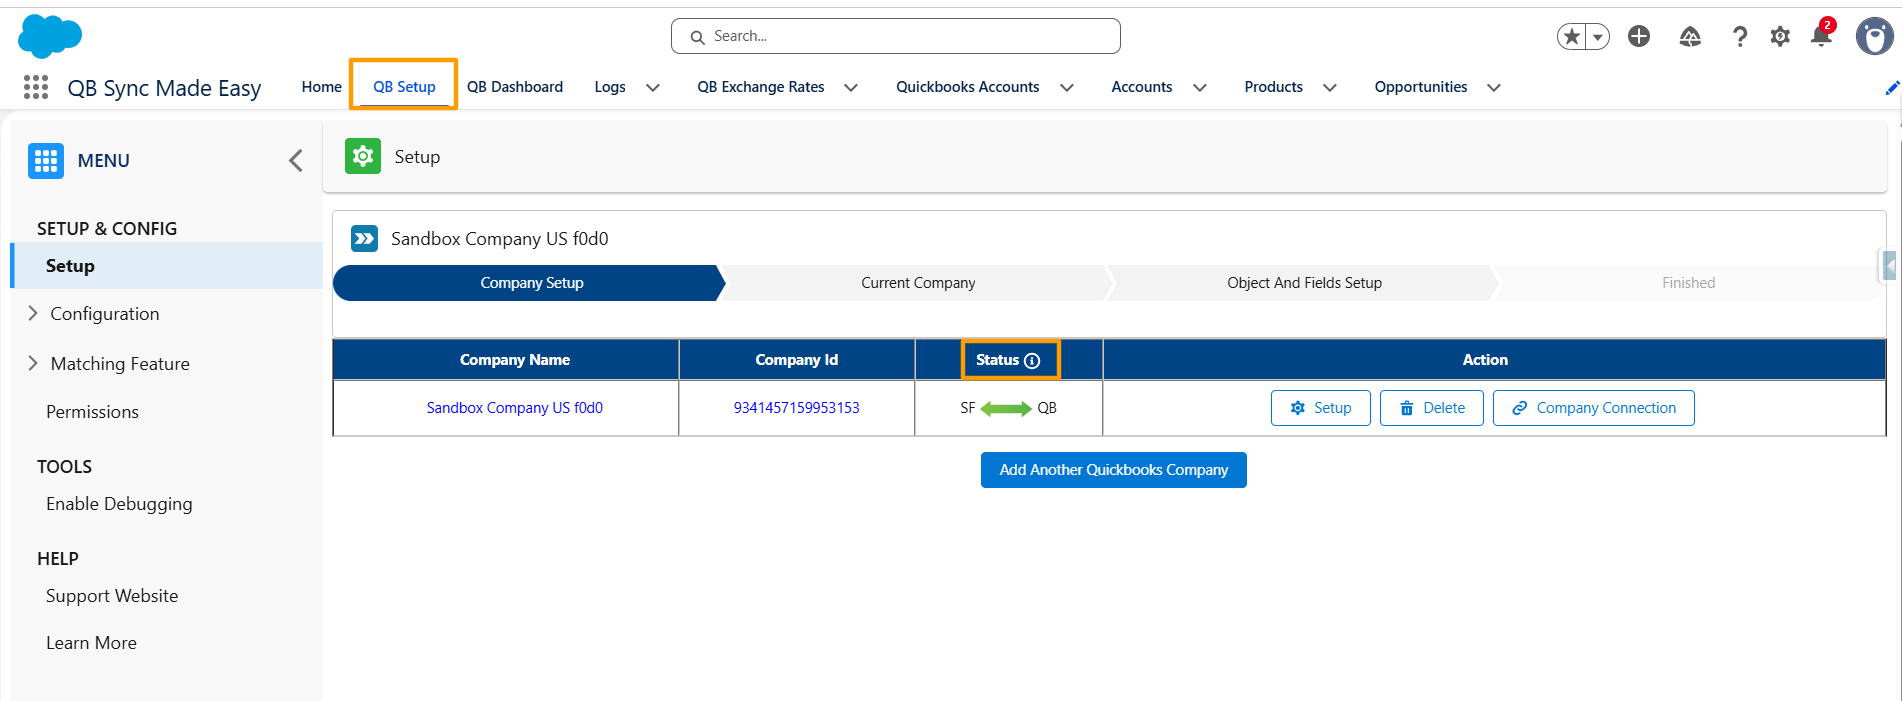
Step 1: Open QB Setup
- Navigate to QB Setup.
- Verify that your QuickBooks company is successfully connected.
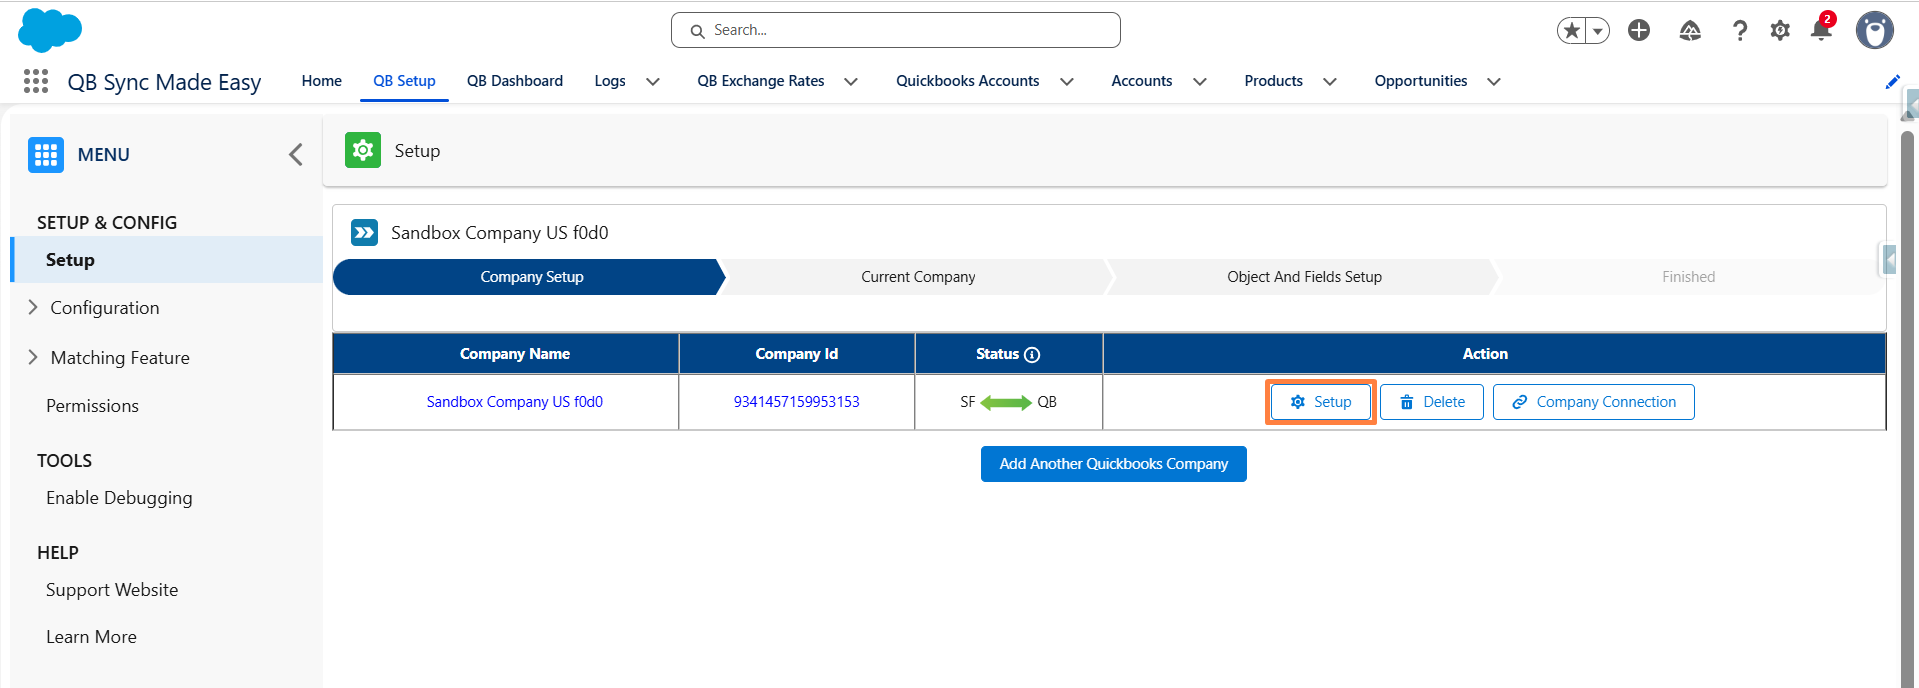
Step 2: Open Setup Configuration
- Click the Setup button.
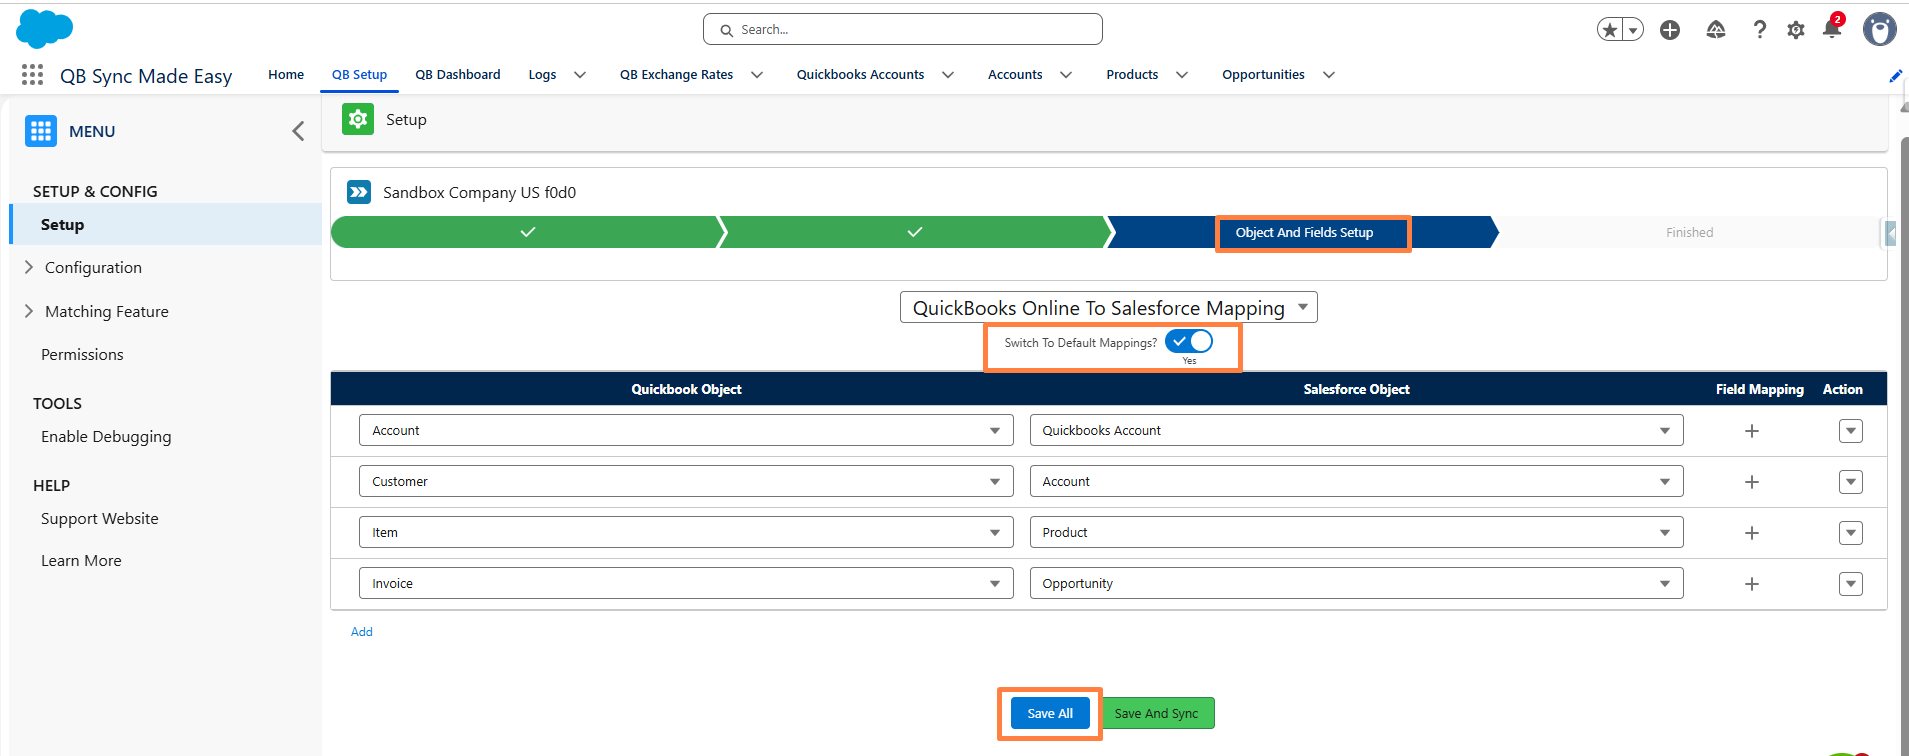
Step 3: Enable Default Mapping
- Go to Object and Field Mapping Setup
- Locate the Default Mapping toggle.
- Enable the toggle to activate QuickBooks → Salesforce default mapping.
- Click Save to apply the changes.
Phase 2: Configure Object-Level Default Mapping
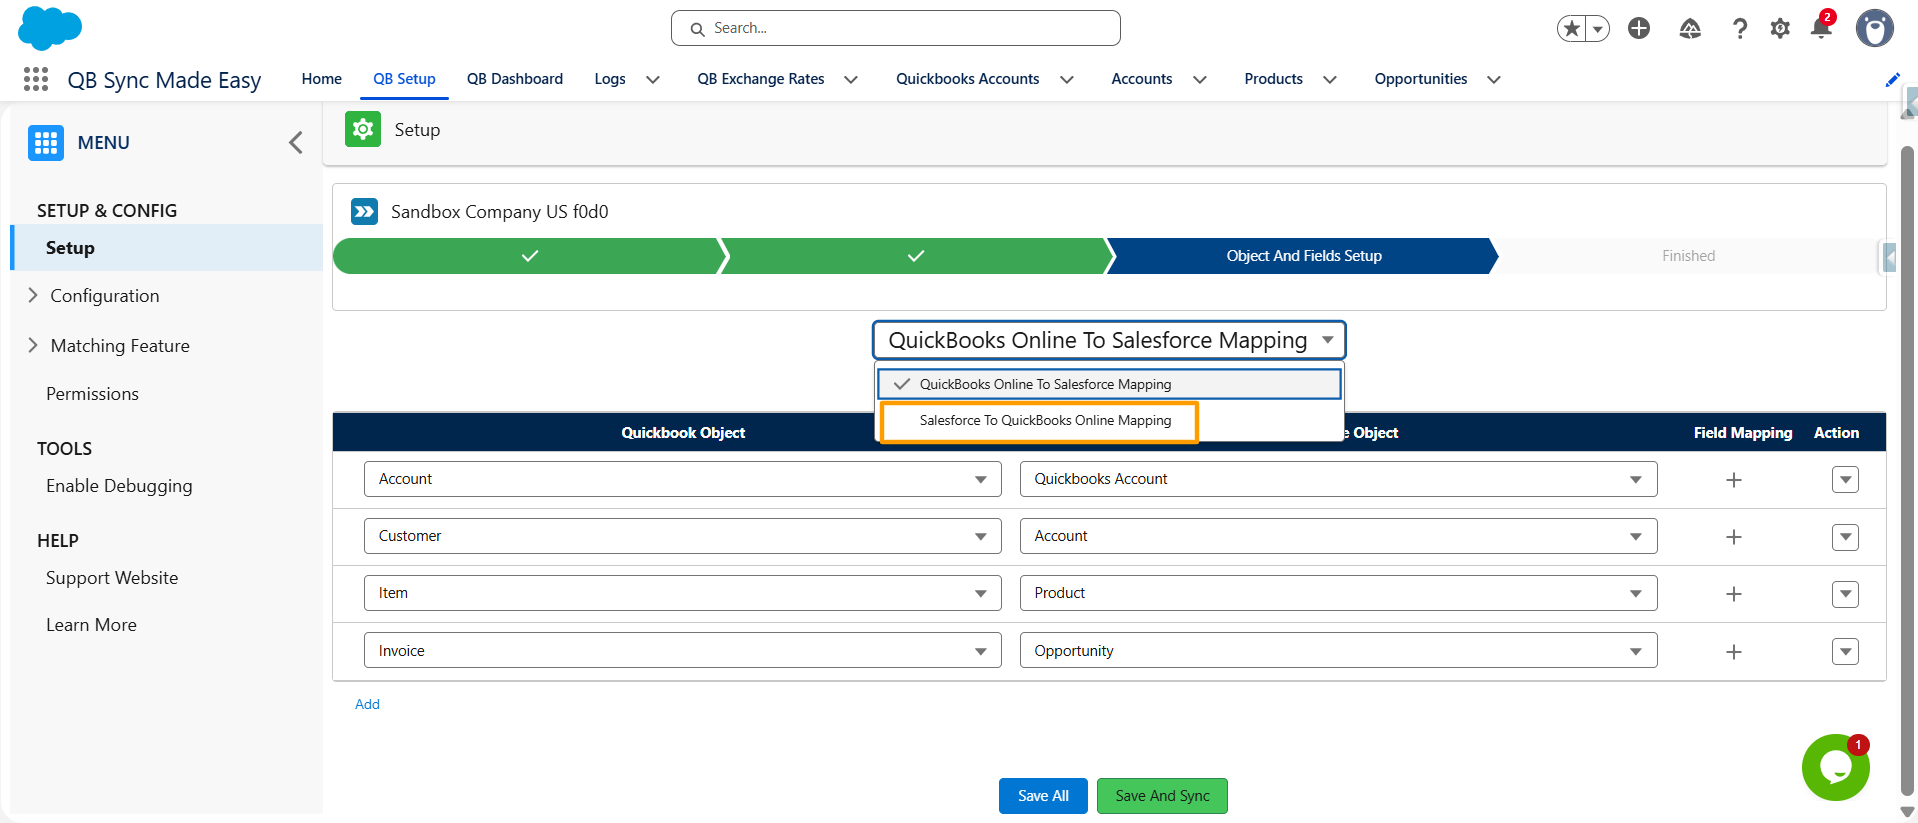
Step 4: Select an Object Mapping
From the available mapping dropdown (picklist), select the Salesforce and QuickBooks objects you want to map.
Examples:
- Account ↔ Customer
- Product ↔ Item
- Opportunity ↔ Estimate

Click Save to apply the configuration.
Step 5: From the available picklist, select the desired Salesforce-to-QuickBooks mapping.
Step 6: Enable the Default Mapping toggle for the selected mapping configuration. Click the Save button to apply your changes.

Was this article helpful?
That’s Great!
Thank you for your feedback
Sorry! We couldn't be helpful
Thank you for your feedback
Feedback sent
We appreciate your effort and will try to fix the article