QB Sync Made Easy on the Salesforce AppExchange helps you quickly integrate QuickBooks and Salesforce — including legacy data — with zero coding and at no extra cost.
Below is a step-by-step guide for installing, configuring, and running a Historical Sync using the QB Sync Made Easy package in Salesforce.
Step 1: Log in to Salesforce
Step 2: Install the QB Sync Made Easy Package
Here is link - How to Install QB Sync Made Easy Package
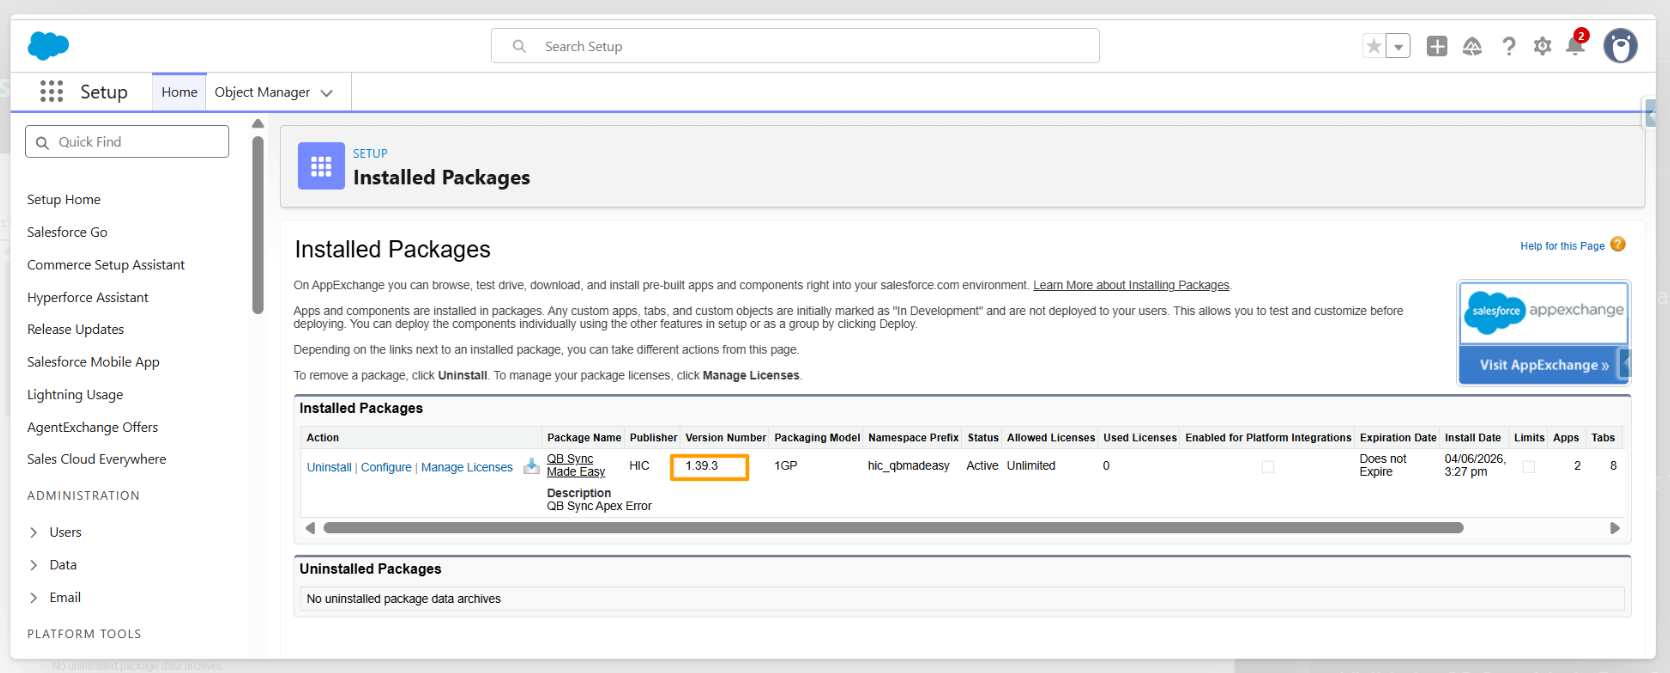
Step 3: Verify Installed Package
After installation, go to:
- Salesforce Setup → Installed Packages
- Verify that QB Sync Made Easy is successfully installed.
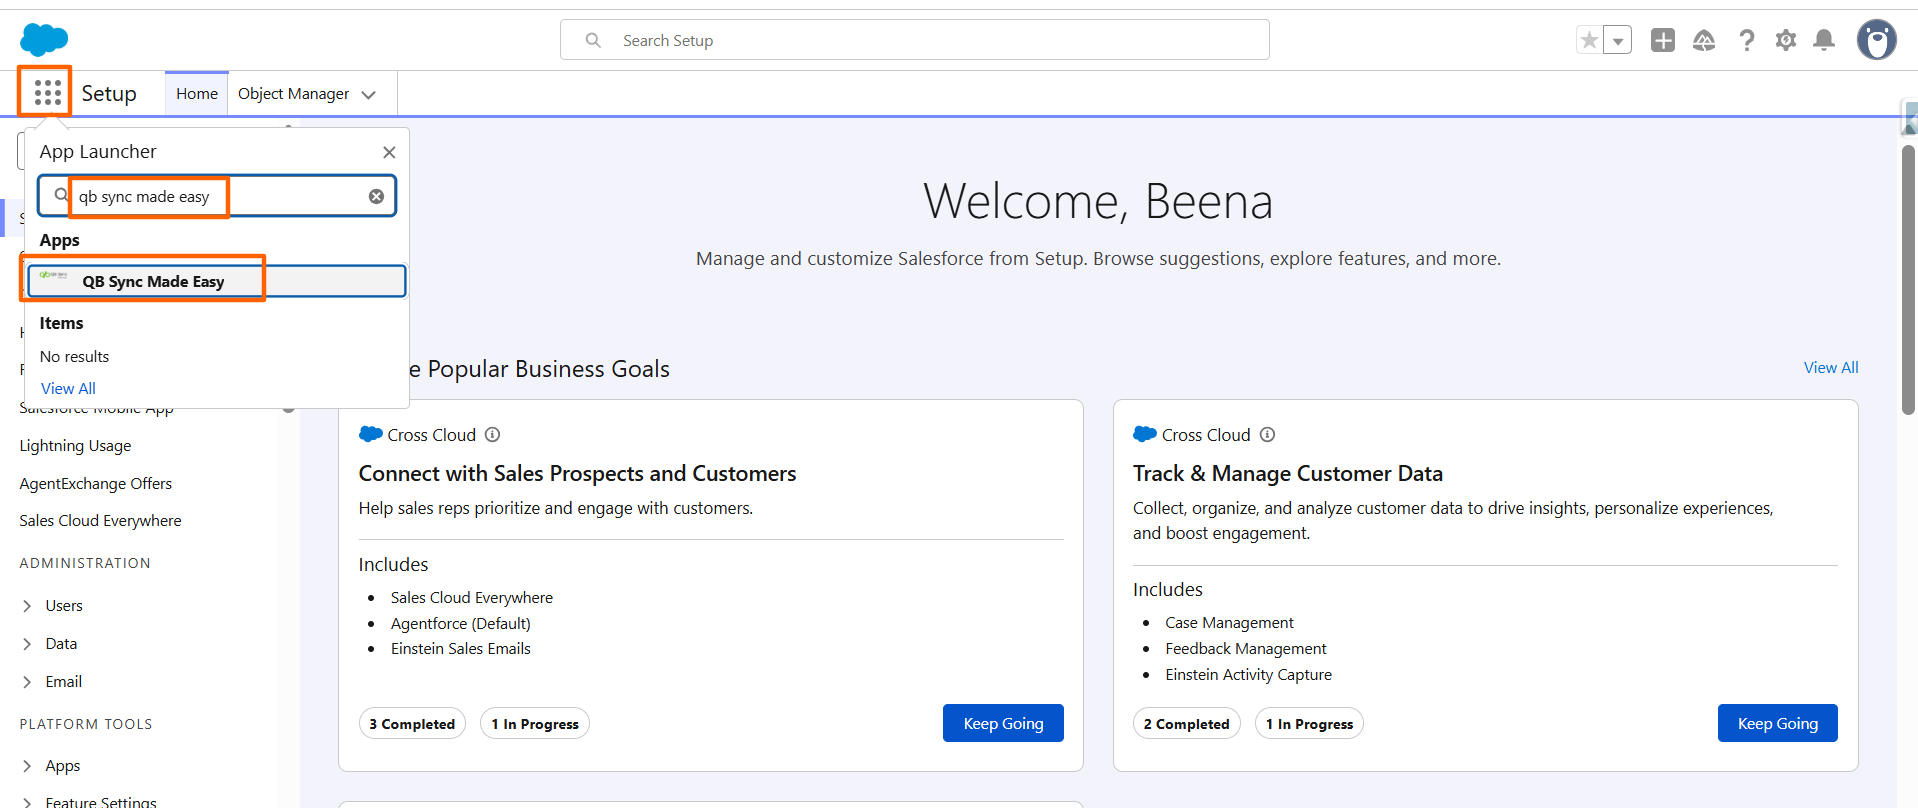
Step 4: Open the App
- Open the Salesforce App Launcher.
- Search for QB Sync Made Easy.
- Launch the application.
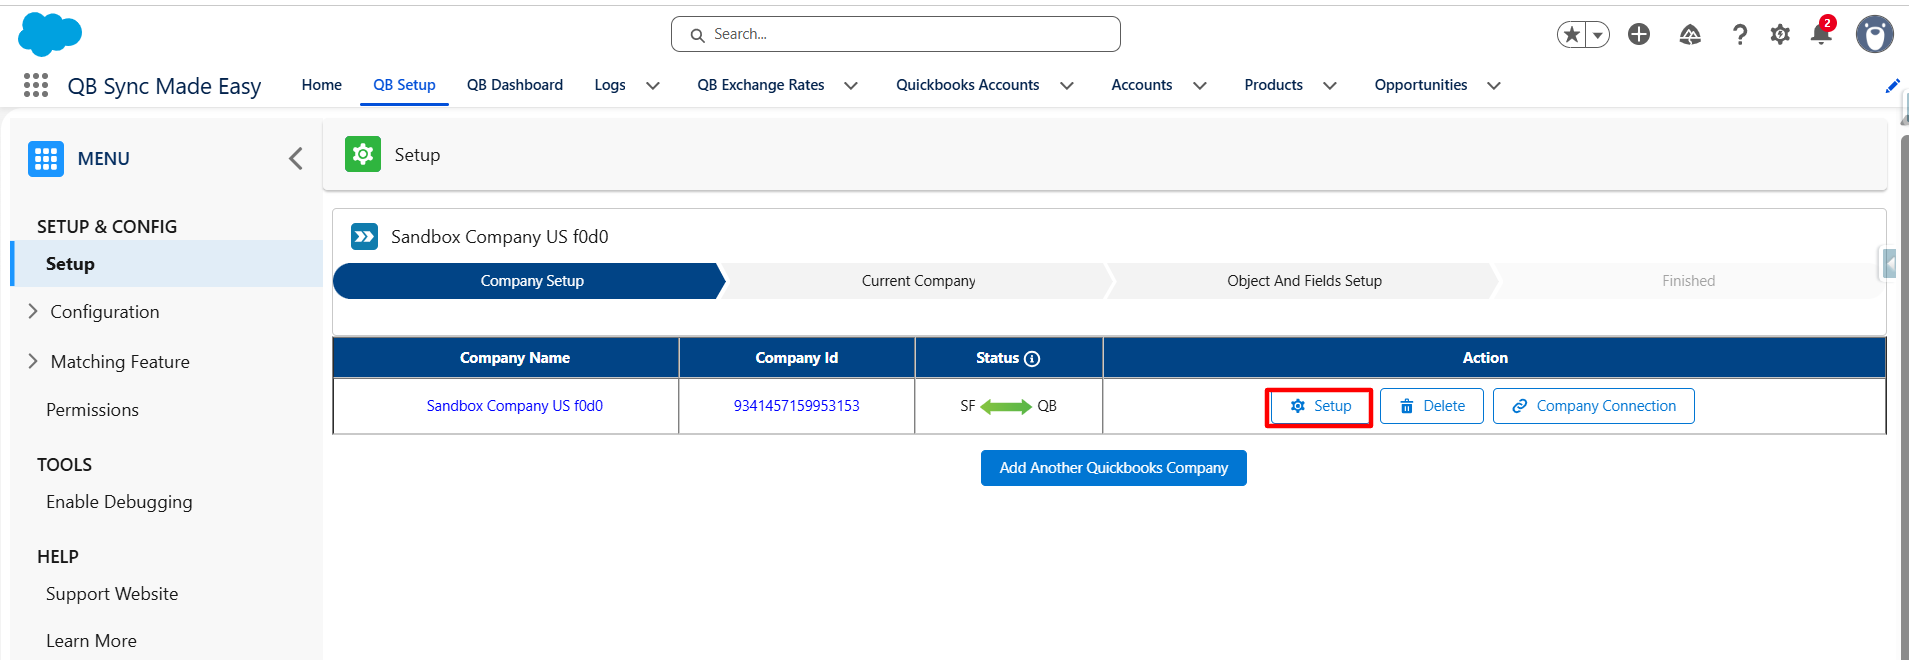
Step 5: Add Your QuickBooks Company and Configure Object & Field Mapping
- Navigate to the Setup page.
- QuickBooks Company should be added.

Here is the link - How to Connect and Configure Quickbook Companies With Salesforce using QB Sync Made Easy?
Here is the link - How to Configure Default Mapping for Standard Objects Or How to Map Dynamic Custom Objects and Fields Between Salesforce and QuickBooks
Step 7: Save and Sync Object & Field Mapping
- Historical Sync requires proper object and field mapping before data can be synchronized.
- Navigate to Object & Field Mapping.
- Configure the mappings between QuickBooks objects and Salesforce objects.
- Select either:
- Default Mapping (QuickBooks → Salesforce or Salesforce → QuickBooks)
- Custom Mapping based on your business requirements
- Configure any additional field mappings as needed.
- Click Save All to save the configuration.
- Click Save & Sync.
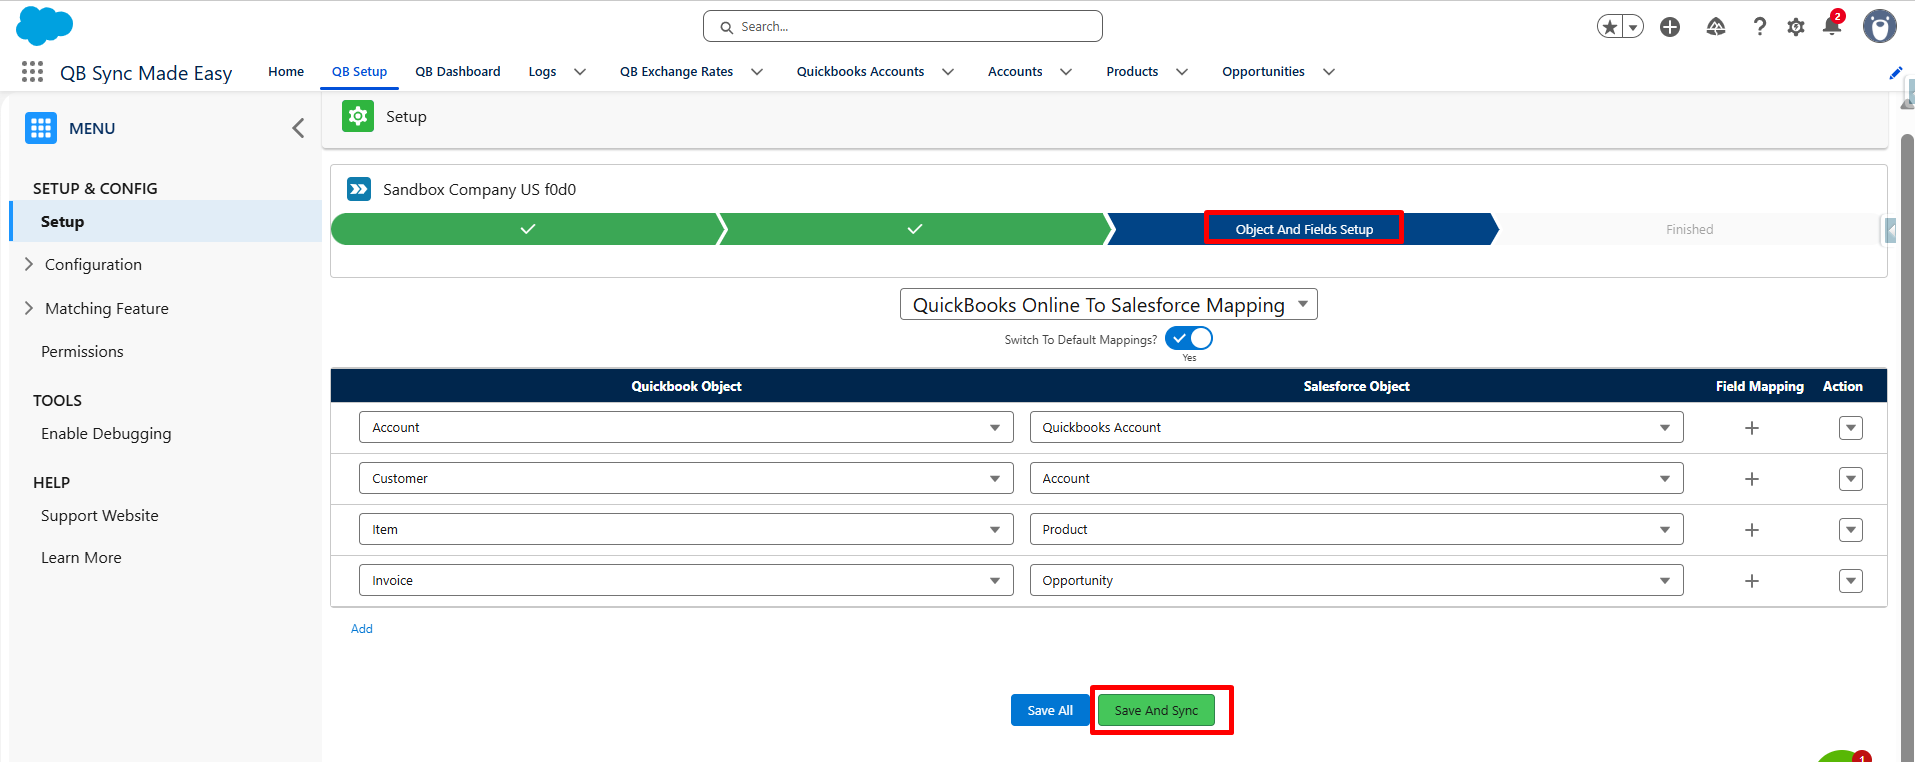
This ensures that QuickBooks data is correctly mapped to Salesforce before synchronization begins.
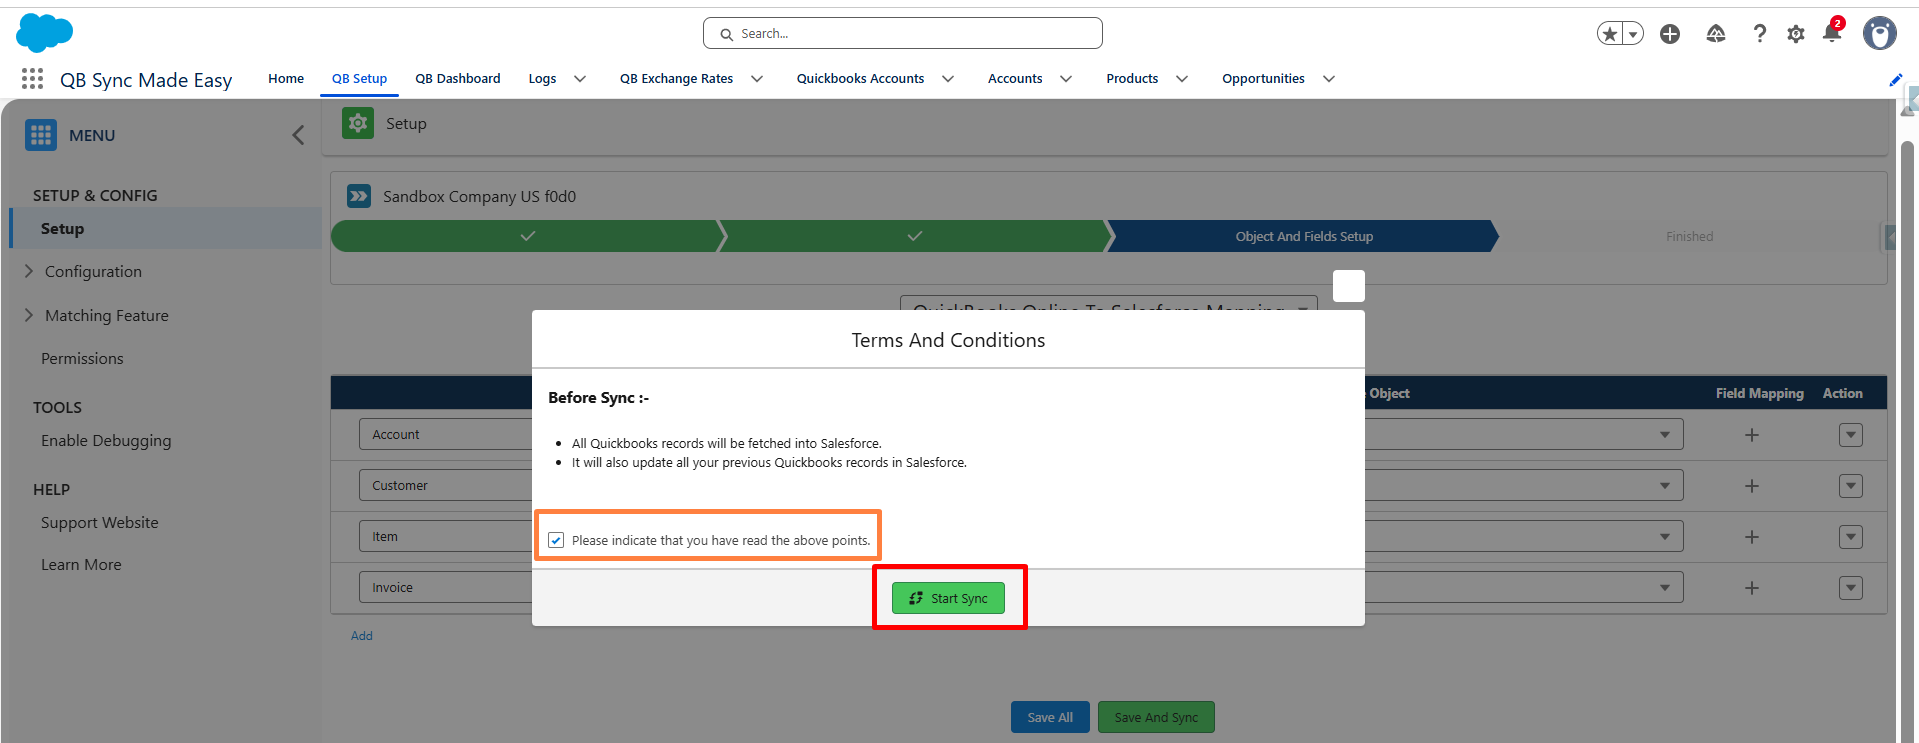
Step 4: Agree Terms and Conditions and Start Historical Sync
Historical Sync allows you to synchronize your existing QuickBooks records with Salesforce without any coding. This one-time process helps bring legacy QuickBooks data into Salesforce before enabling ongoing synchronization.
- After clicking Save & Sync, review the Terms and Conditions.
- Agree to the Terms and Conditions.
- Click Start Sync.
Step 5: The historical sync starts, and the sync progress is displayed as a completion percentage in real time.
- The Historical Sync process will begin automatically.
- The sync progress is displayed in real time as a completion percentage.
- Wait for the process to complete.
- Once finished, verify that the records have been successfully synchronized to Salesforce.

Benefits of Historical Sync
- Synchronize existing QuickBooks records into Salesforce with no coding.
- Import legacy data before enabling ongoing synchronization.
- Ensure Salesforce contains up-to-date QuickBooks information.
- Track sync progress in real time.
- Reduce manual data migration effort.
Was this article helpful?
That’s Great!
Thank you for your feedback
Sorry! We couldn't be helpful
Thank you for your feedback
Feedback sent
We appreciate your effort and will try to fix the article