Syncing Salesforce with QuickBooks Online using Salesforce Flows helps automate data synchronization, reduce manual effort, and streamline your bookkeeping processes.
This guide explains how to create Flows that automatically create and update QuickBooks Online records whenever changes occur in Salesforce.
Before You Begin
Before configuring the Flow, make sure:
- QB Sync Made Easy is installed and configured.
- Salesforce is connected to your QuickBooks Online company.
- You have the required permissions to create and activate Flows.
- You know the QuickBooks Company ID and the QuickBooks object you want to sync.
- Flow Types Required
To maintain synchronization between Salesforce and QuickBooks Online, create separate Flows for:
1. Create New Records
When a new record is created in Salesforce, the Flow automatically creates the corresponding record in QuickBooks Online.
Example:
A new Salesforce Account creates a new Customer in QuickBooks Online.
2. Update Existing Records
When an existing Salesforce record is updated, the Flow automatically updates the corresponding record in QuickBooks Online.
Example:
Updating an Account's billing information in Salesforce updates the associated Customer record in QuickBooks Online.
Create a Flow for New Records
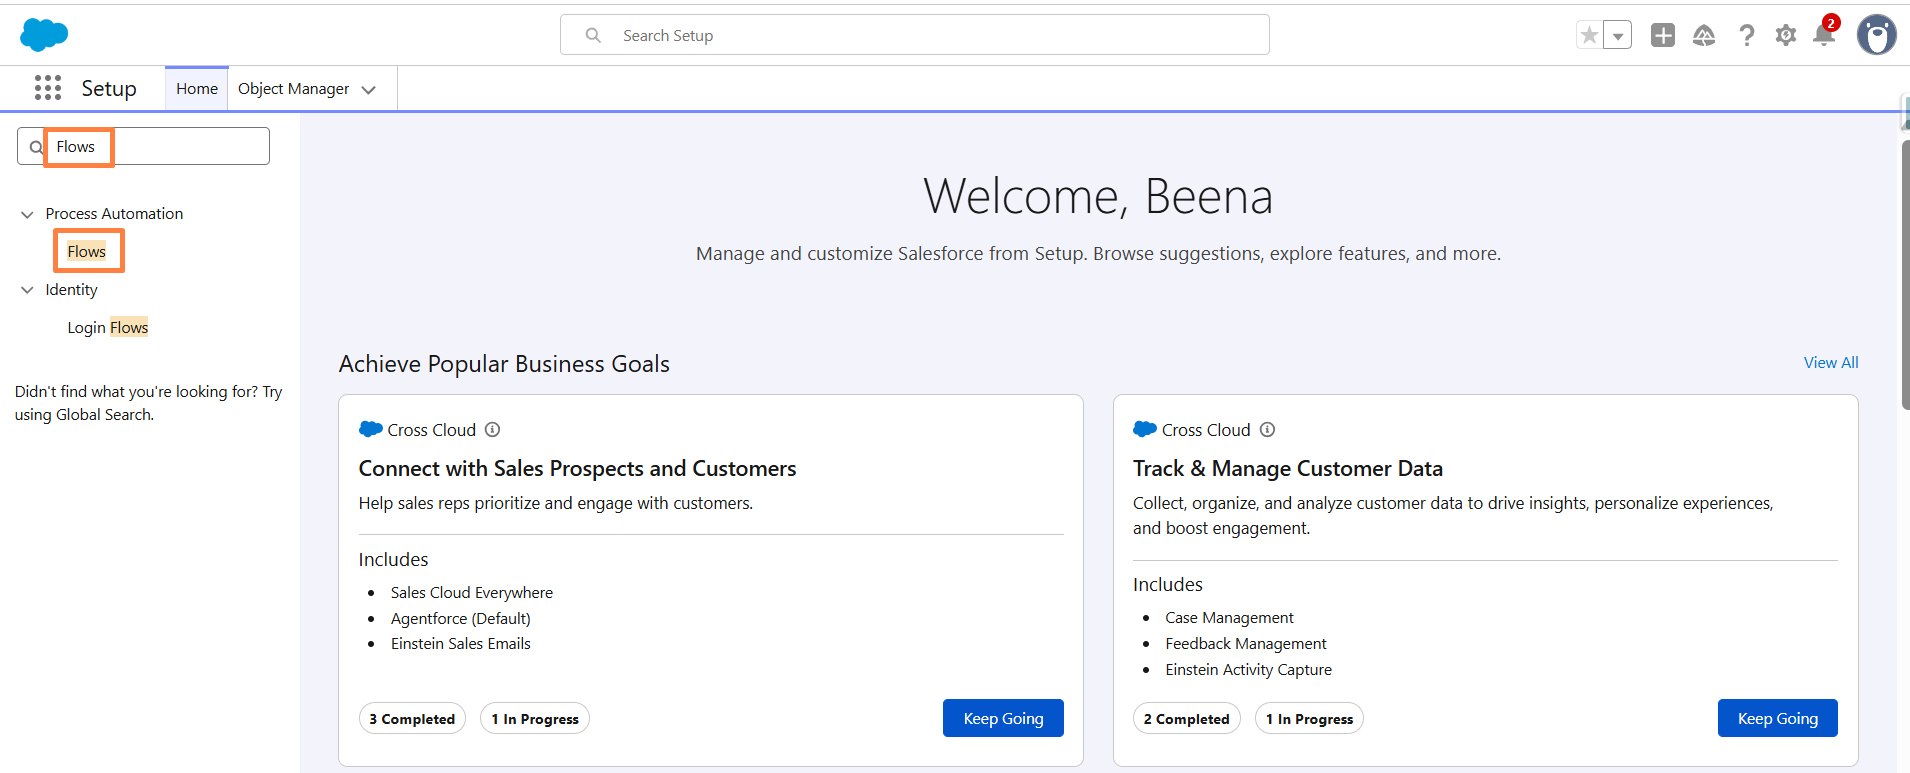
Step 1: Open Flow Builder
- Navigate to Setup.
- Search for Flows in the Quick Find box.
- Click Flows.
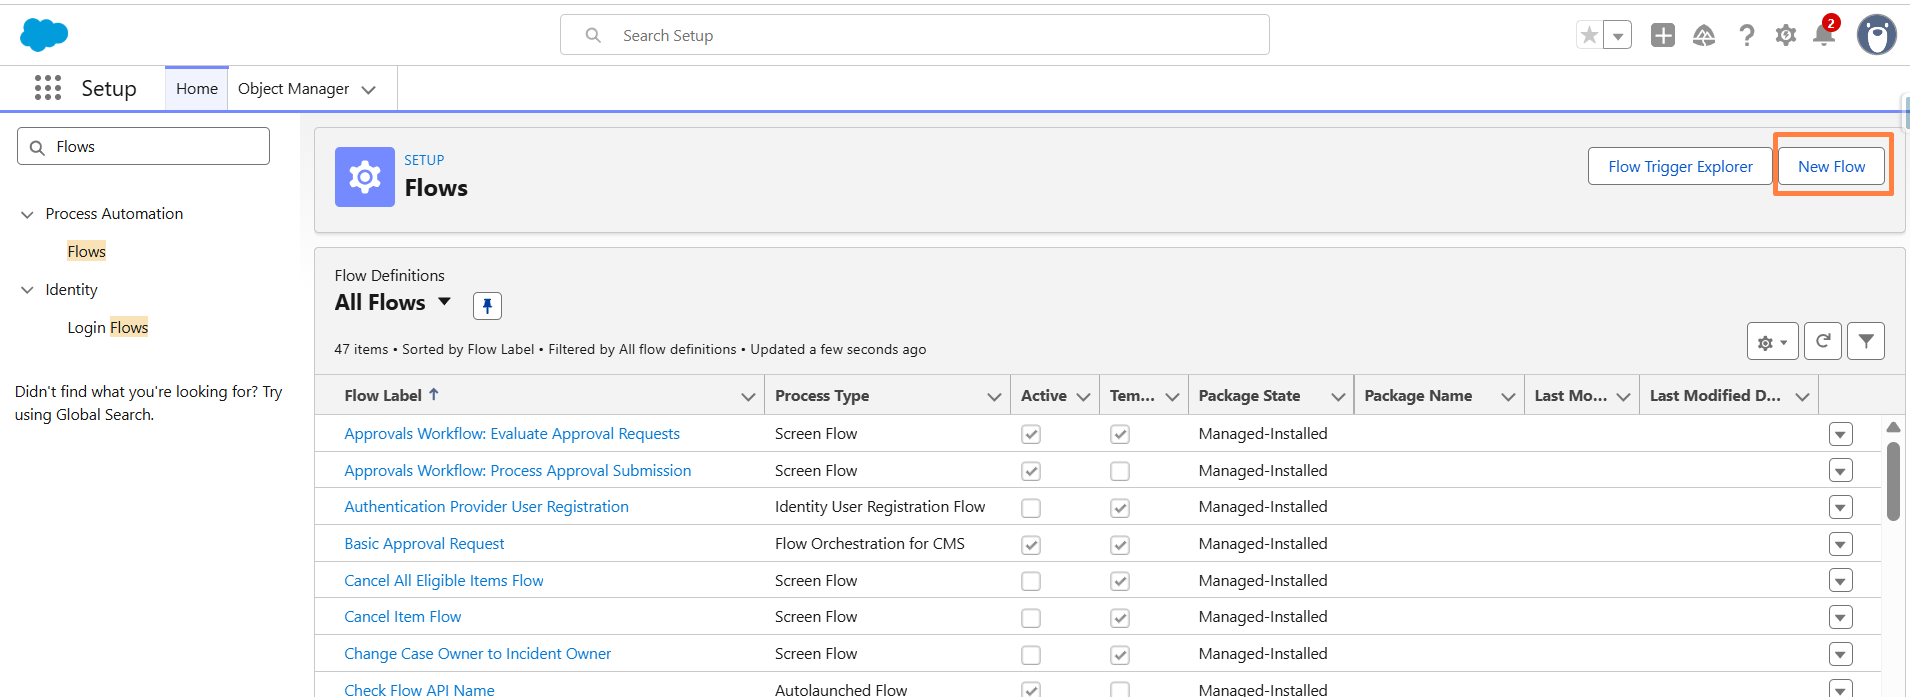
Step 2: Create a New Flow
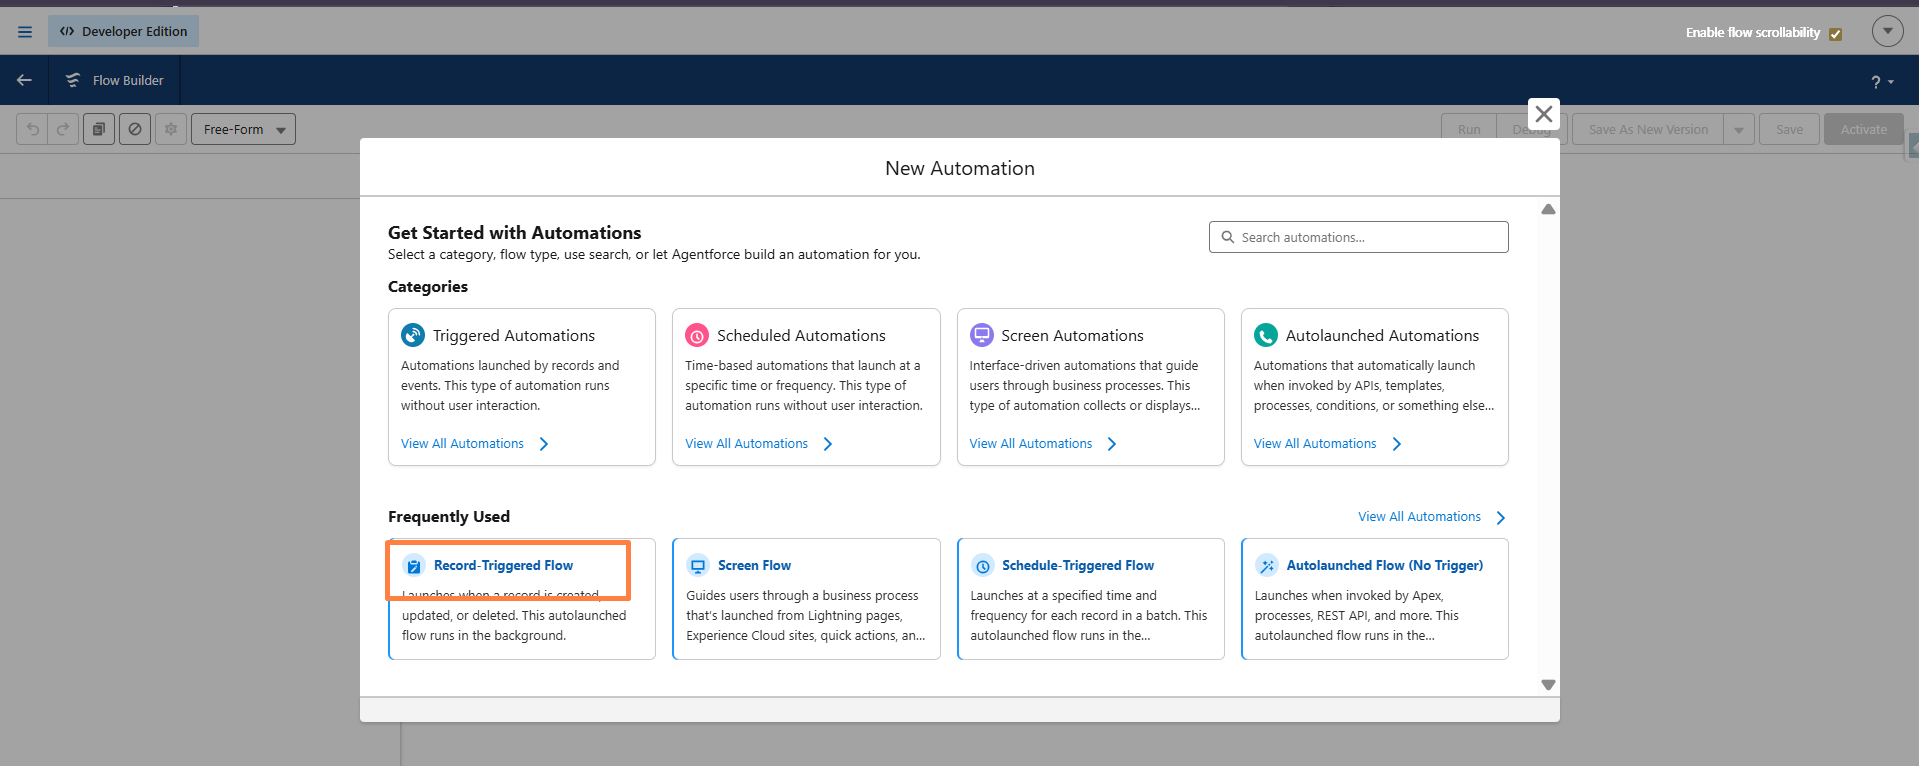
- Click New Flow.
- Select Record-Triggered Flow.
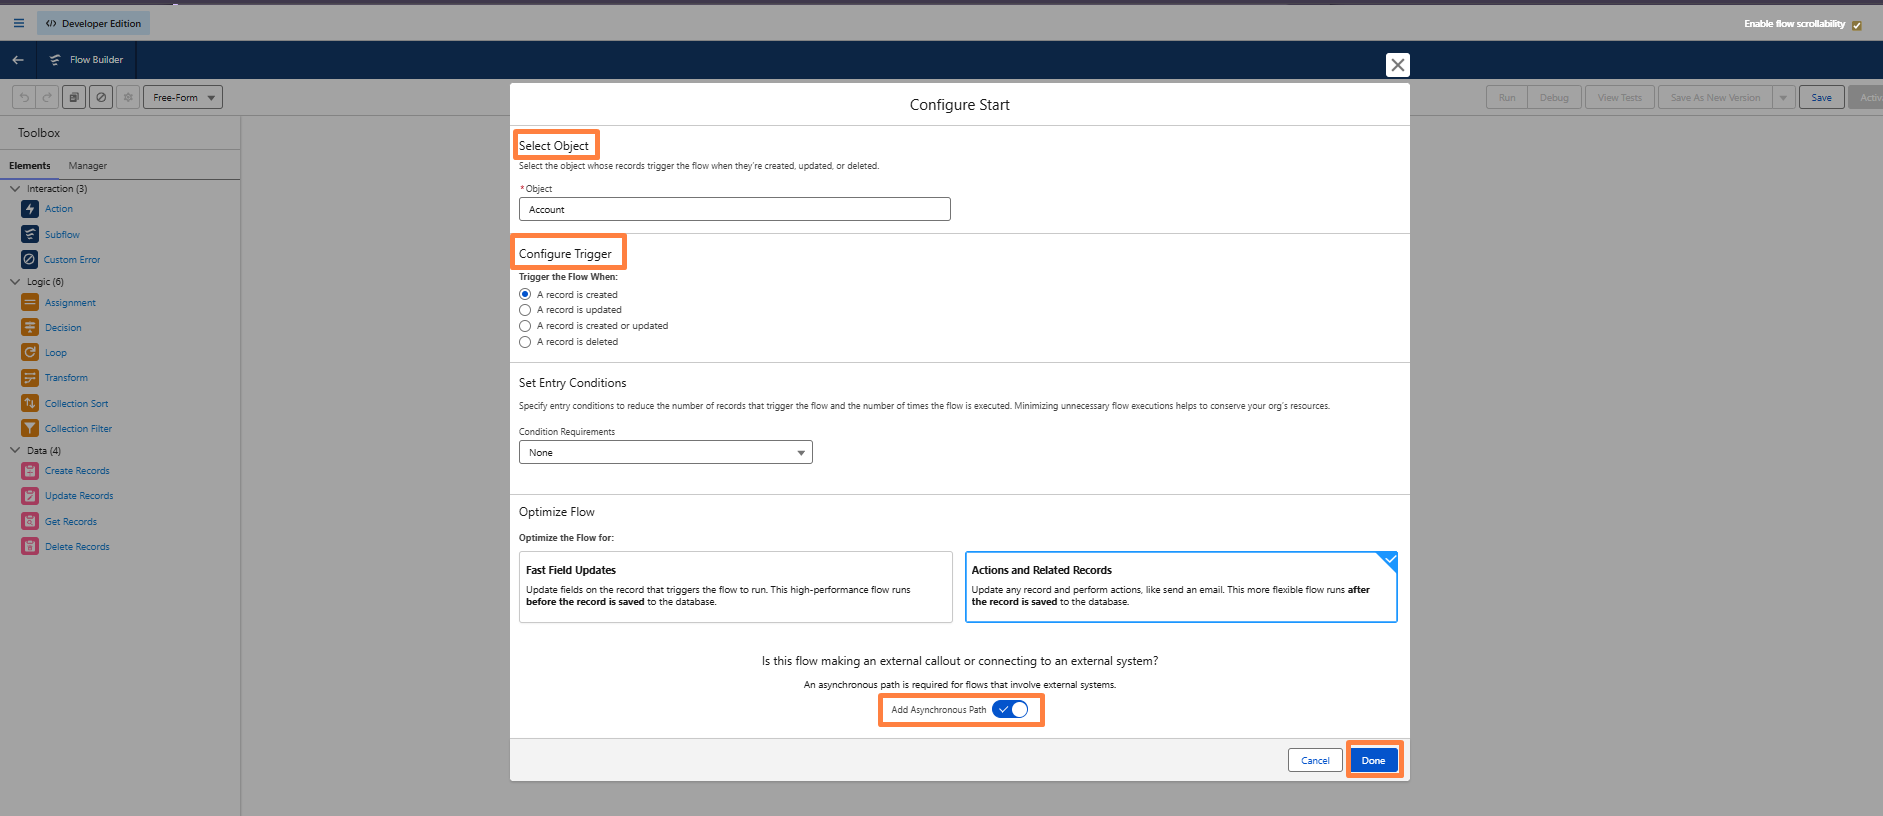
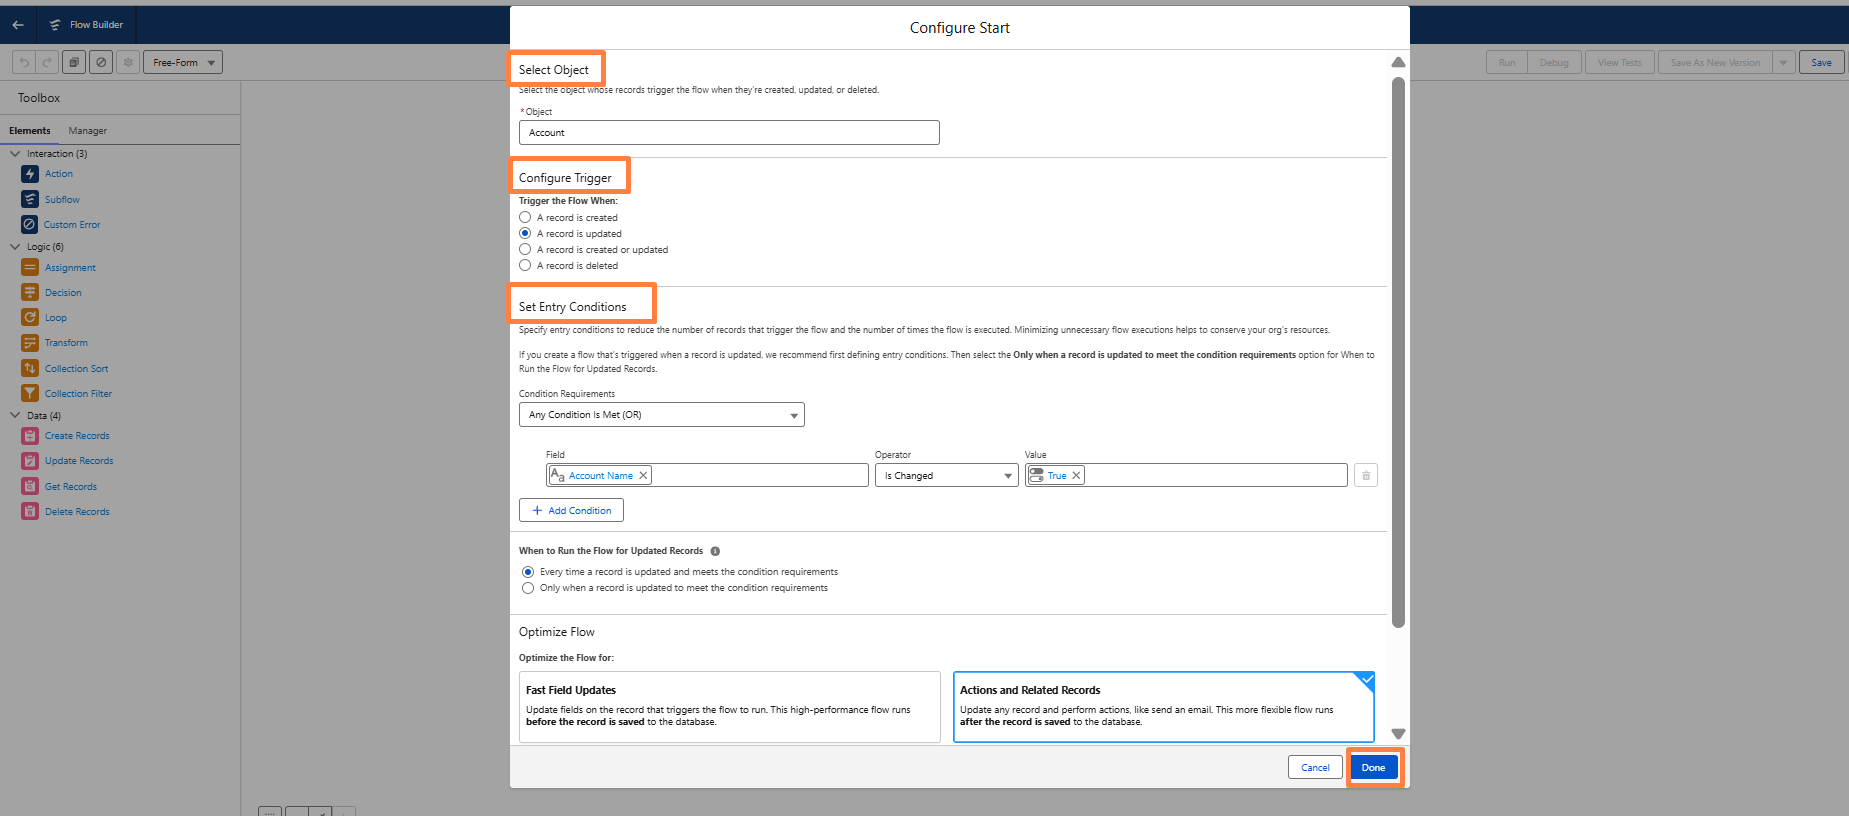
Step 3: Configure the Trigger
- Select the Salesforce object you want to sync.
Example: Account
Configure the Flow to run when:
- A record is created
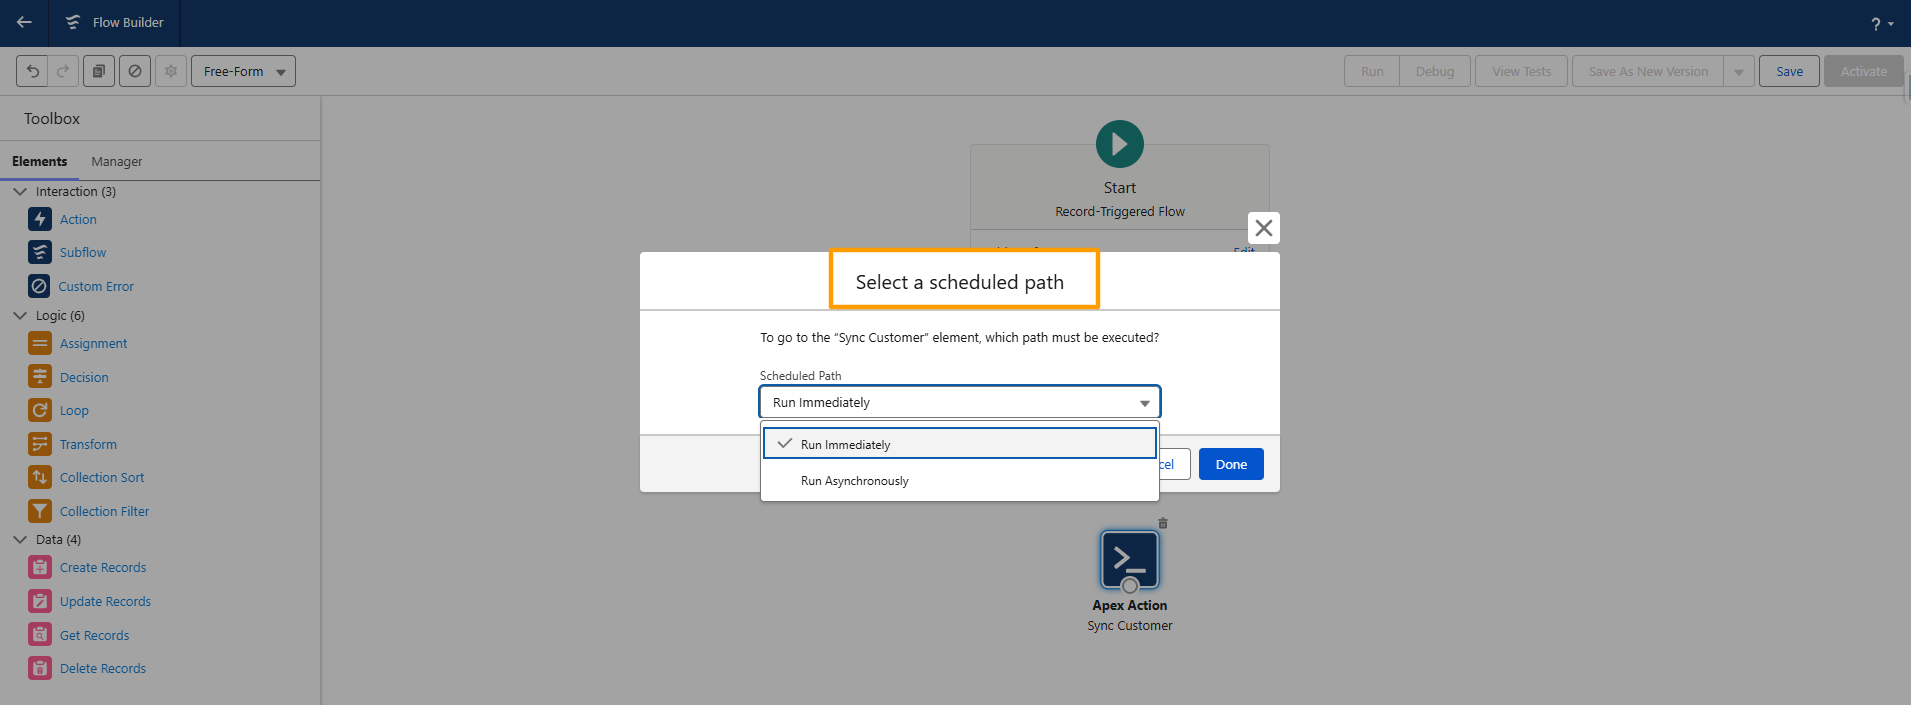
- Enable Run Asynchronously.
- Click Done.
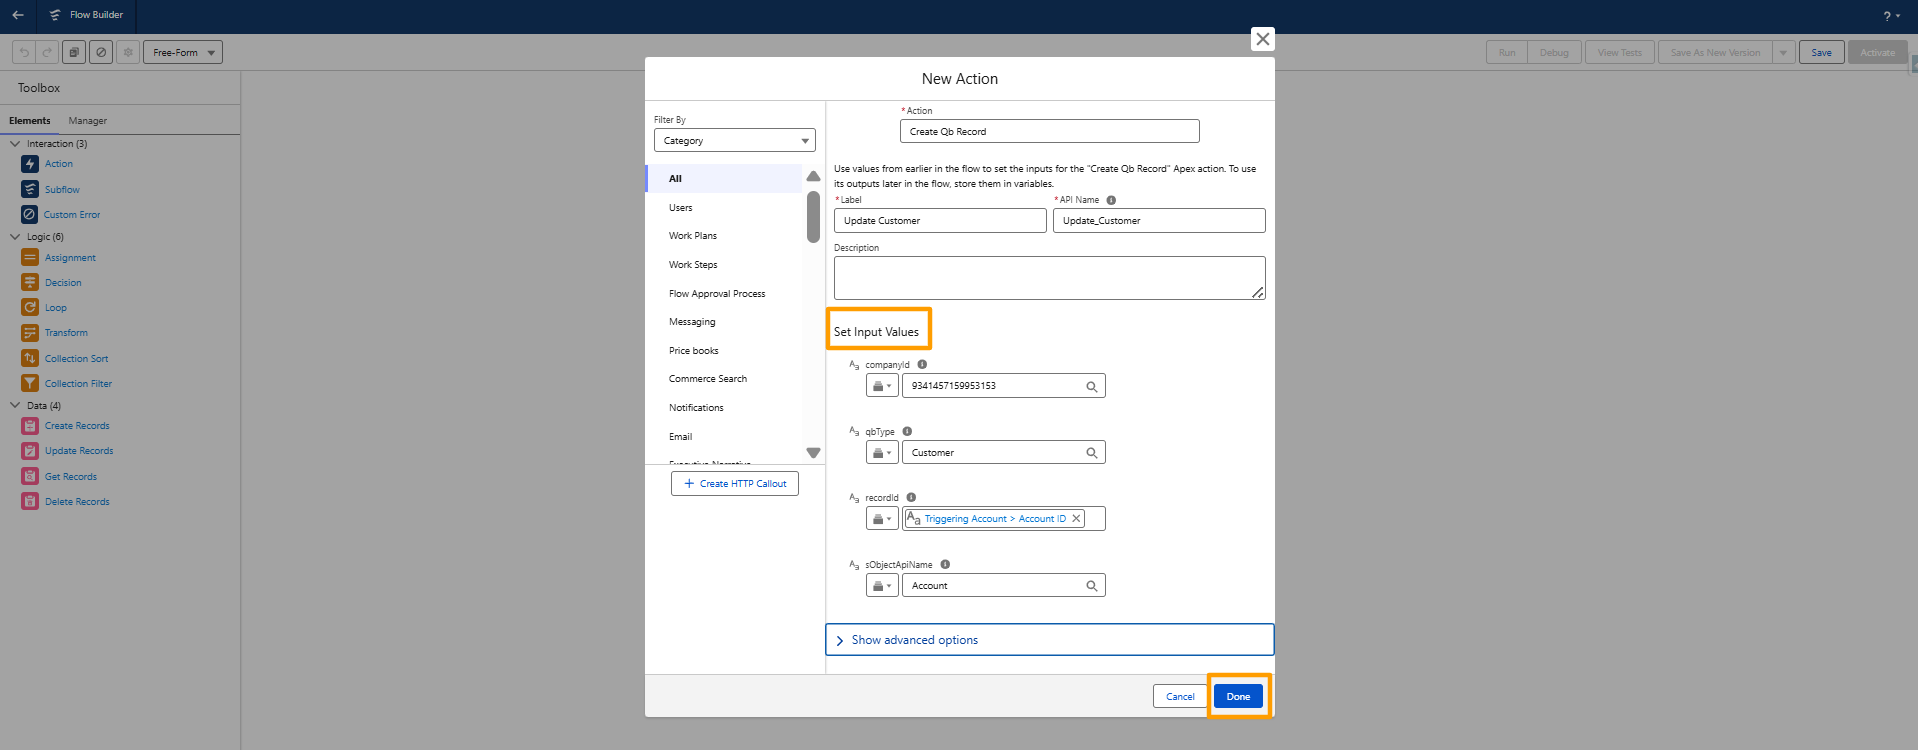
Step 4: Add the QuickBooks Action
- Drag and Drop Action
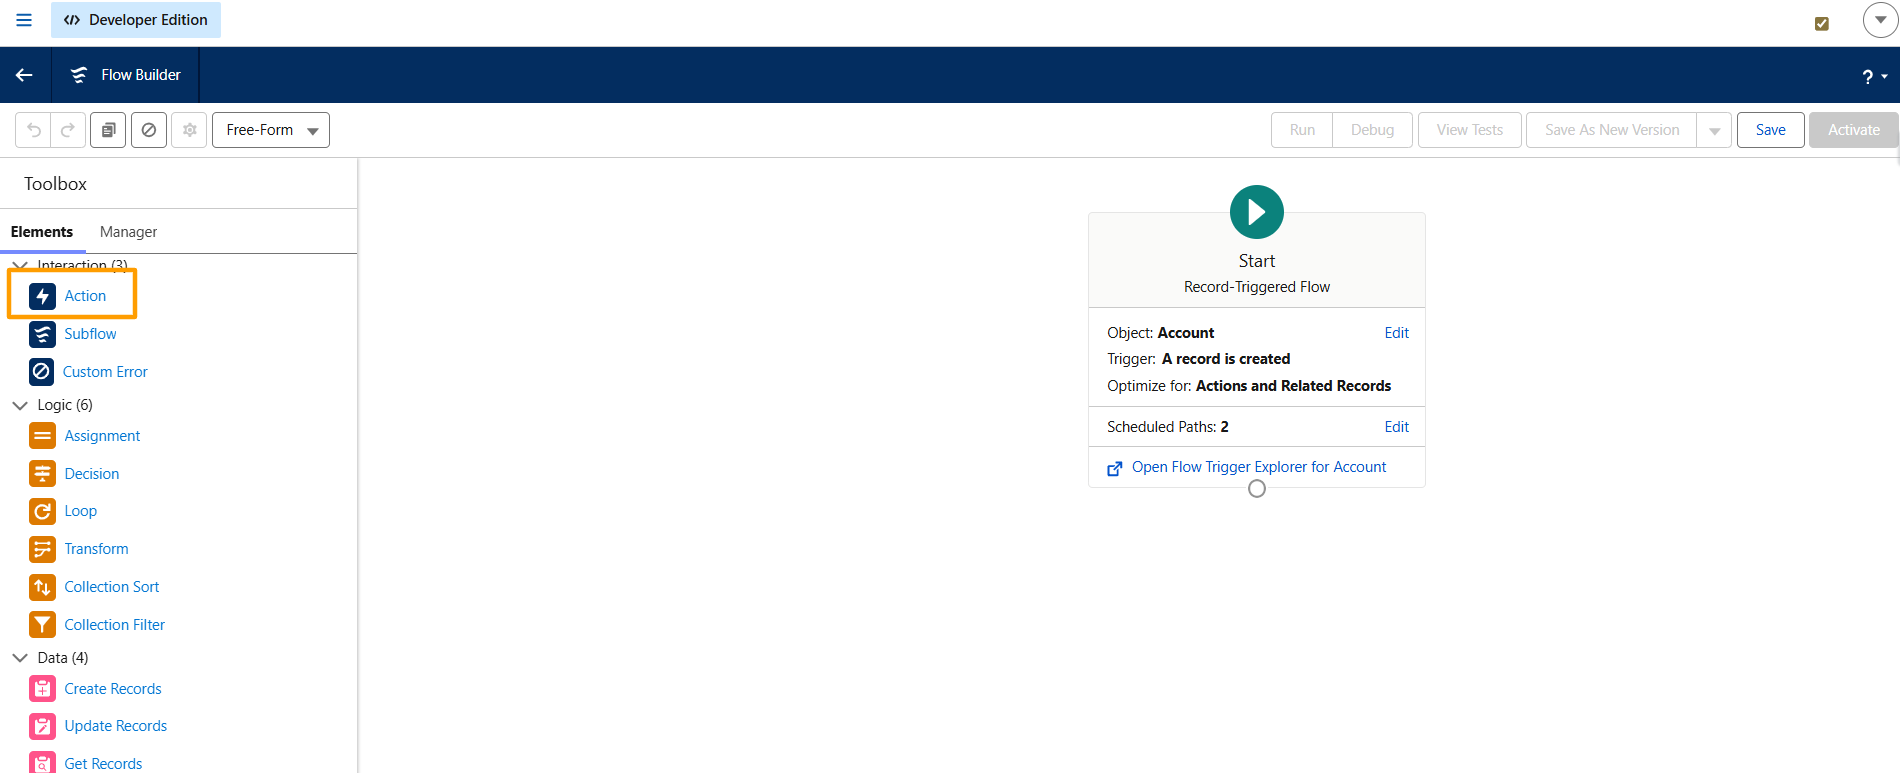
Choose the Apex Action:
- Create QB Record
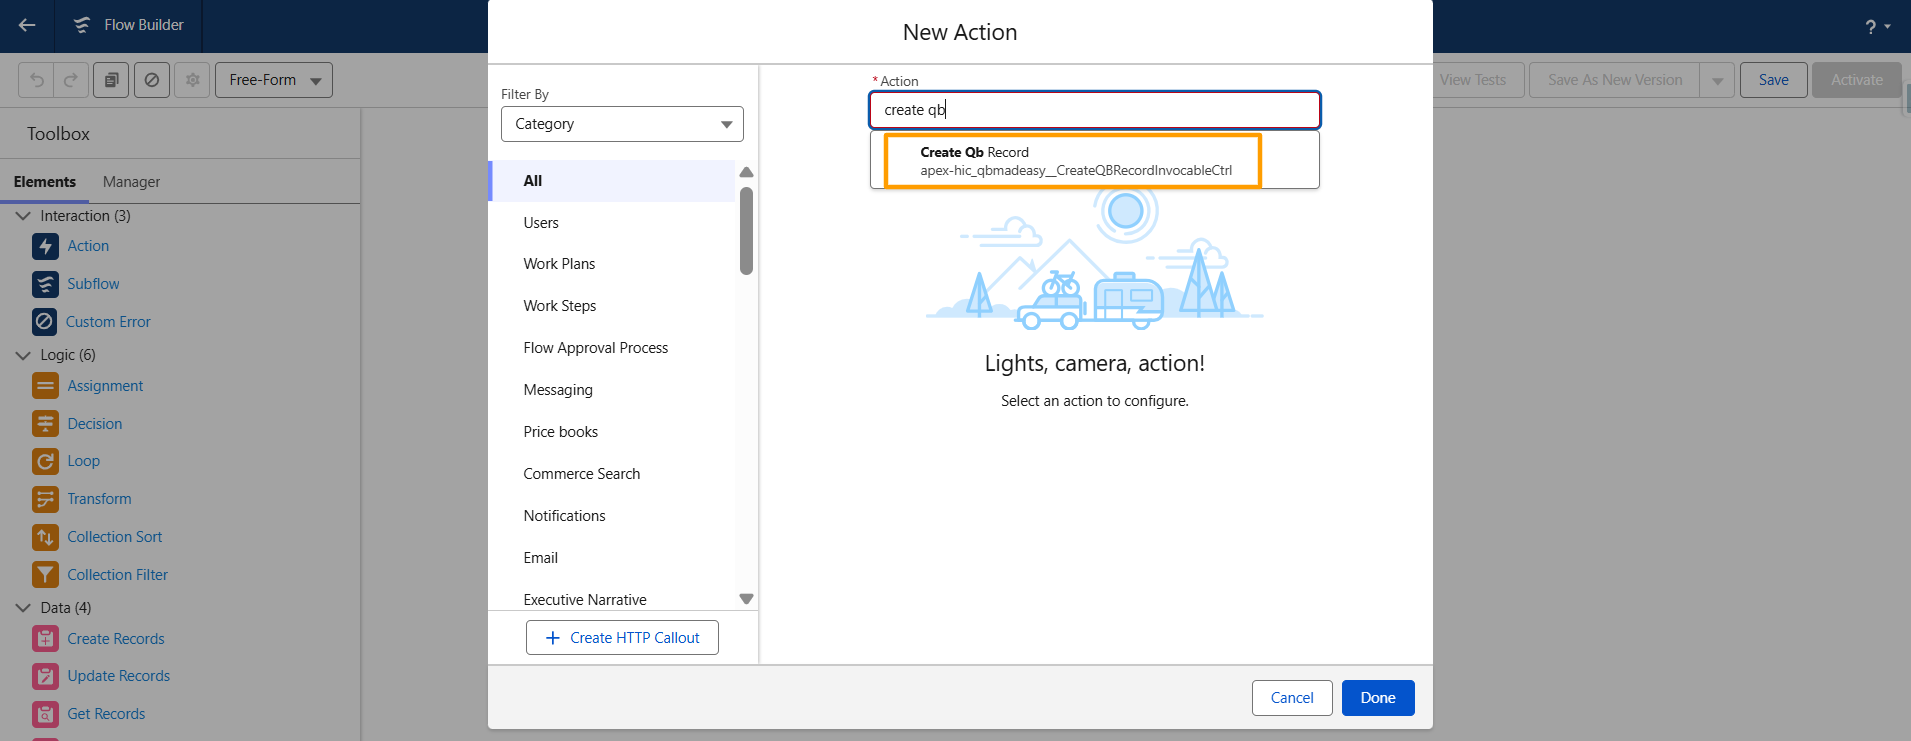
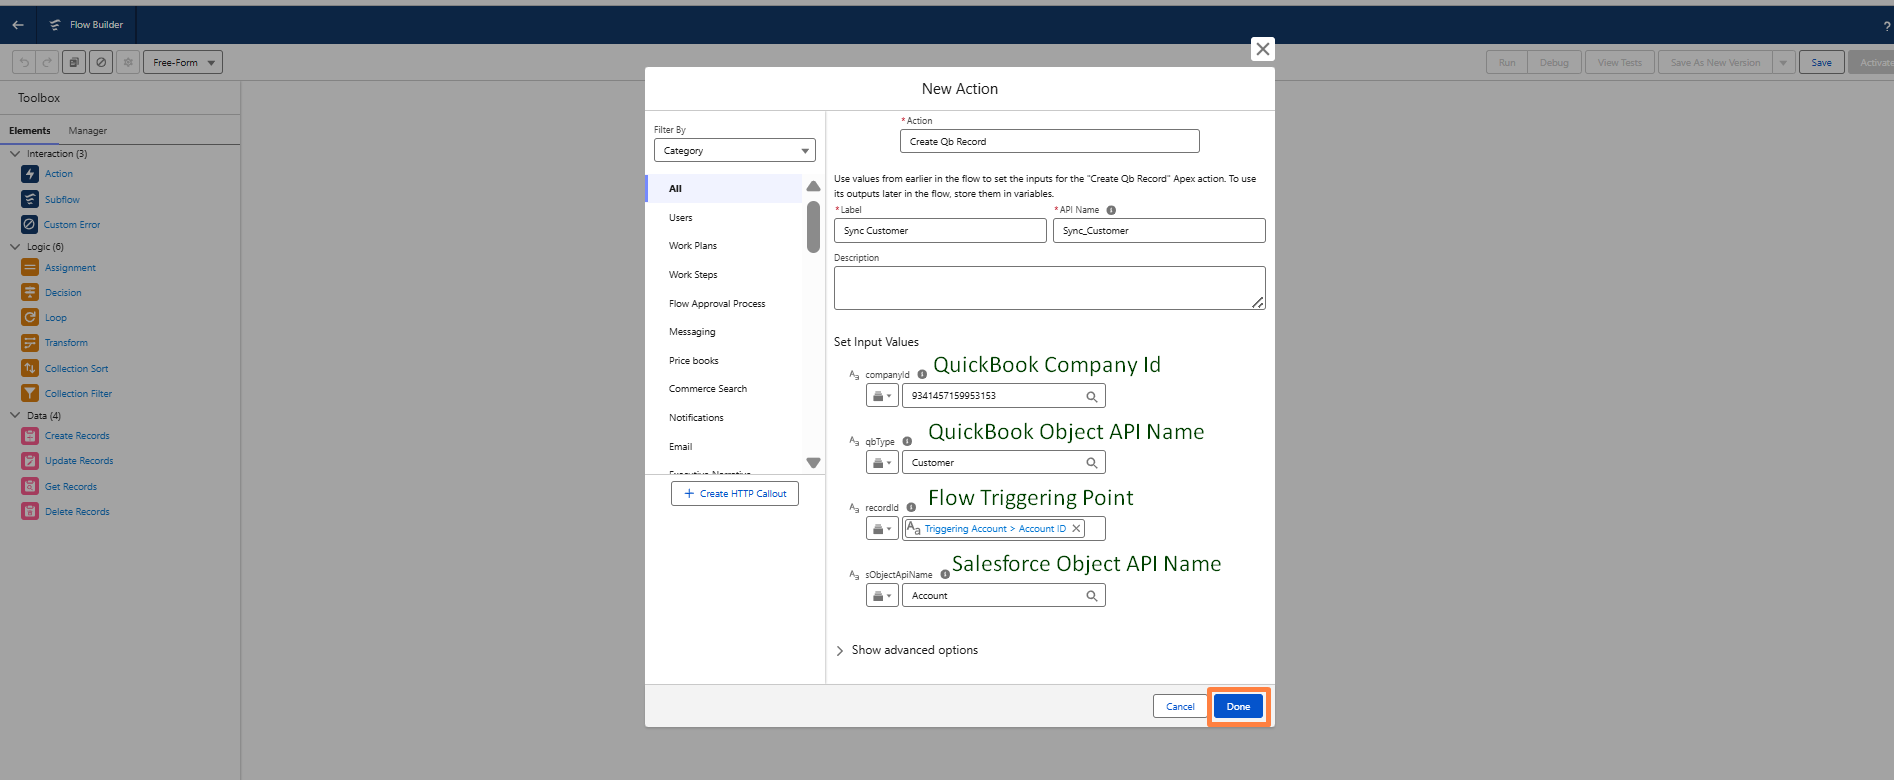
Configure the required fields and Click on Done.
- Label Name
- Company ID - Enter the QuickBooks Company ID where records will be synced
- QB Type - Enter the QuickBooks object type (for example, Customer)
- Object API Name - Enter the Salesforce object API name (for example, Account)
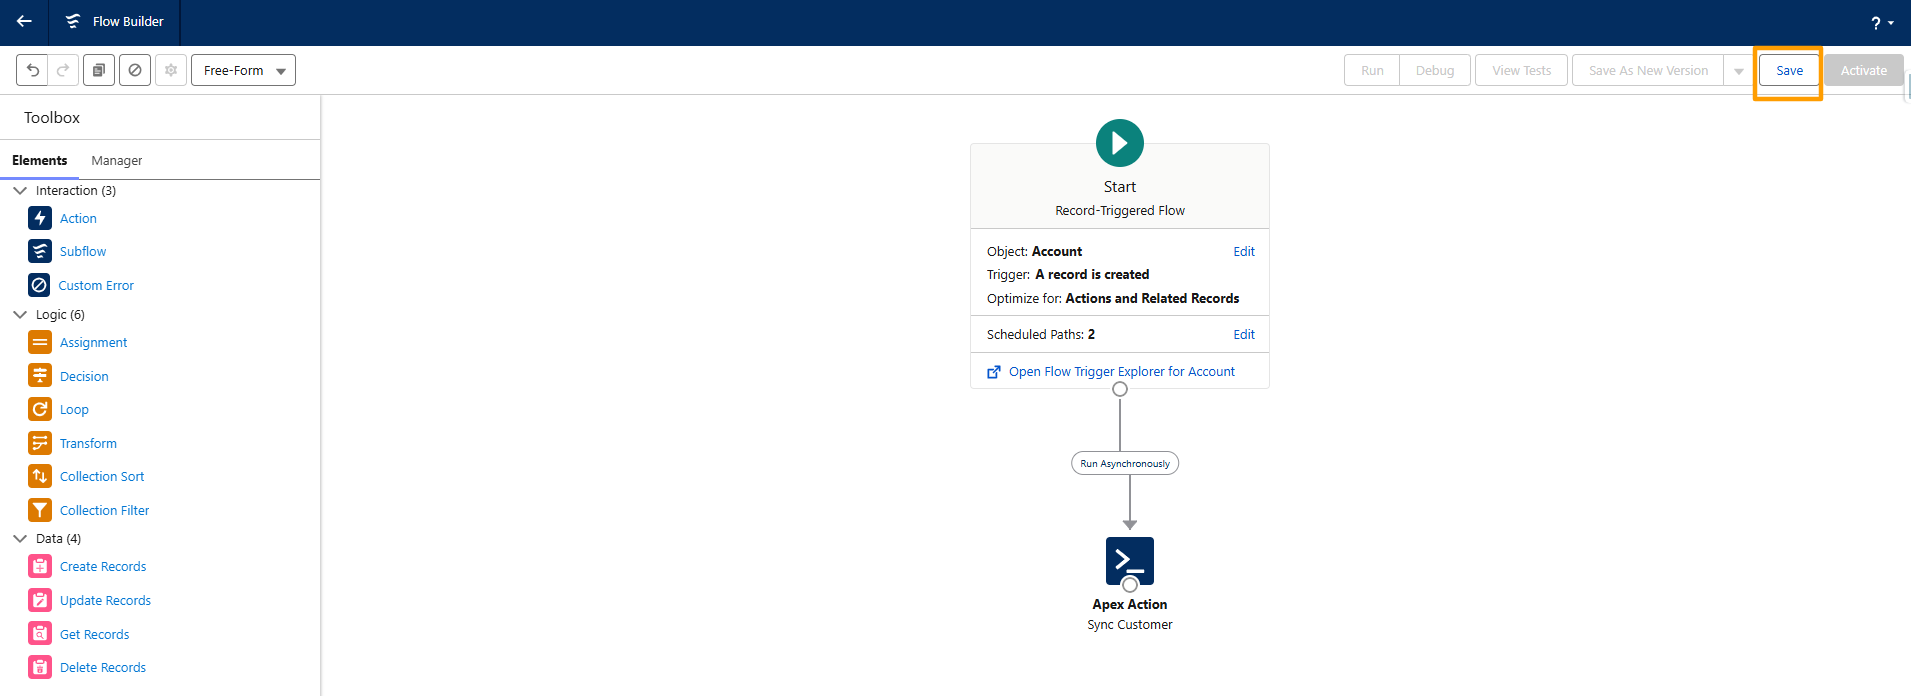
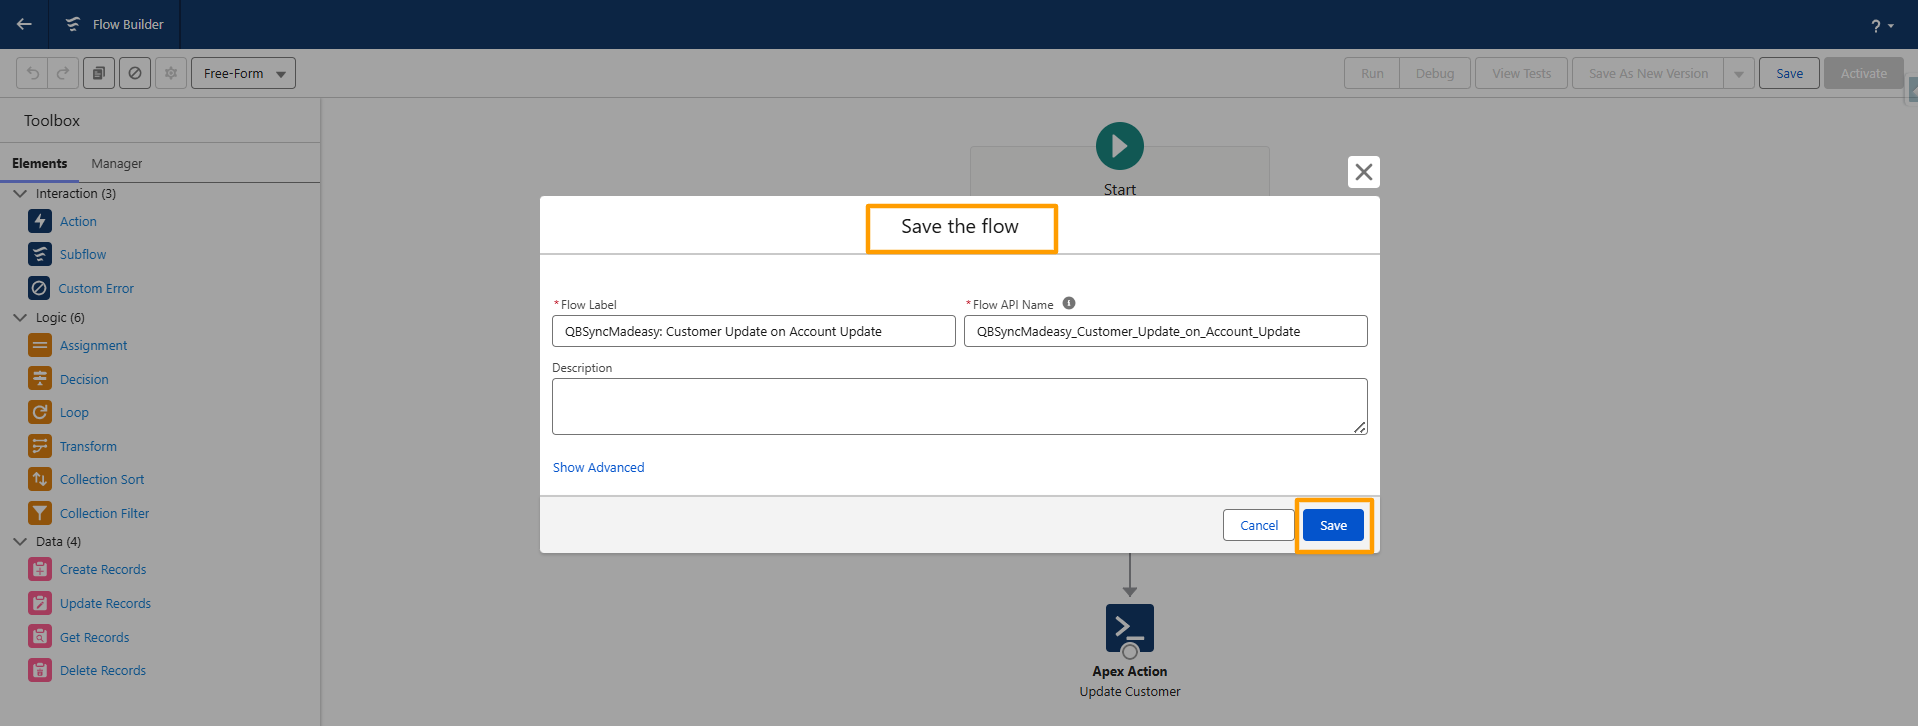
Step 5: Select Path and Save the Flow
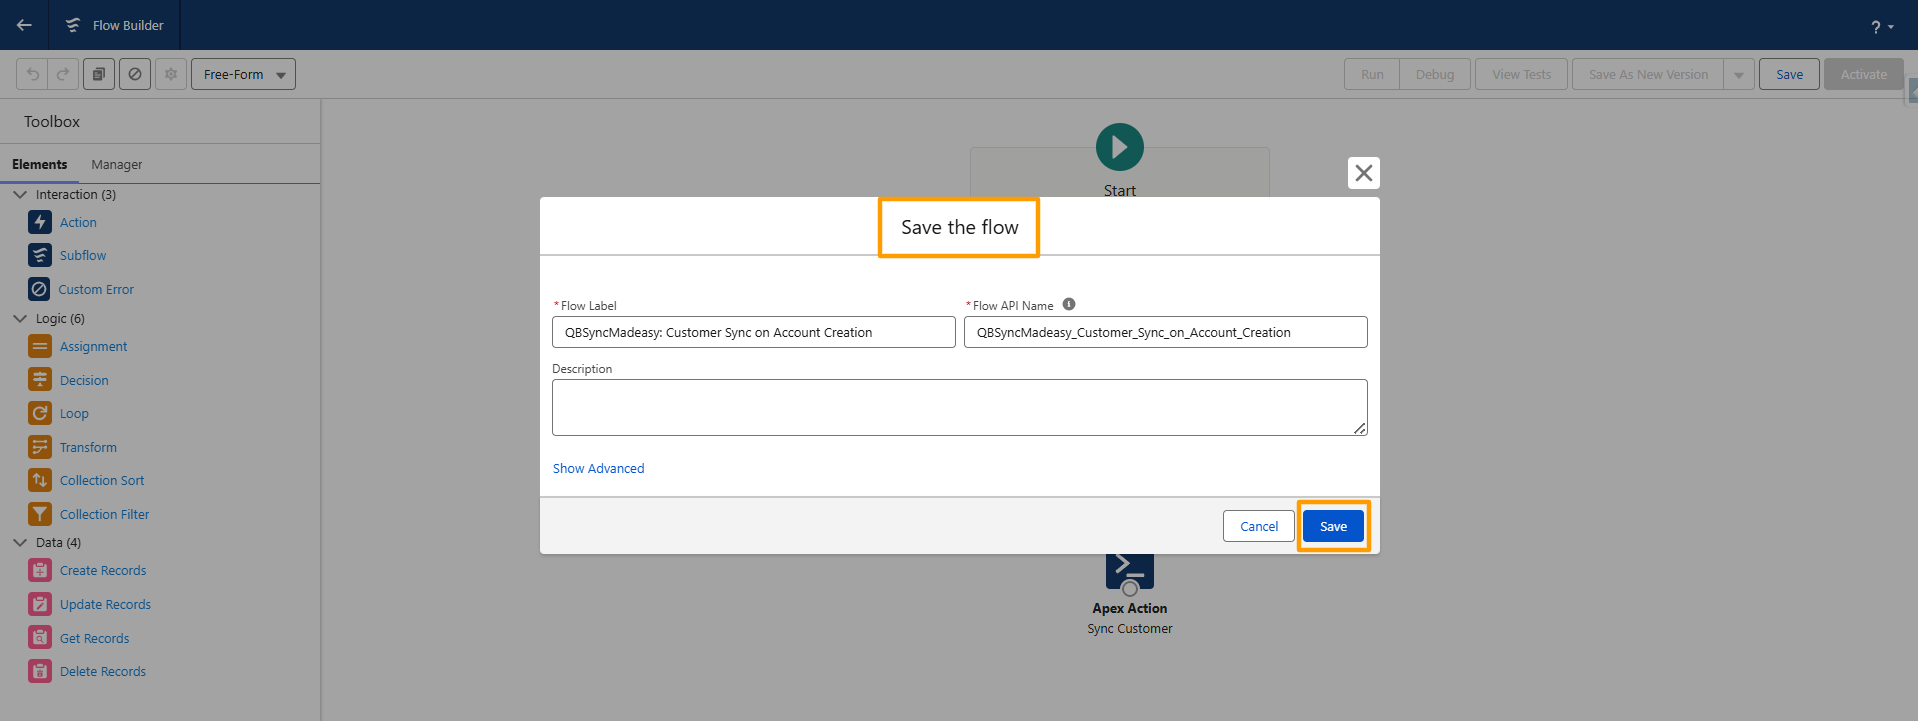
- Click Save As.
- Enter a Flow Name and Description.
- Click Save.
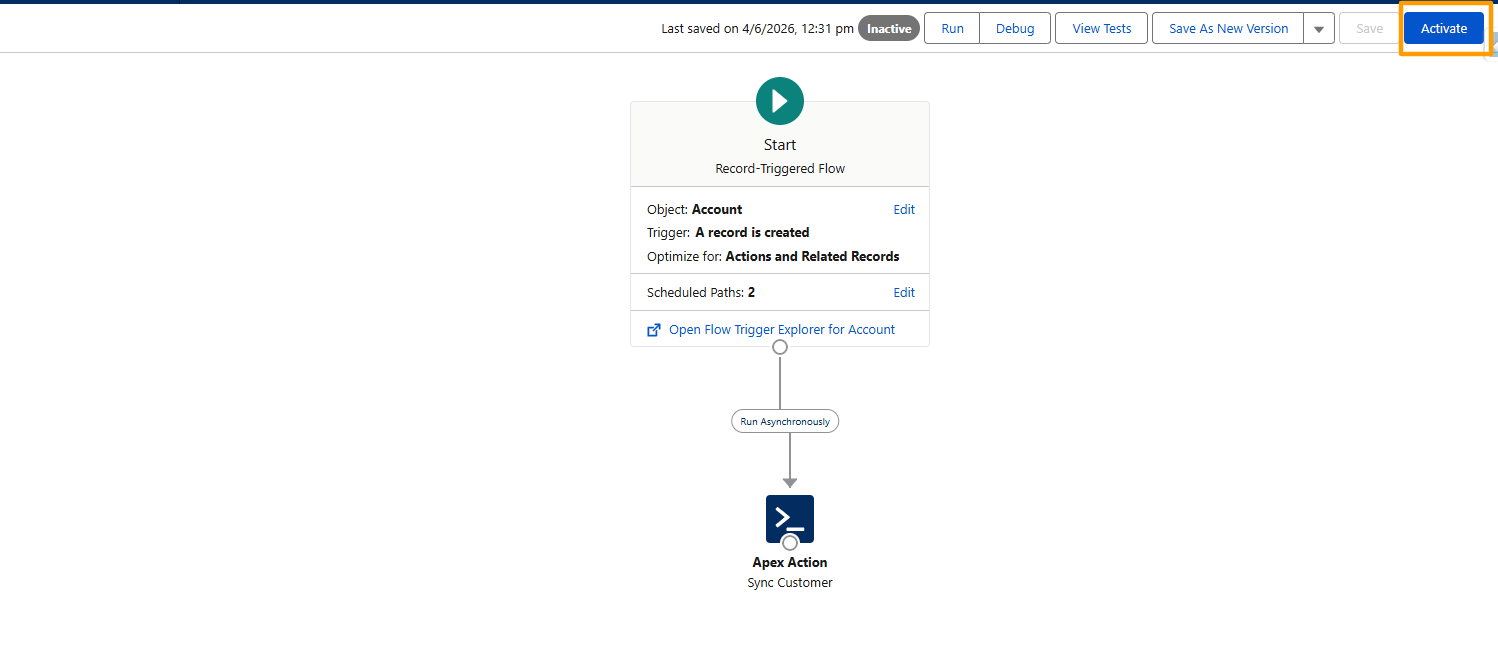
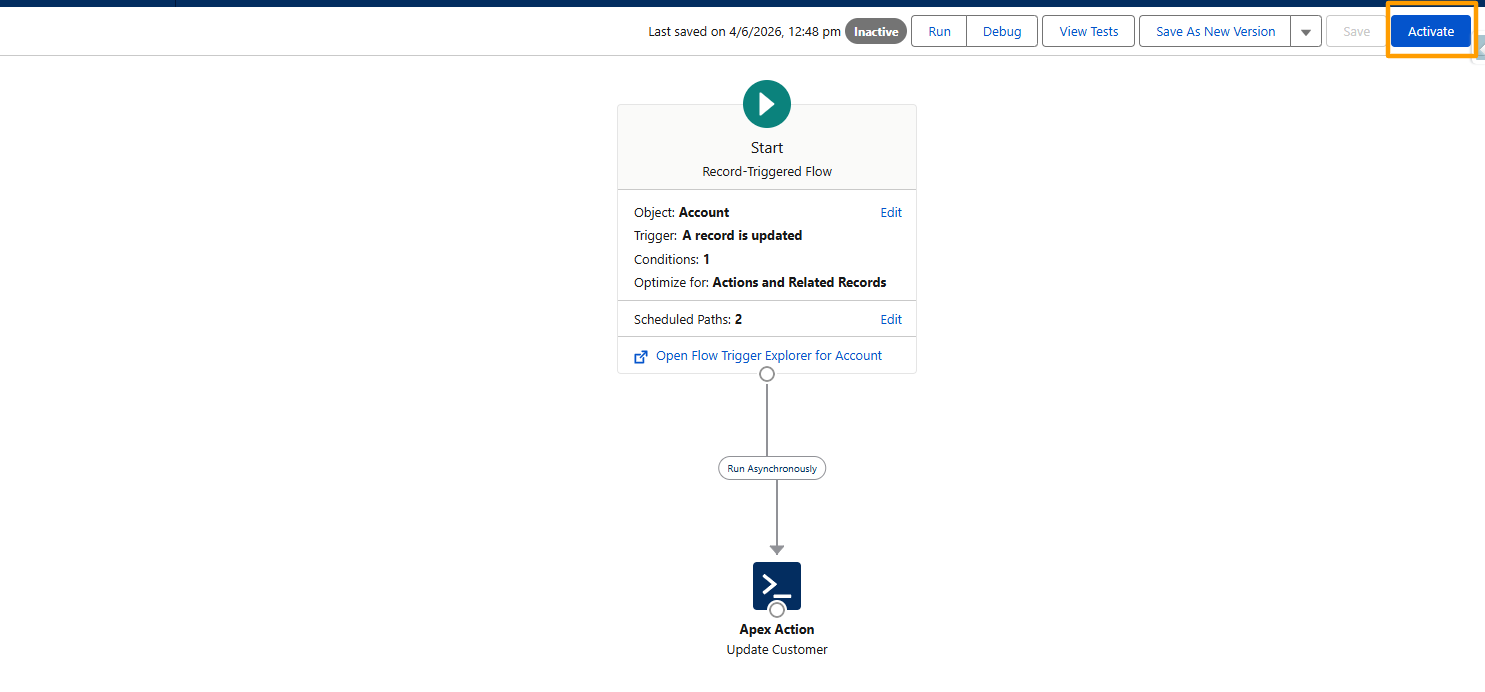
Step 6: Activate the Flow
- Click Activate.
- Your Flow is now active.
Result
Whenever a new record is created in Salesforce, the corresponding record will automatically be created in QuickBooks Online.
Create a Flow for Updating Records
Follow the same steps as above with the following changes.
Step 1: Configure the Trigger
Select the Salesforce object you want to sync.
Example: Account
Configure the Flow to run when:
- A record is updated
- Set any additional entry conditions based on your business requirements.
- Click Done.
Step 2: Add the QuickBooks Update Action
- Add the appropriate QB Sync action.
- Map the required fields.
Configure:
- Company ID
- QuickBooks Object Type
- Salesforce Object API Name
Step 3: Save and Activate
- Click Save As.
- Save the Flow.
- Click Activate.
Result
Whenever a Salesforce record is updated, the corresponding record in QuickBooks Online will automatically be updated.
Was this article helpful?
That’s Great!
Thank you for your feedback
Sorry! We couldn't be helpful
Thank you for your feedback
Feedback sent
We appreciate your effort and will try to fix the article