Follow the steps below to synchronize the custom fields configured in QuickBooks Online (QBO) with the QB Sync Made Easy application.
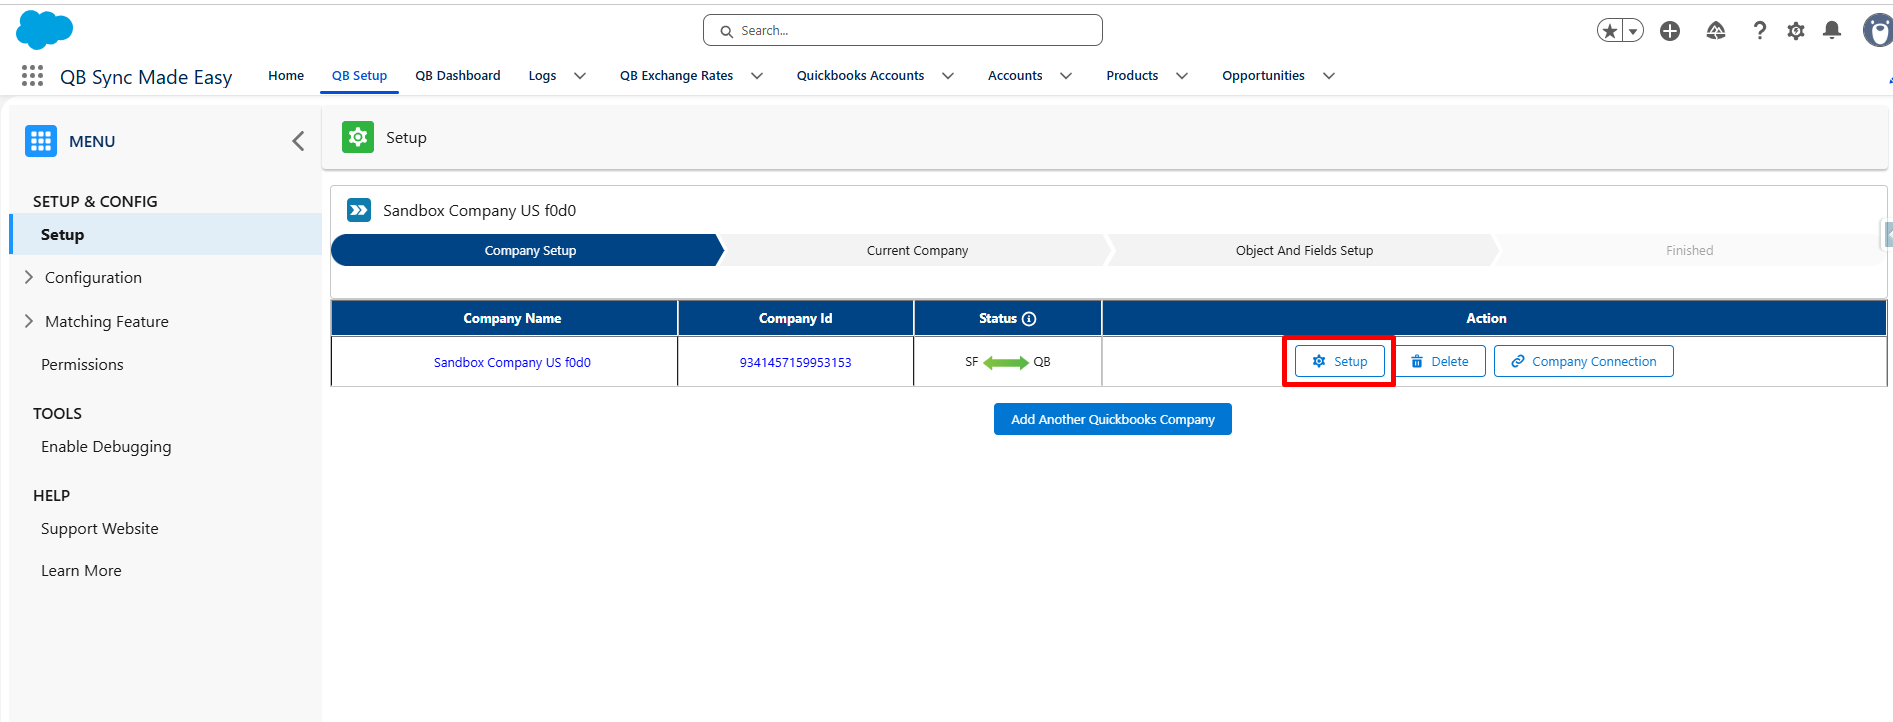
Step 1: Connect the QuickBooks Company and click on Setup Button
Connect the required QuickBooks Online company to Salesforce using the company connection option.
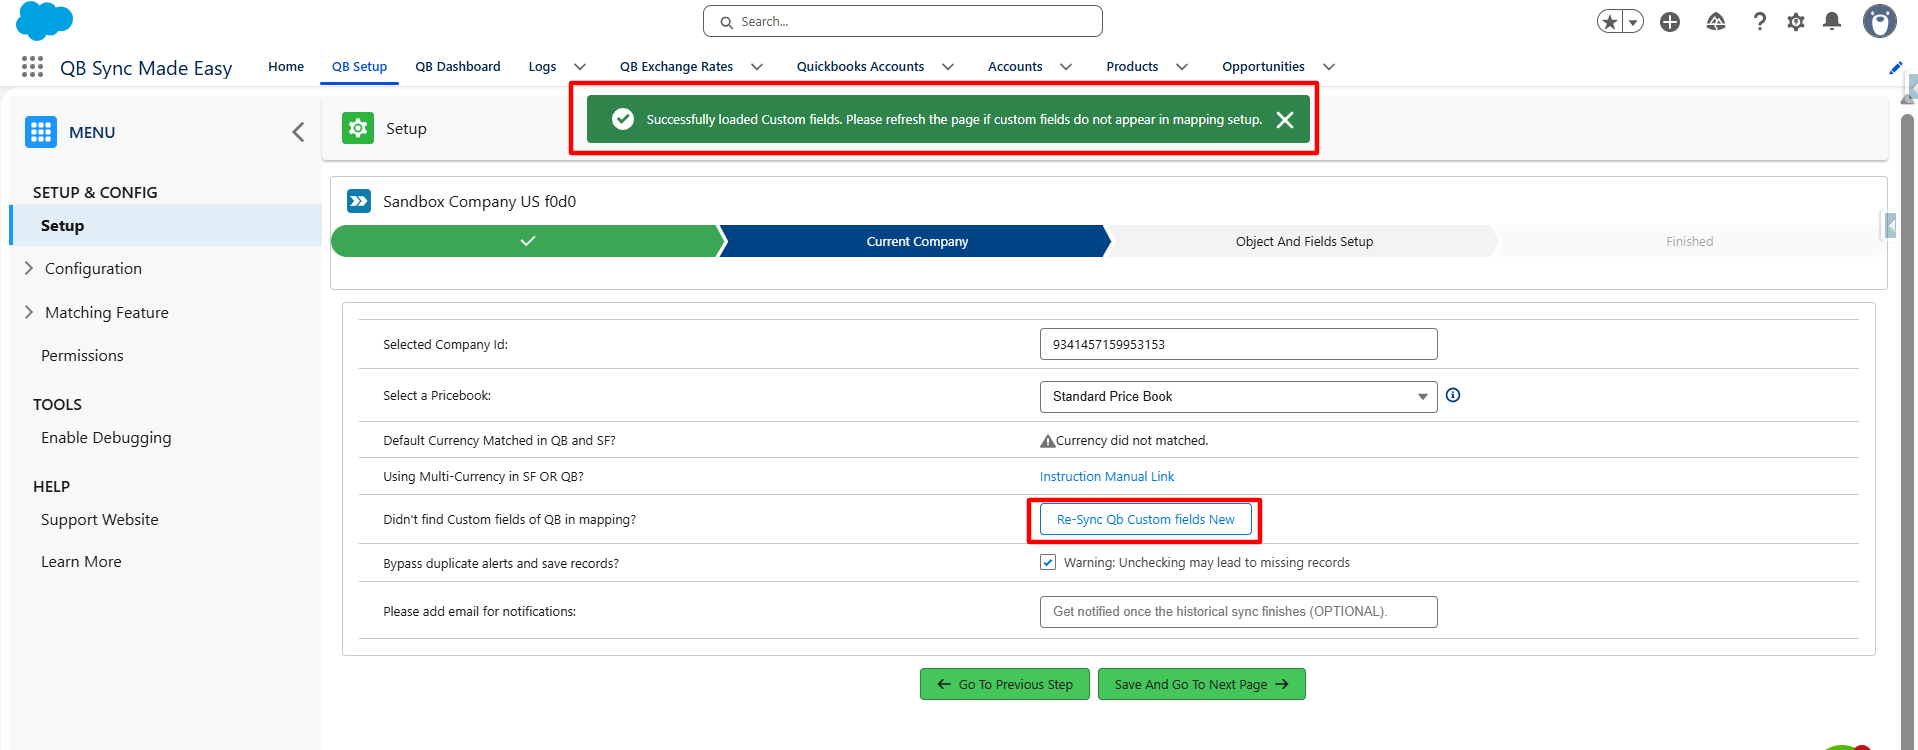
Step 2: Click on Re-Sync QB Custom field New button and Verify the Successful Sync
After clicking Re-sync QB Custom Field, a confirmation message will be displayed indicating that the QuickBooks custom fields were successfully synchronized.
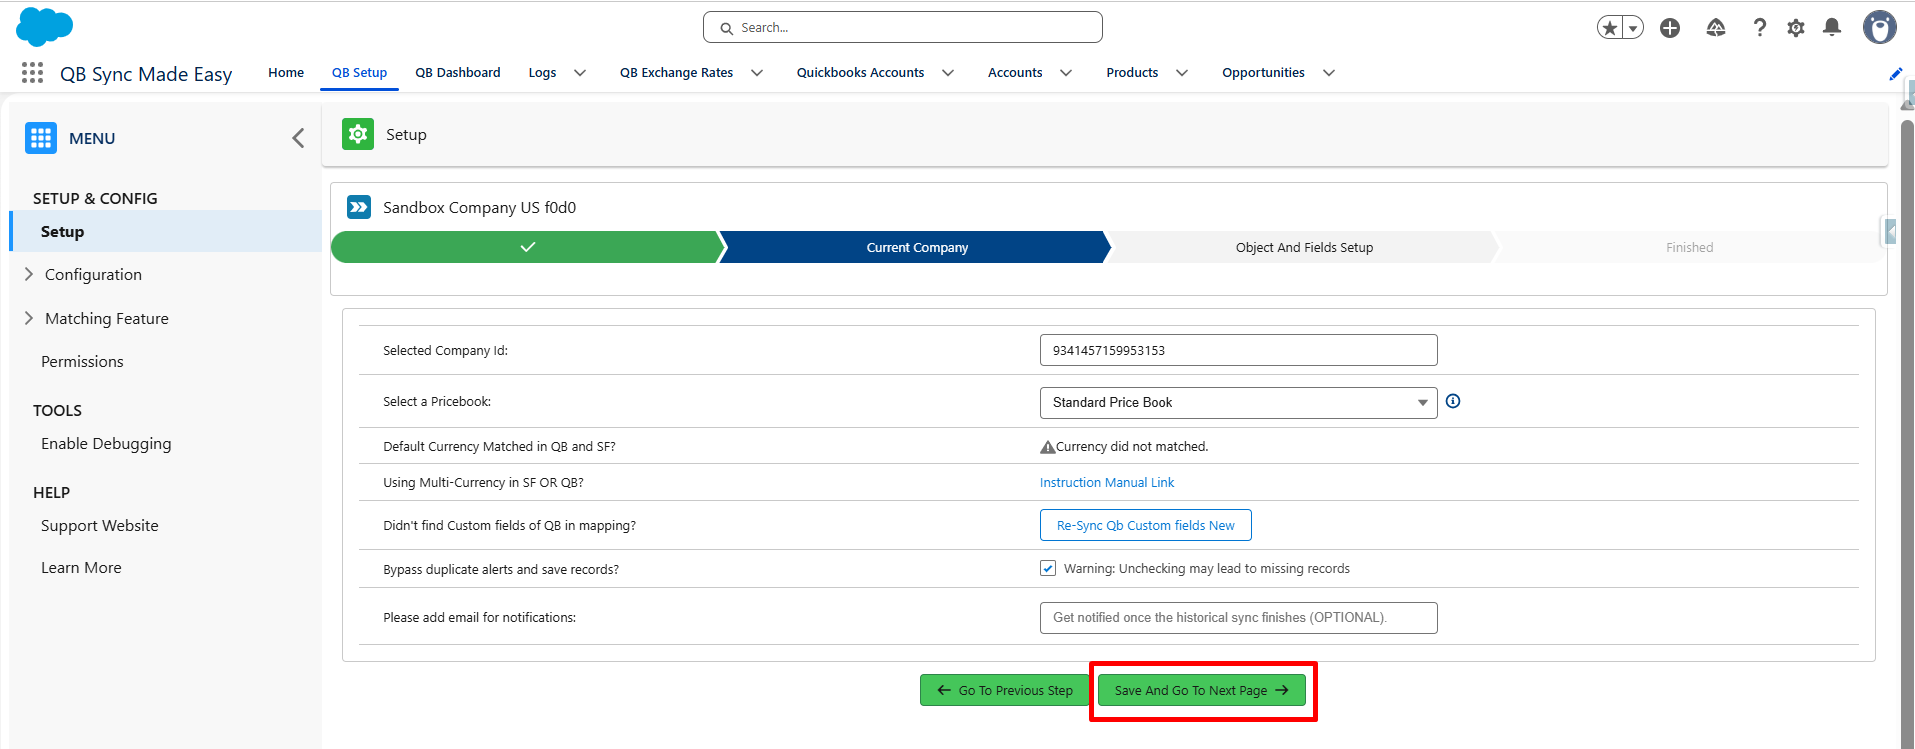
Step 3: Click Save and Go To Next Page button
Step 4: Verify QB Custom Fields in Field Mapping
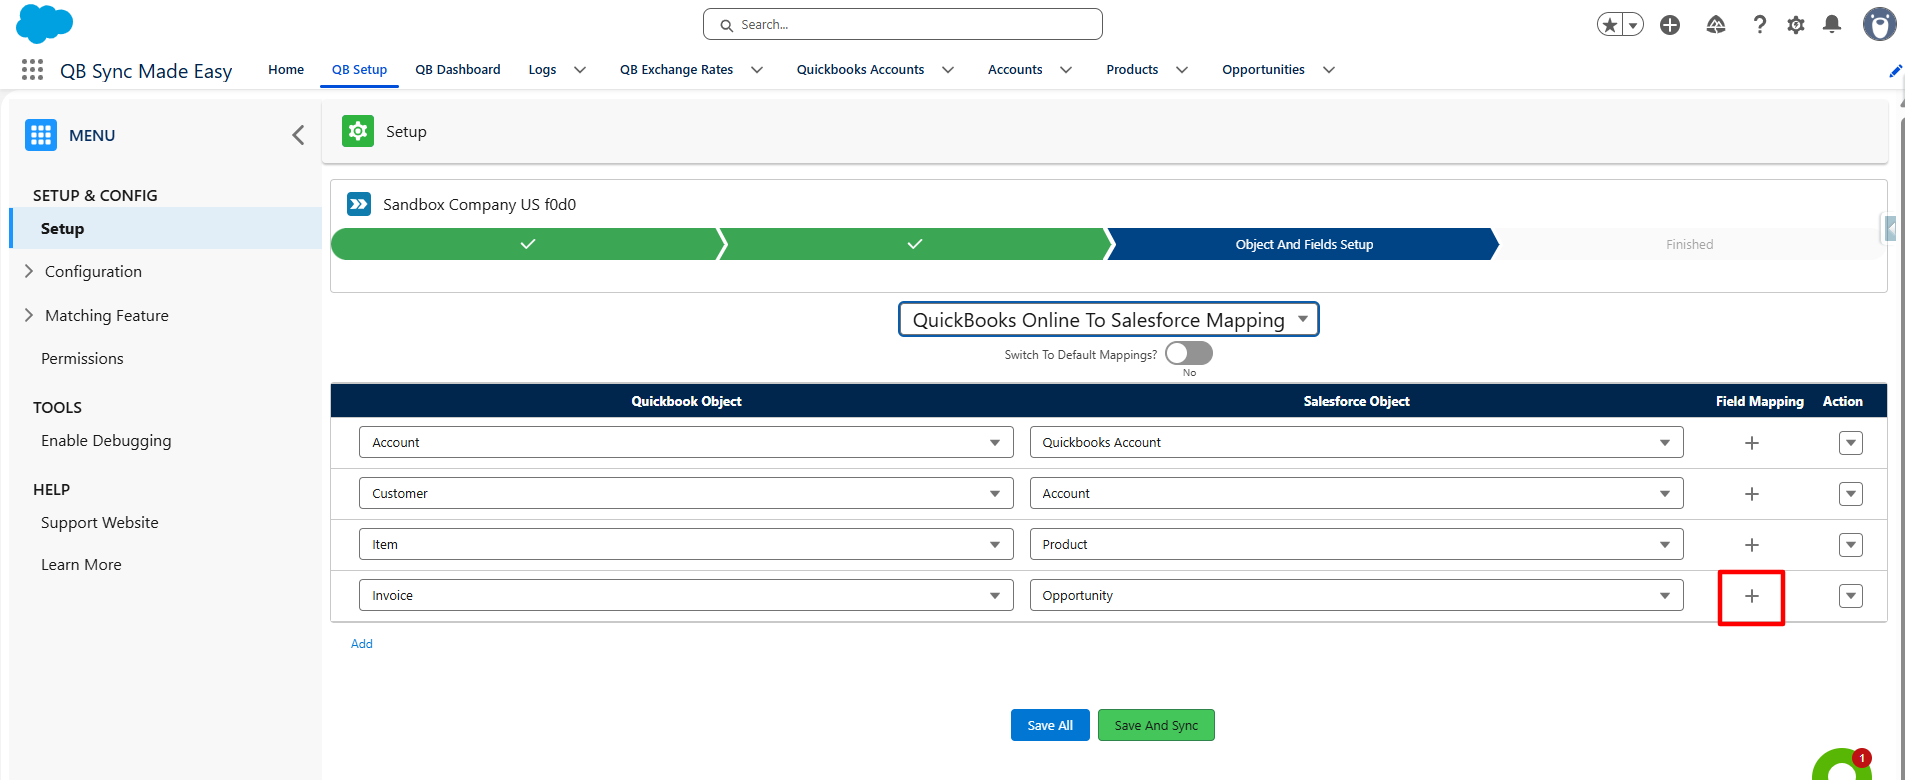
- Choose Mapping Direction from SF to QB or QB to SF
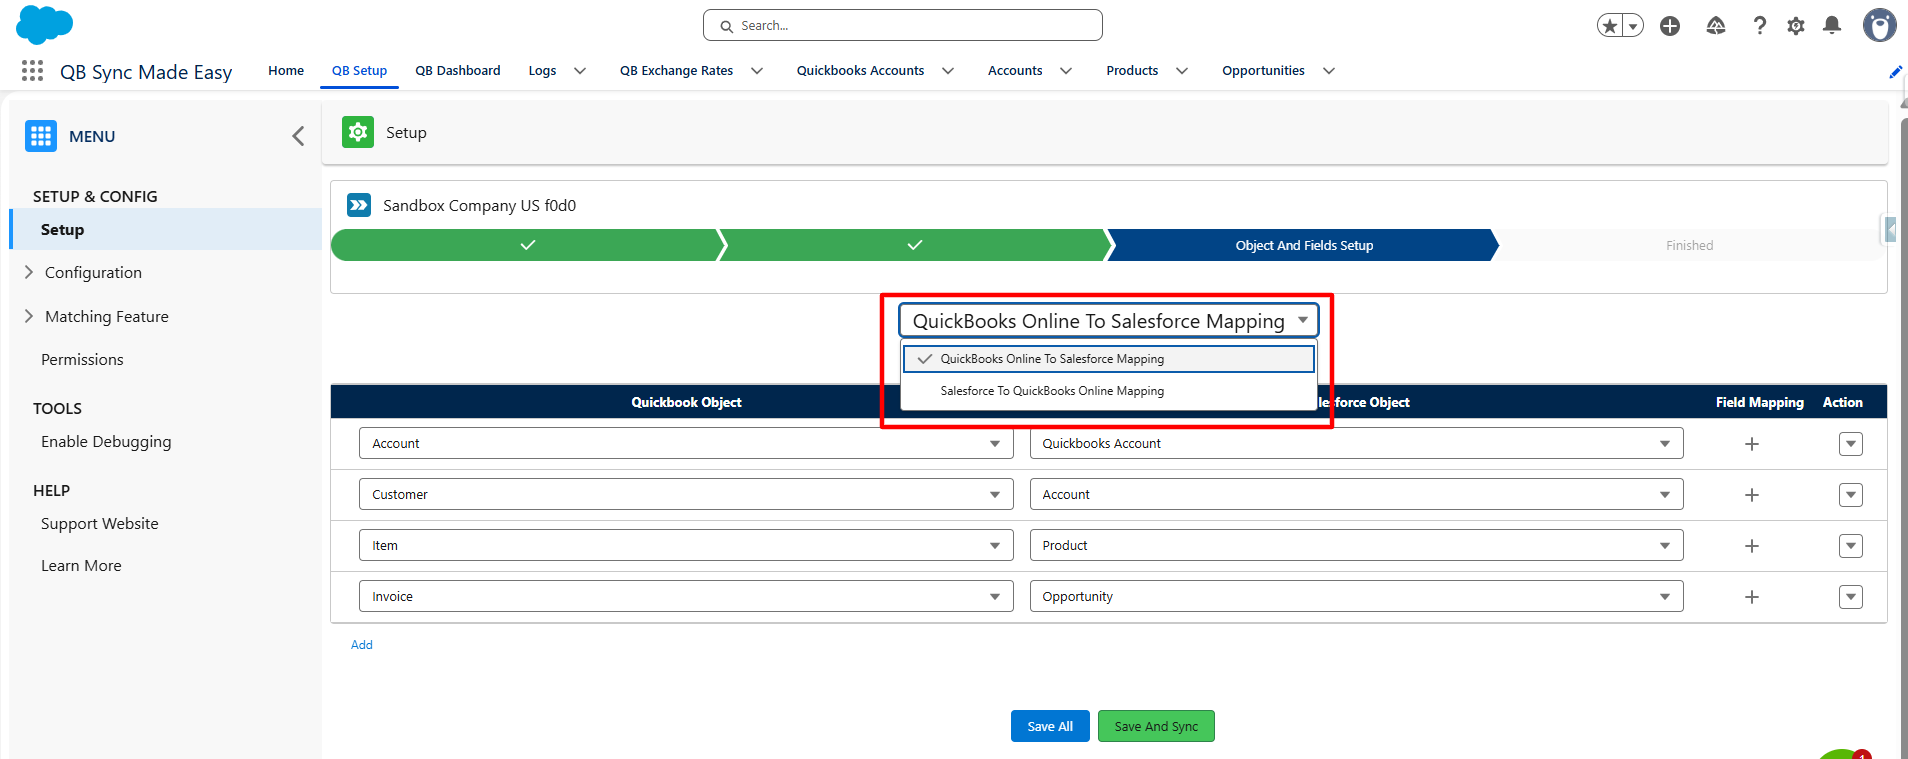
- Choose Object and click on ‘+’ icon
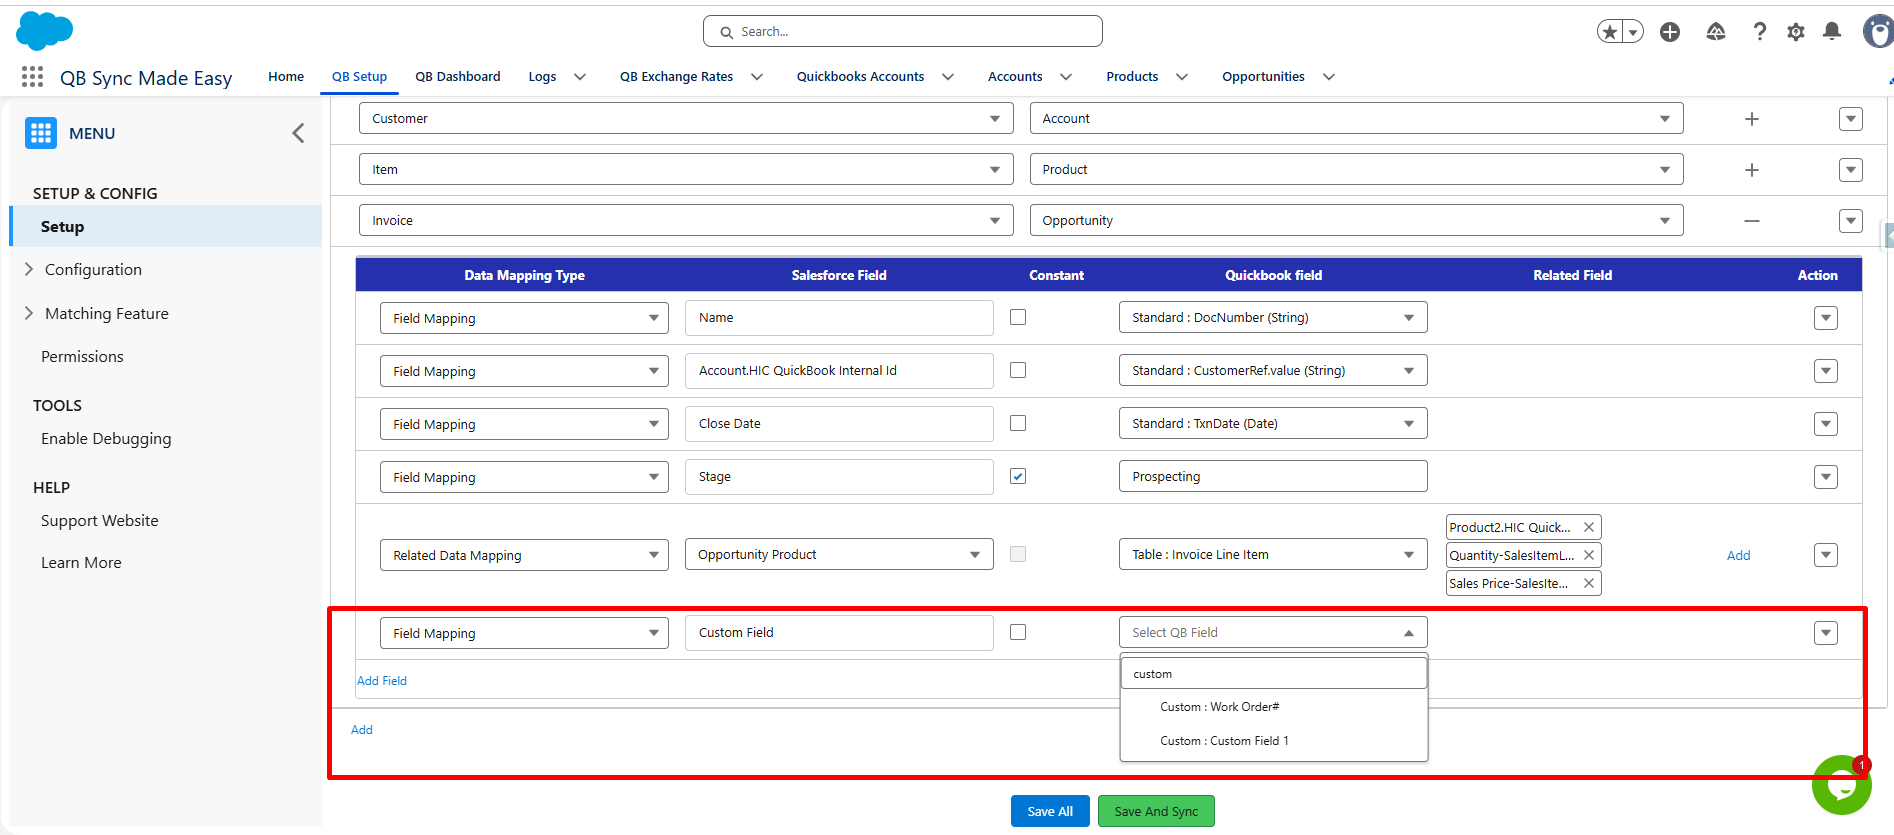
- Search custom field on field level mapping
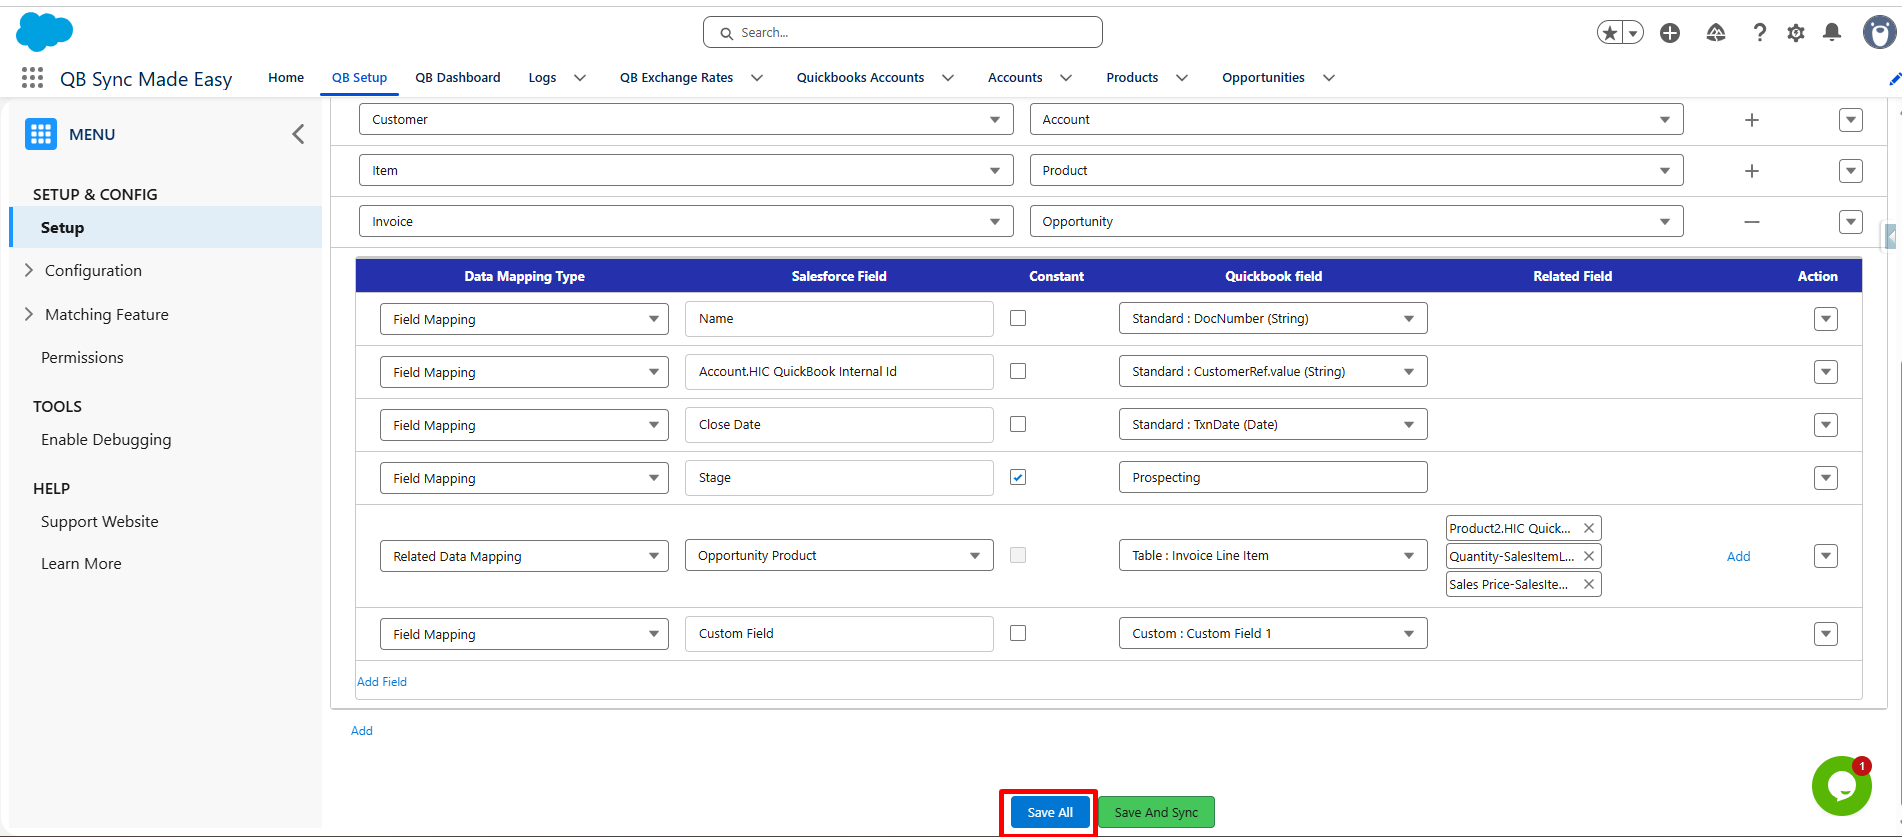
- Click Save All Button
Was this article helpful?
That’s Great!
Thank you for your feedback
Sorry! We couldn't be helpful
Thank you for your feedback
Feedback sent
We appreciate your effort and will try to fix the article