QB Sync Made Easy simplifies this process by synchronizing exchange rates from QuickBooks Online into Salesforce. With flexible storage options and automatic synchronization, businesses can manage current and historical exchange-rate information according to their requirements.
How to Configure Exchange Rate Synchronization
Follow these steps to get started.
Step 1: Open Exchange Rate Settings
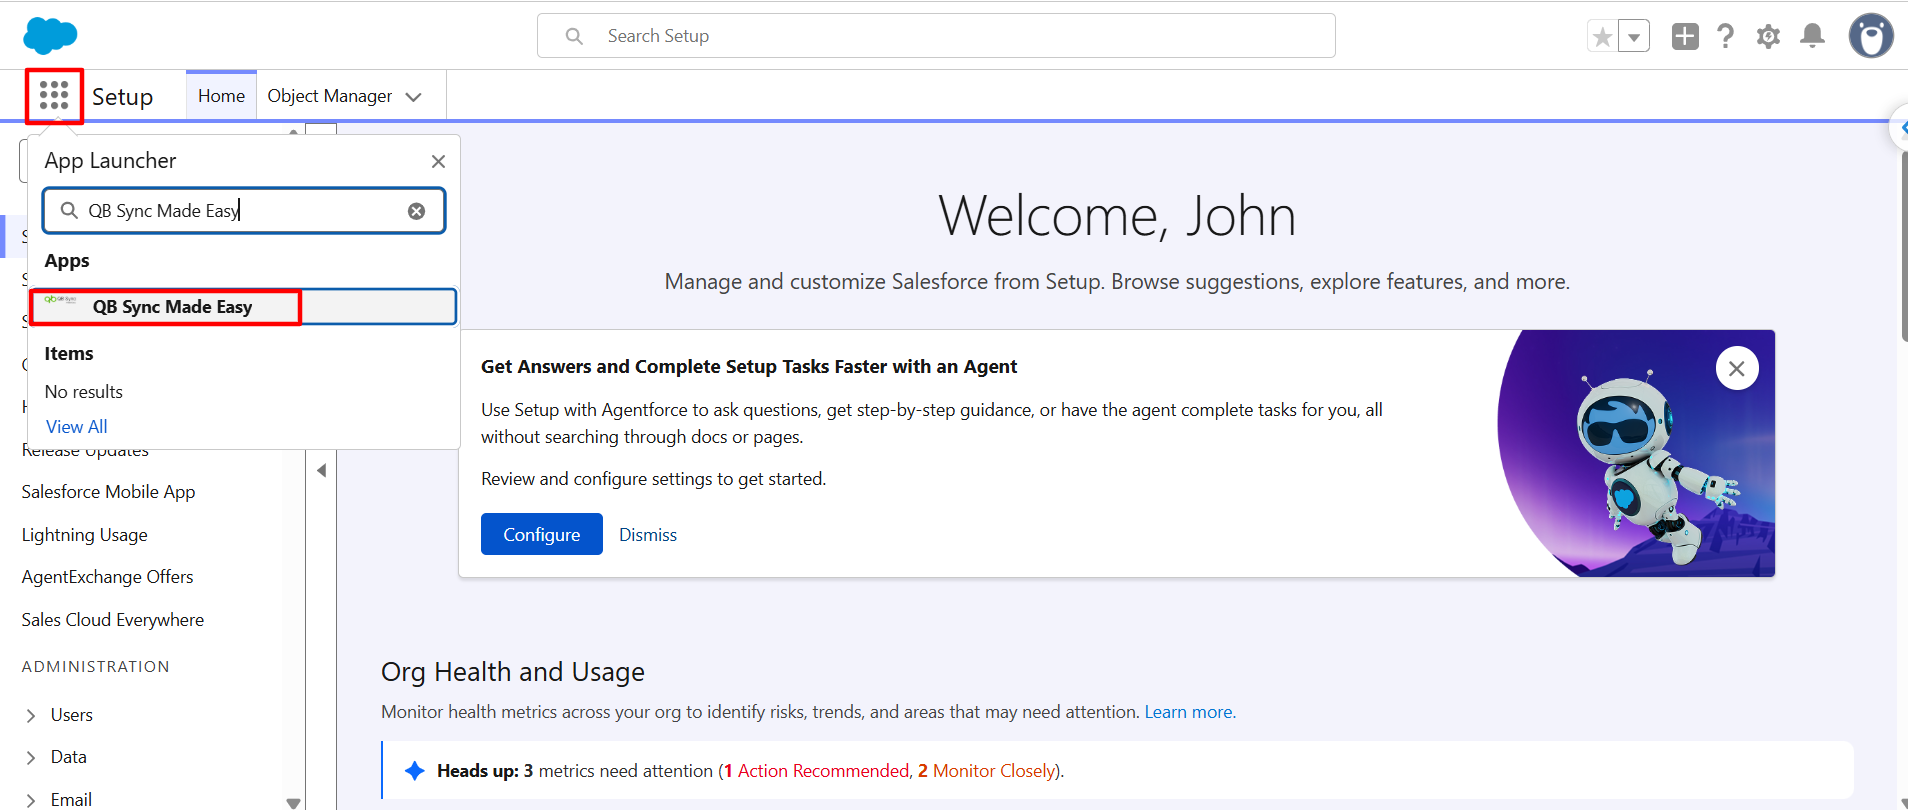
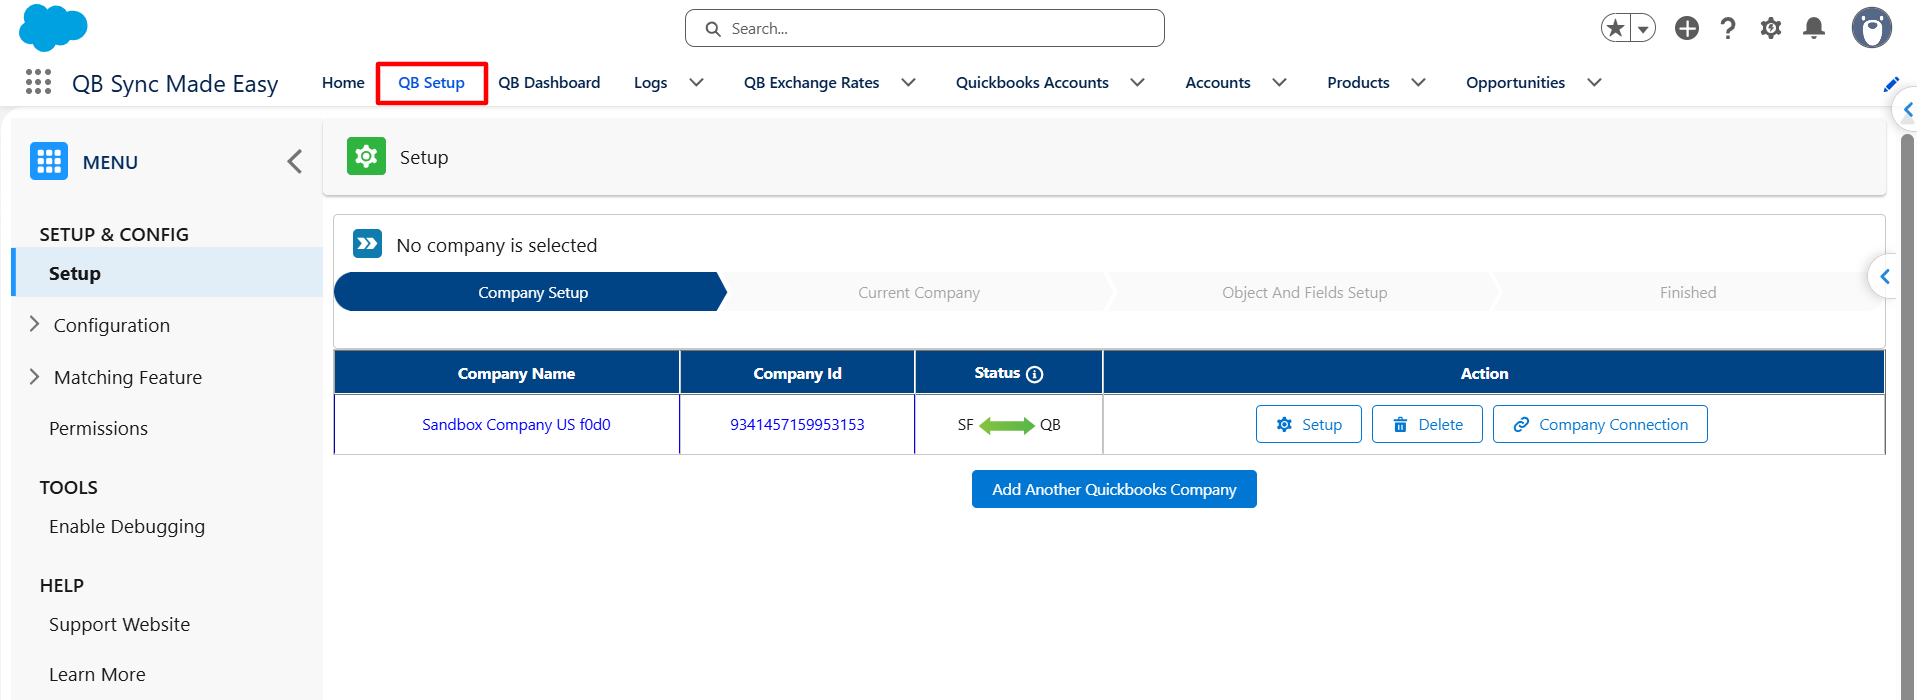
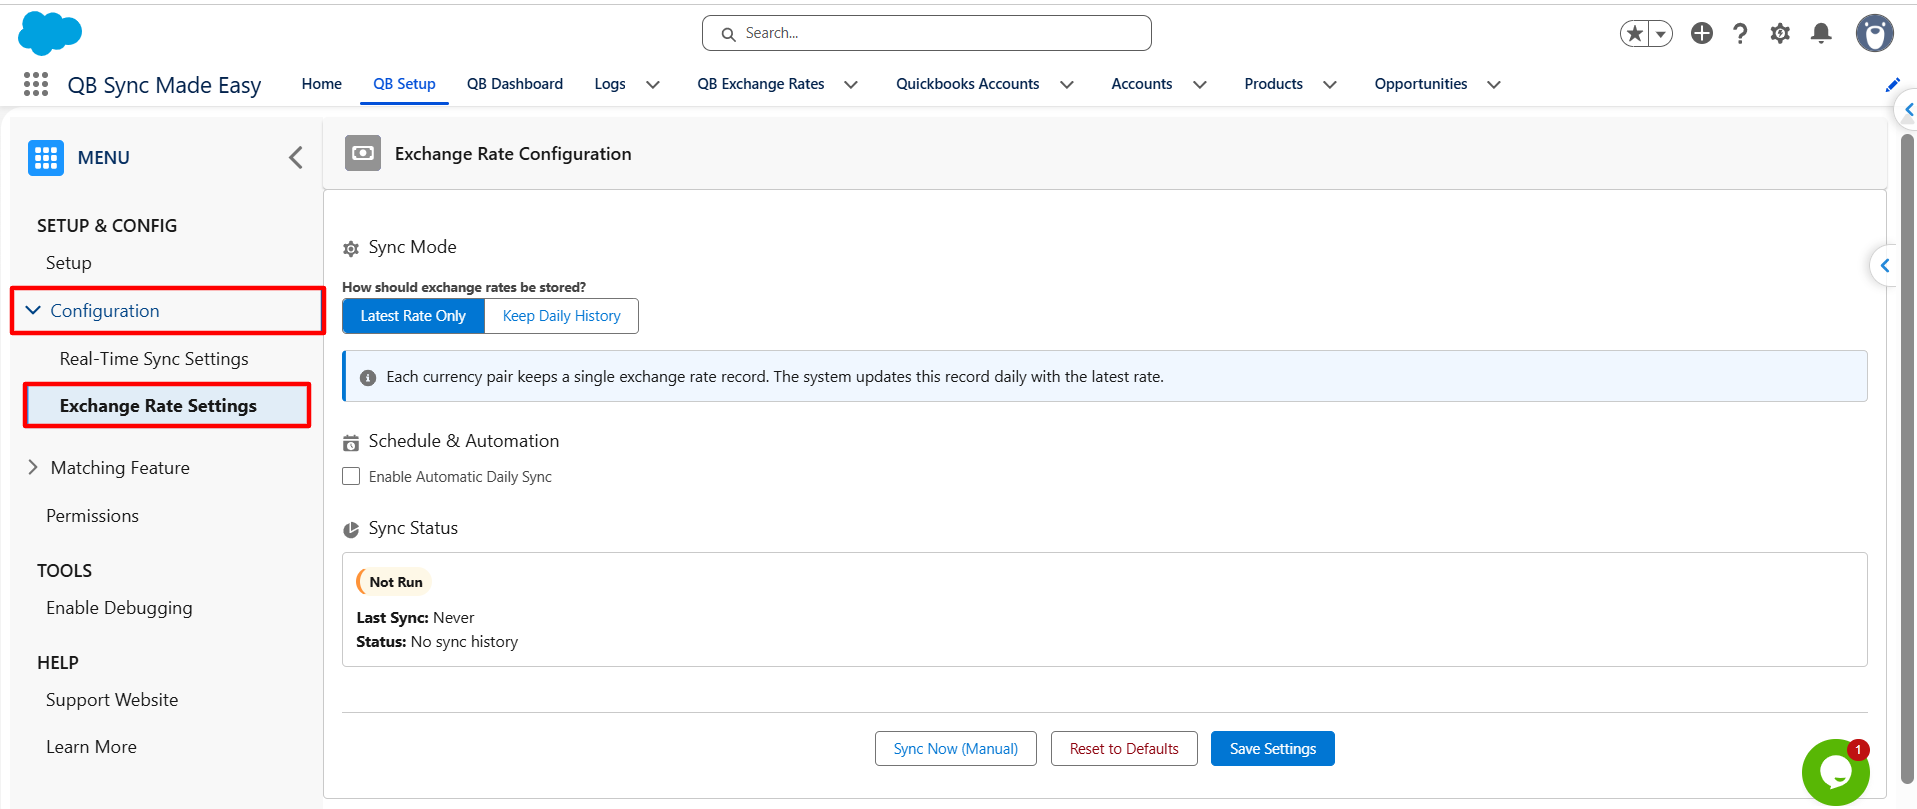
Log in to Salesforce, open the QB Sync Made Easy application, navigate to the QB Setup tab, and select Exchange Rate Settings.
Review the available configuration options.
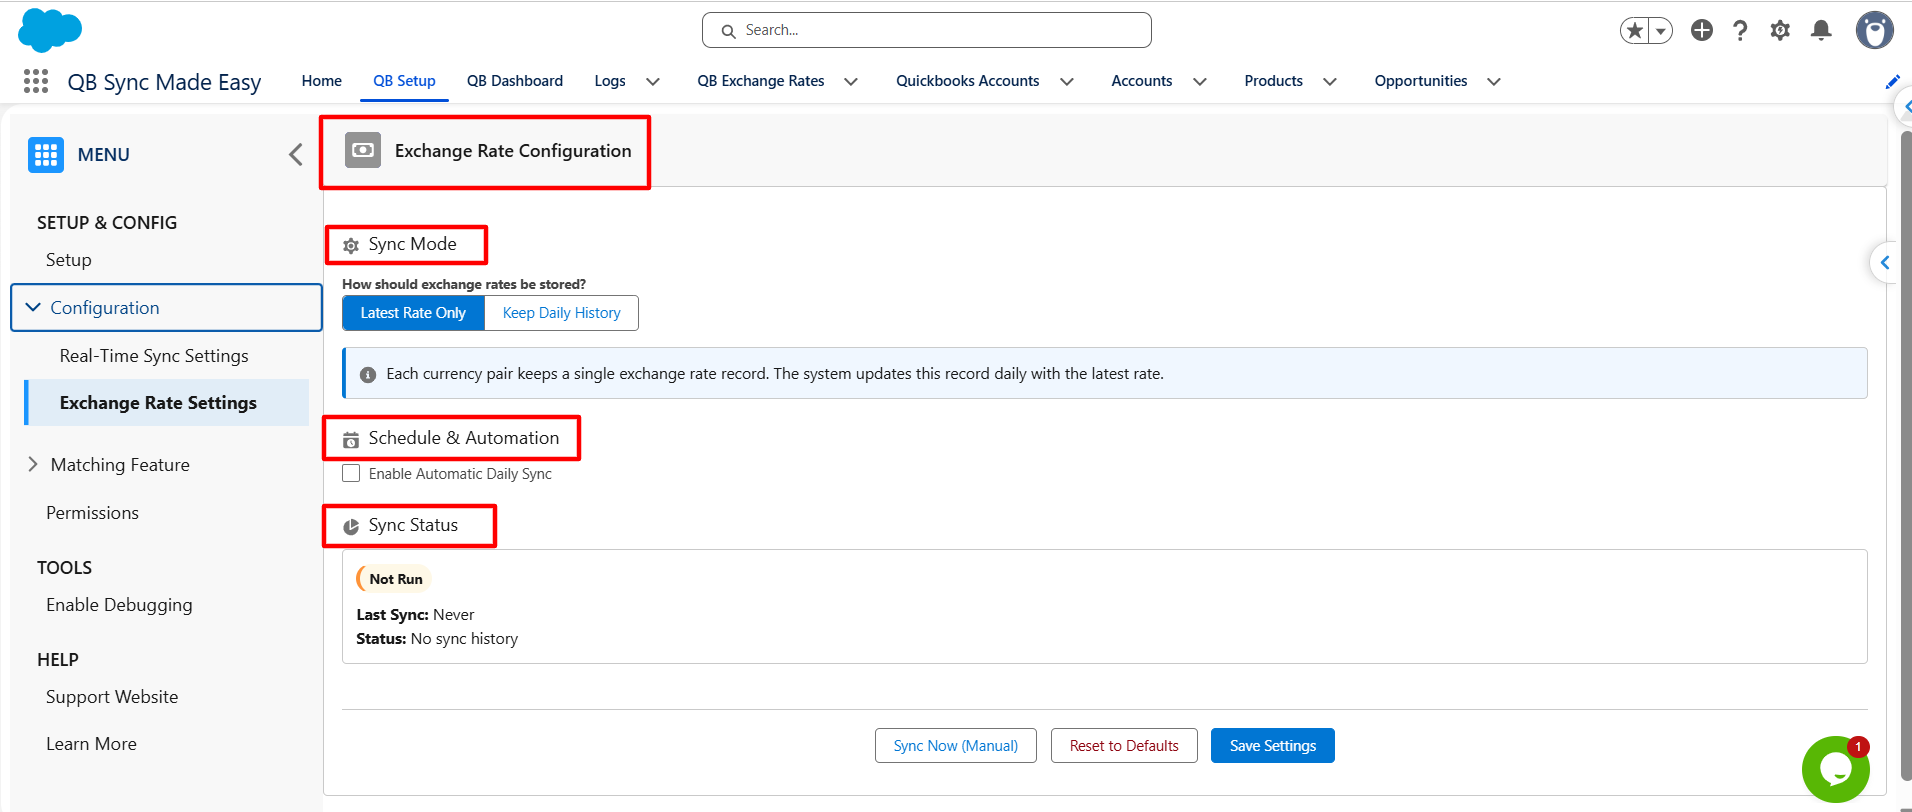
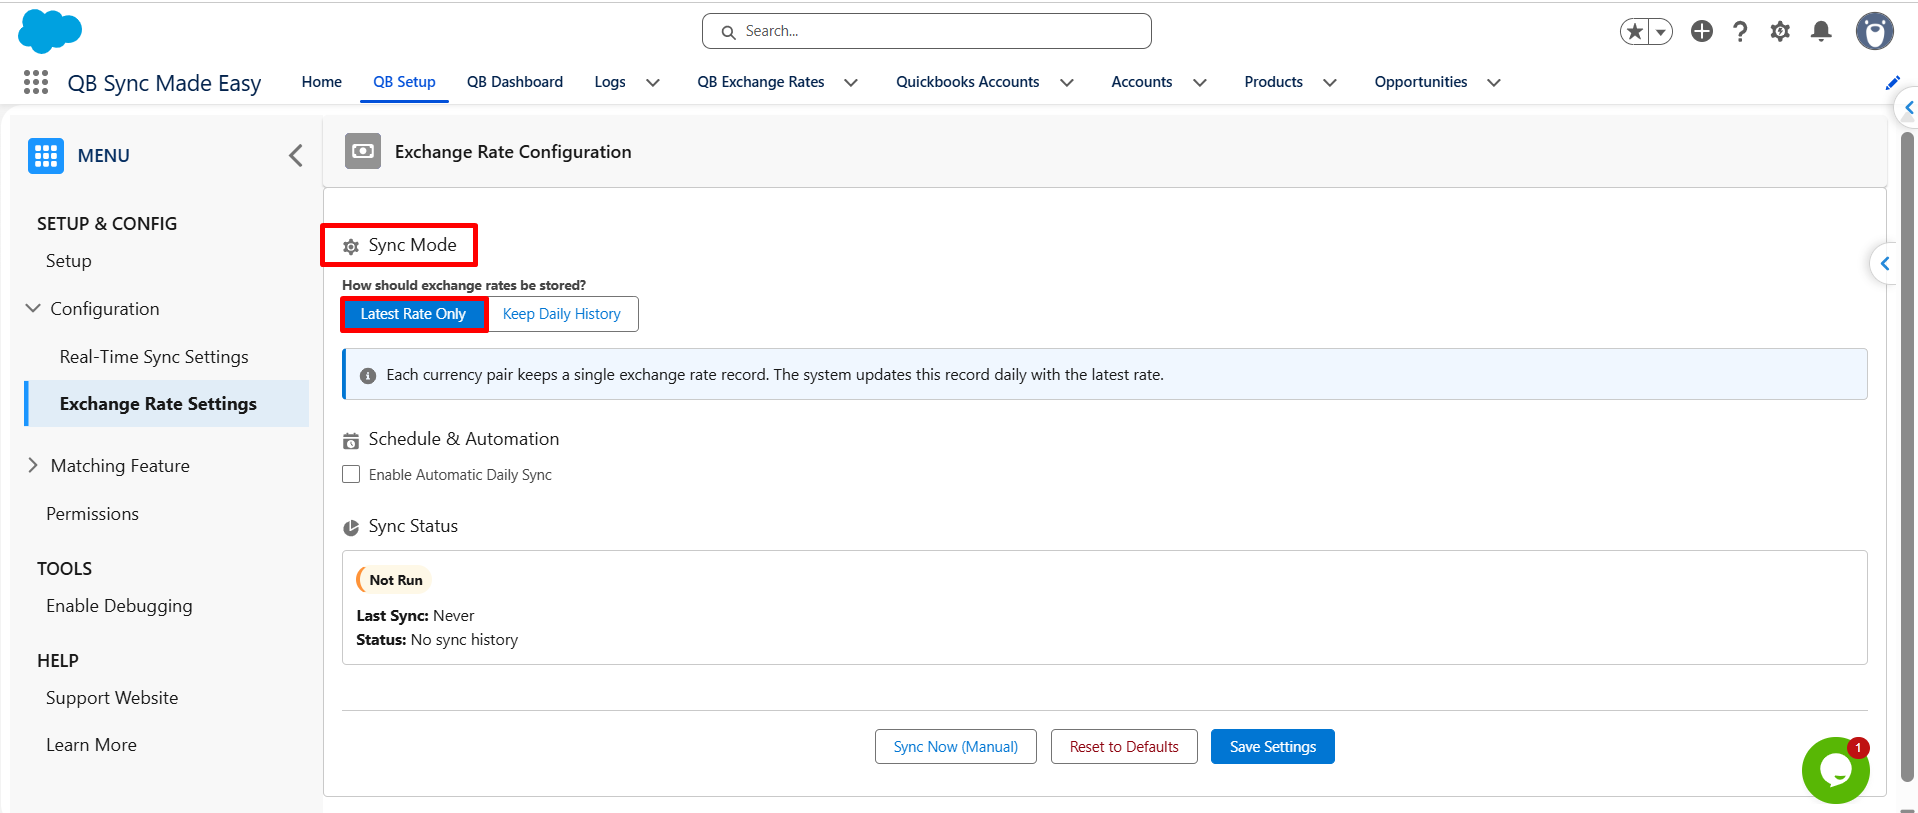
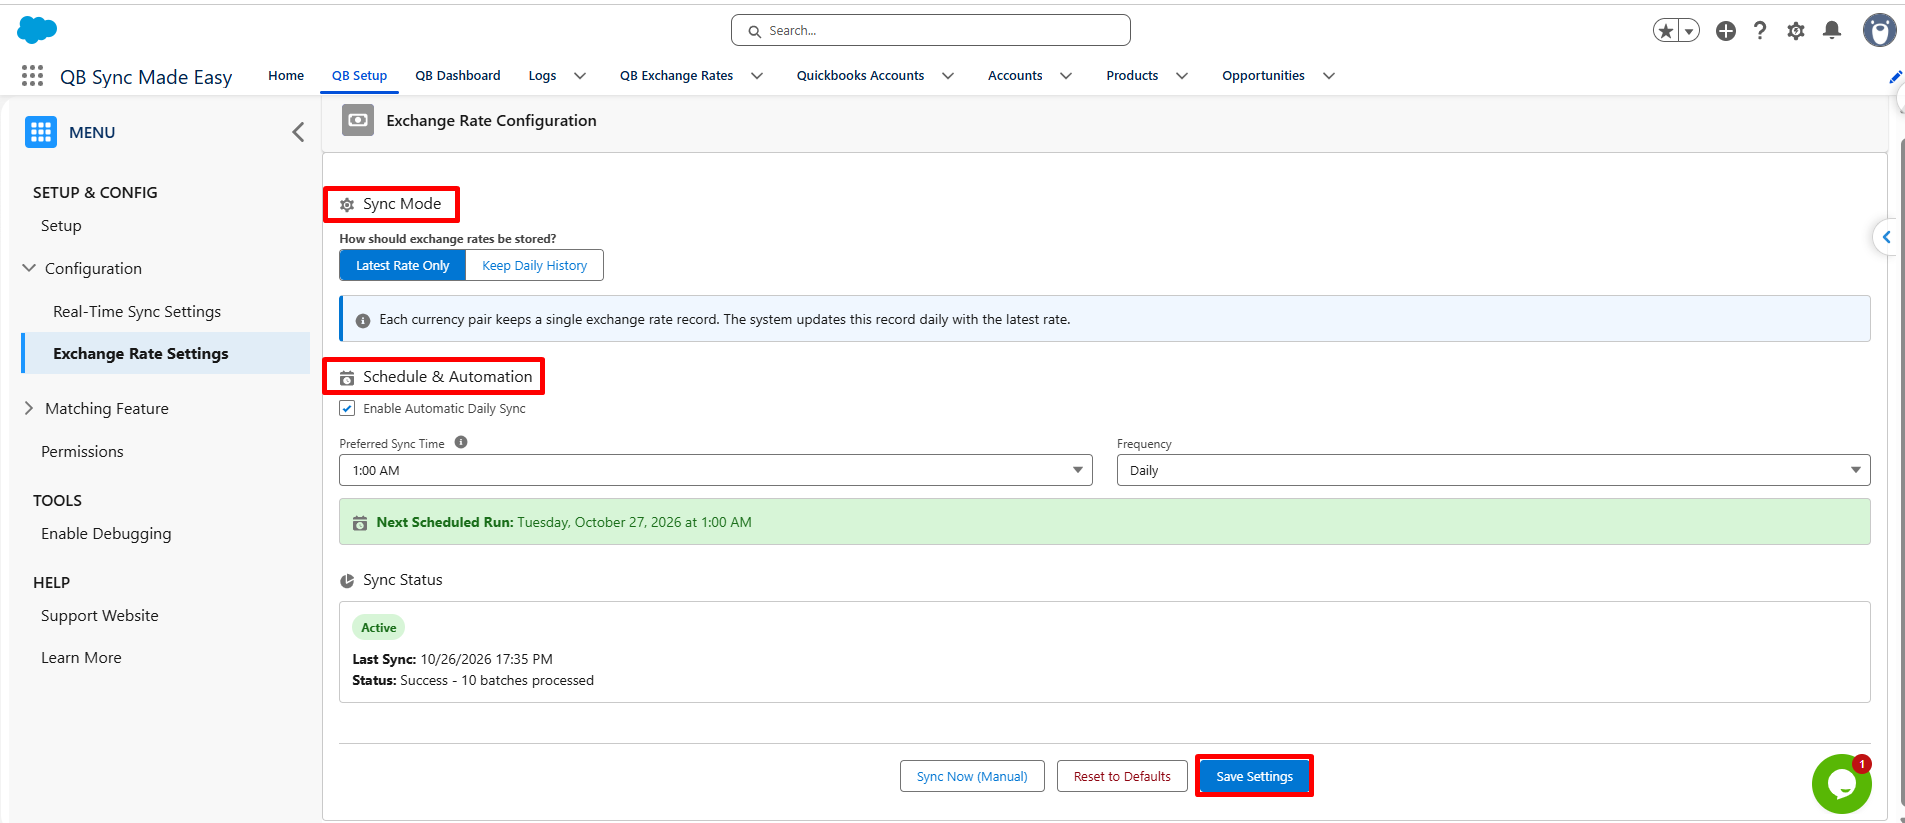
The Exchange Rate Configuration page contains three main sections:
- Sync Mode: Choose how exchange-rate records are stored.
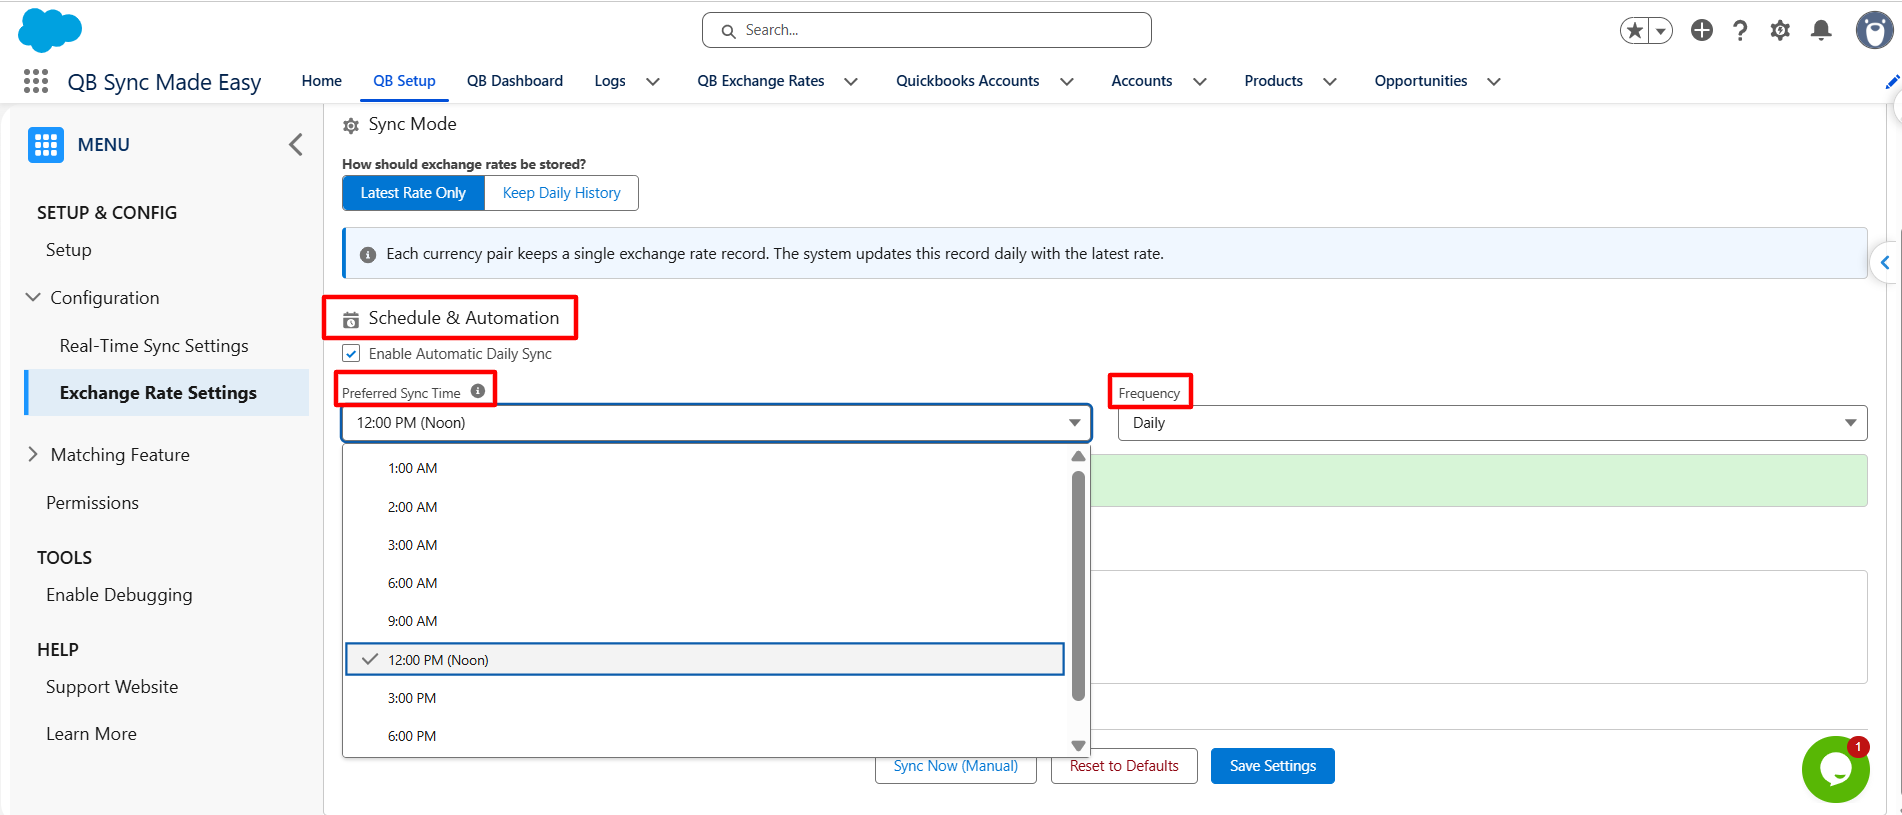
- Schedule & Automation: Configure automatic synchronization.
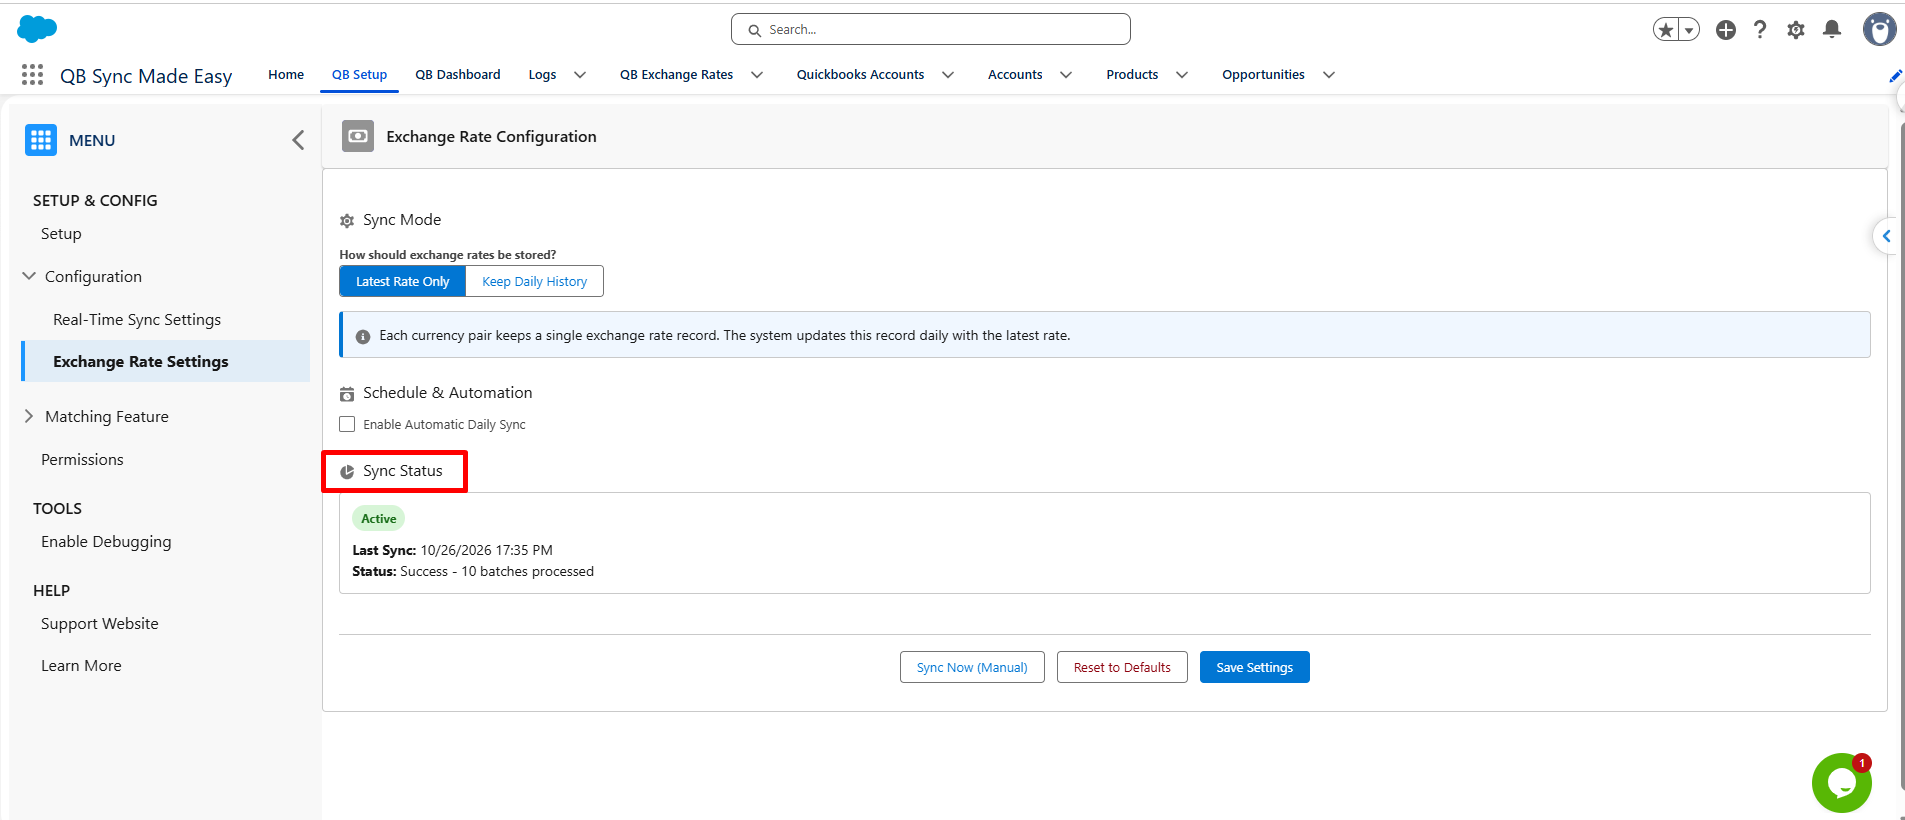
- Sync Status: Monitor the synchronization status and last sync information.
Step 2: Select the Sync Mode
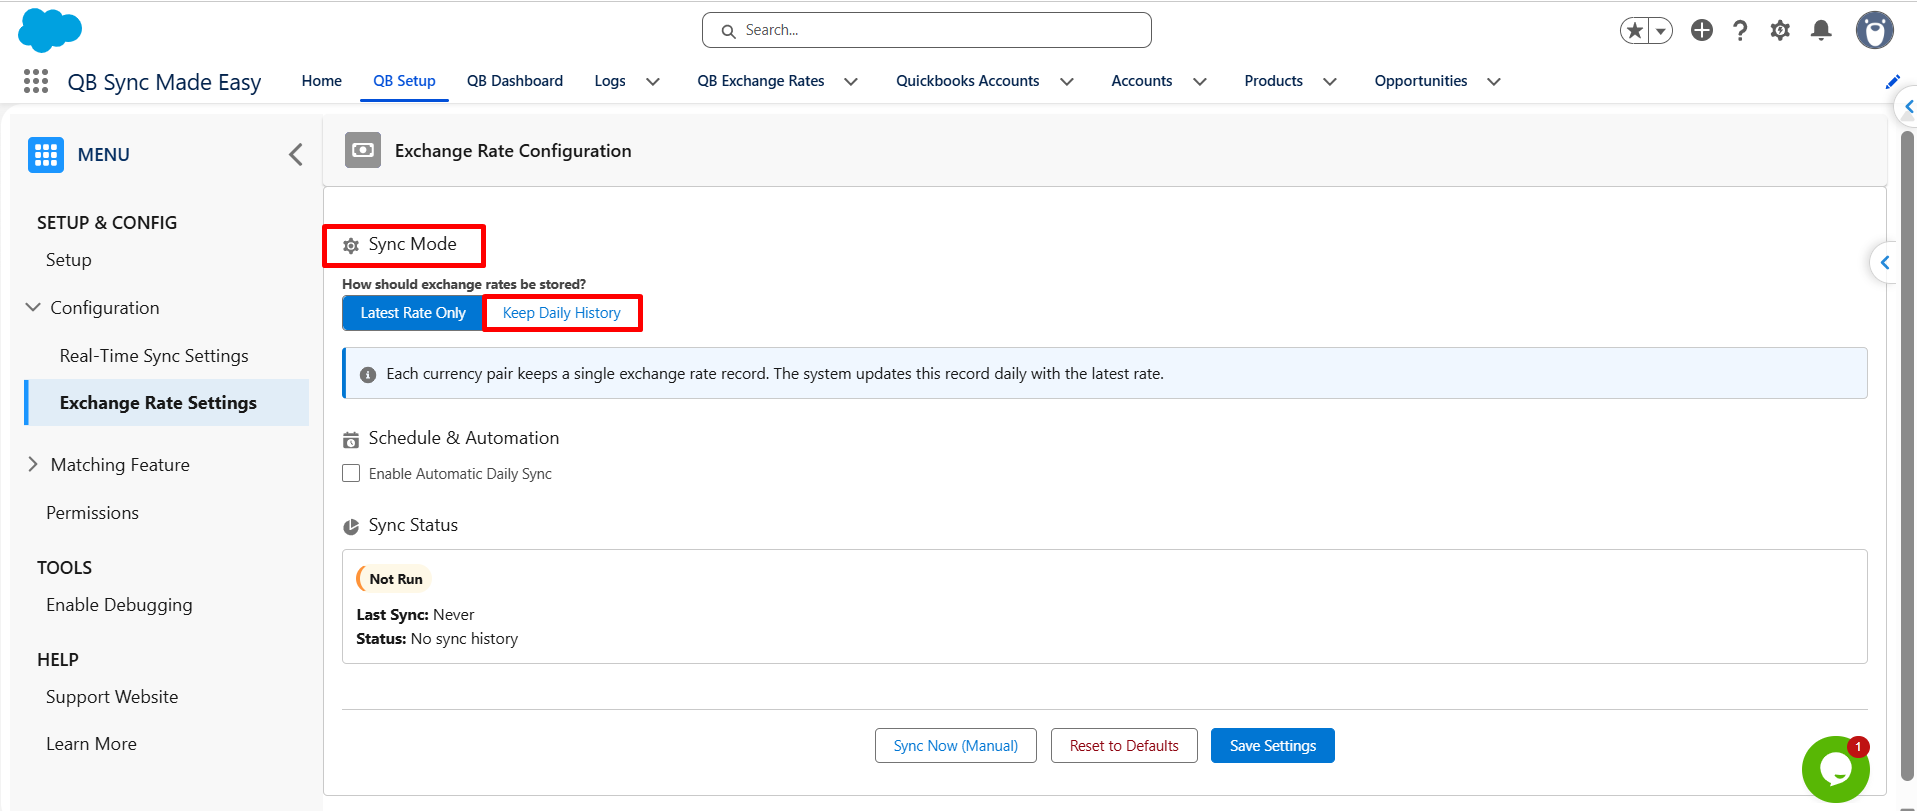
Under the Sync Mode section, choose the option that matches your business requirements.
- Select Latest Rate Only to maintain the latest rate for each currency pair.
- Select Keep Daily History to maintain daily exchange-rate records.
Step 3: Configure Automatic Synchronization
Under Schedule & Automation:
- Select Enable Automatic Daily Sync.
- Choose your preferred synchronization time from the available options.
- Review the scheduling information, if displayed.
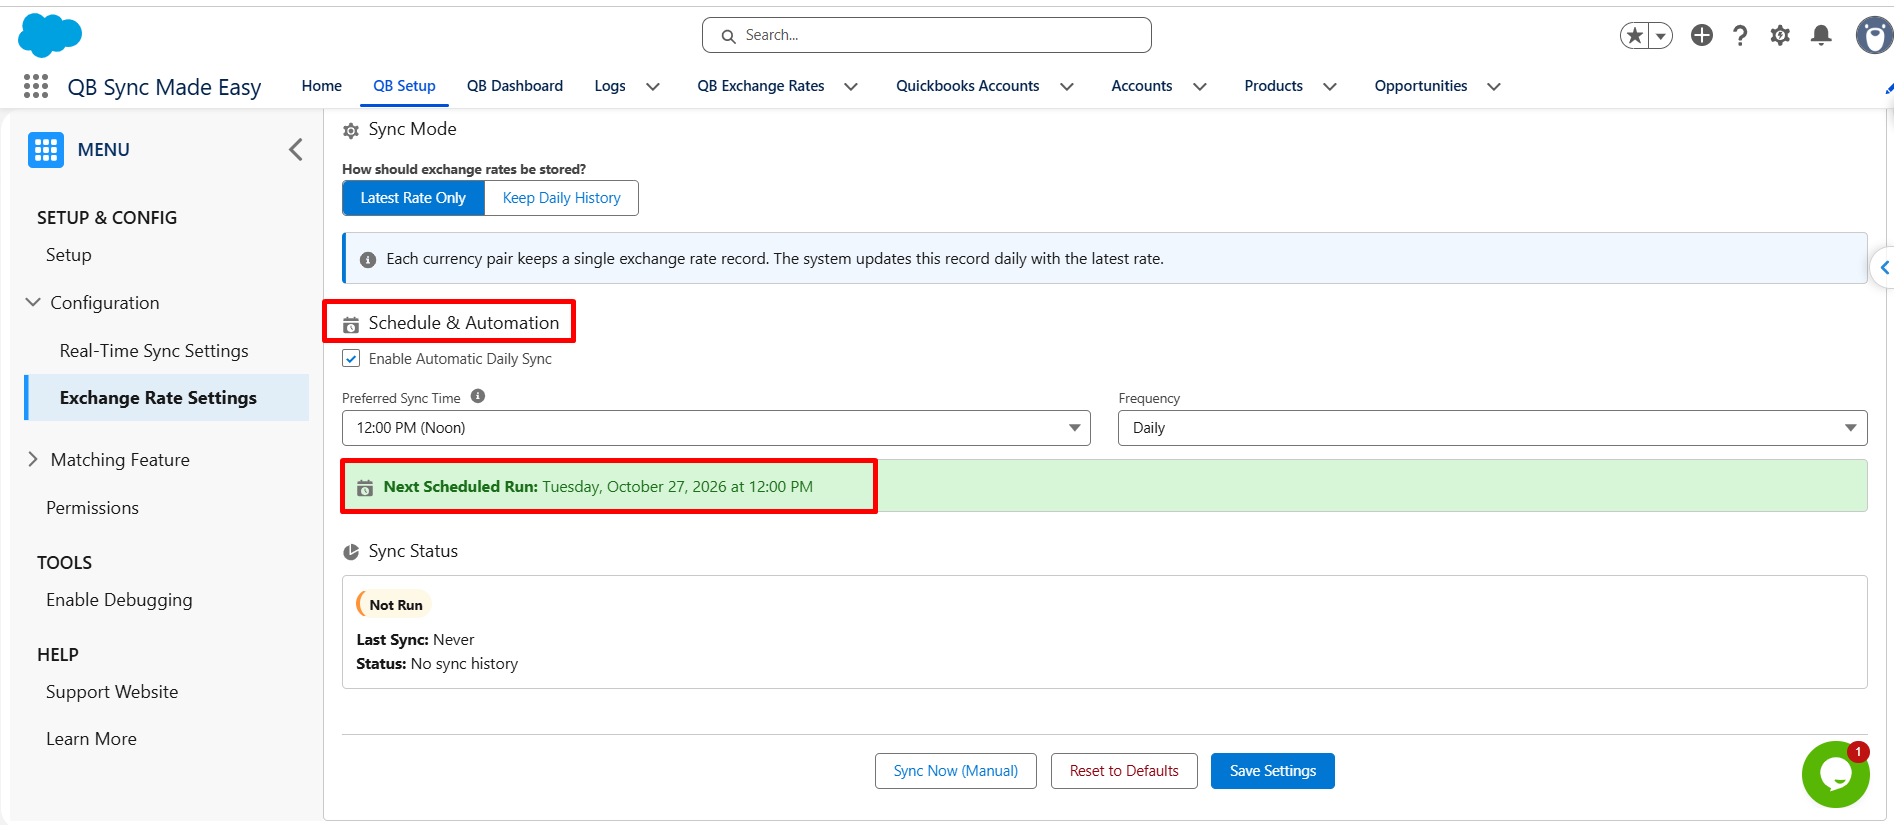
The system will run according to the saved schedule and update exchange-rate records based on the selected Sync Mode.
Step 4: Run a Manual Sync
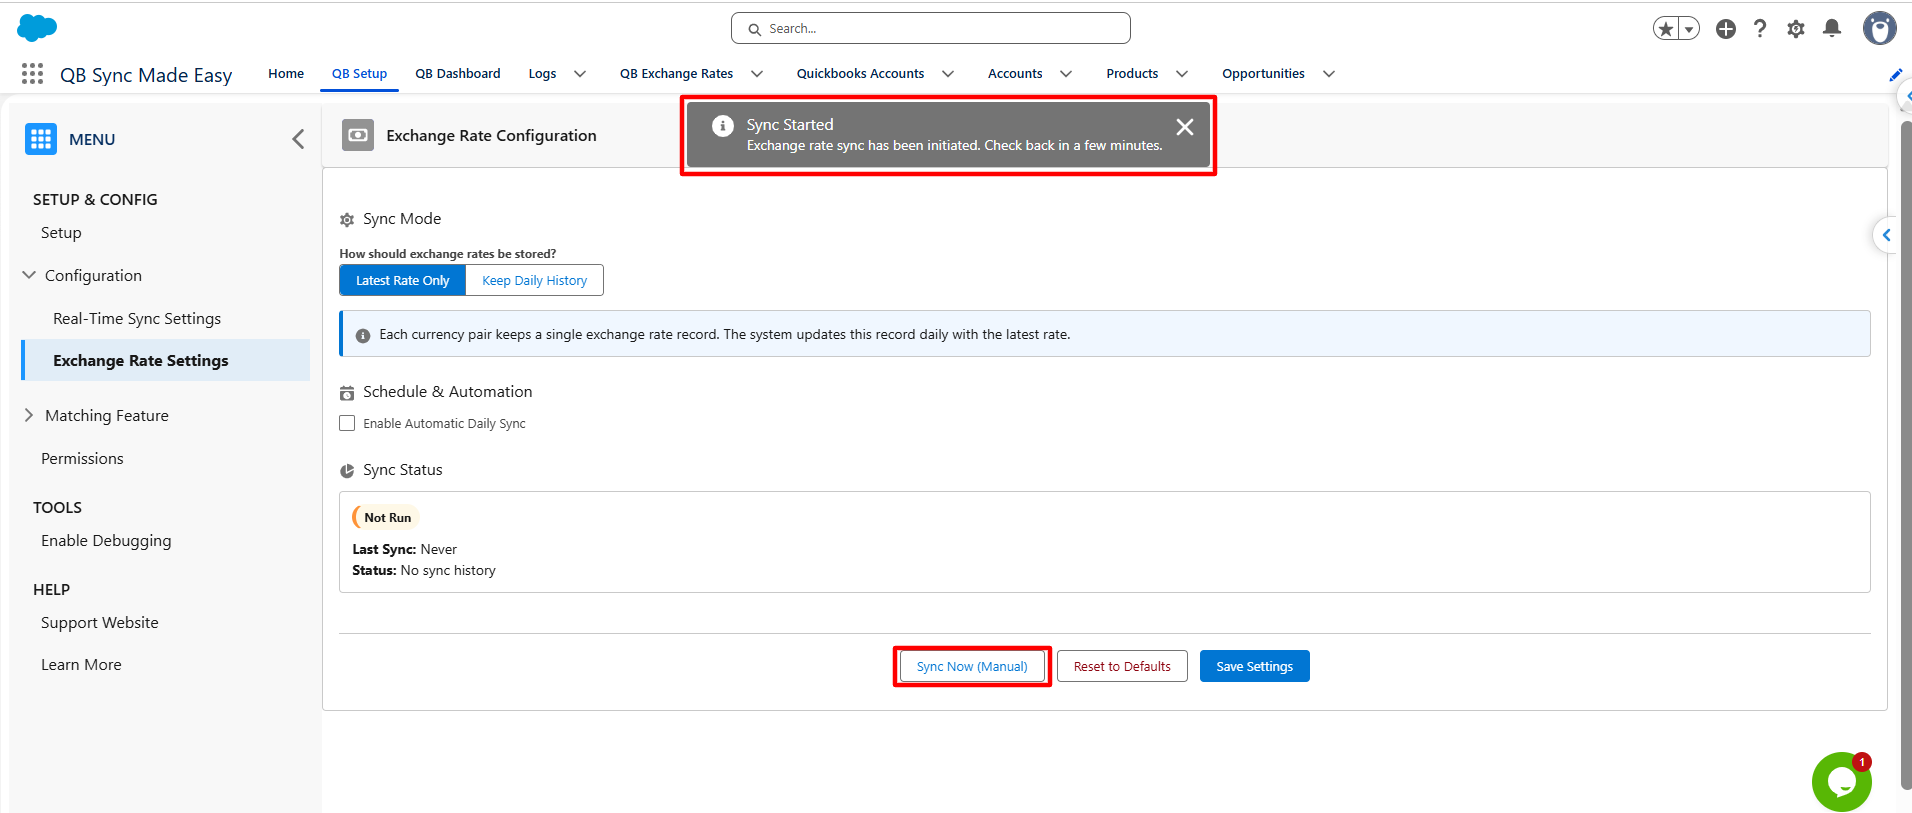
To retrieve exchange rates immediately, click Sync Now (Manual) on the Exchange Rate Configuration page.
This is useful during initial setup or whenever you need to initiate synchronization without waiting for the next scheduled run.
Step 5: Save Your Settings
Click Save Settings to save your selected Sync Mode and scheduling configuration.
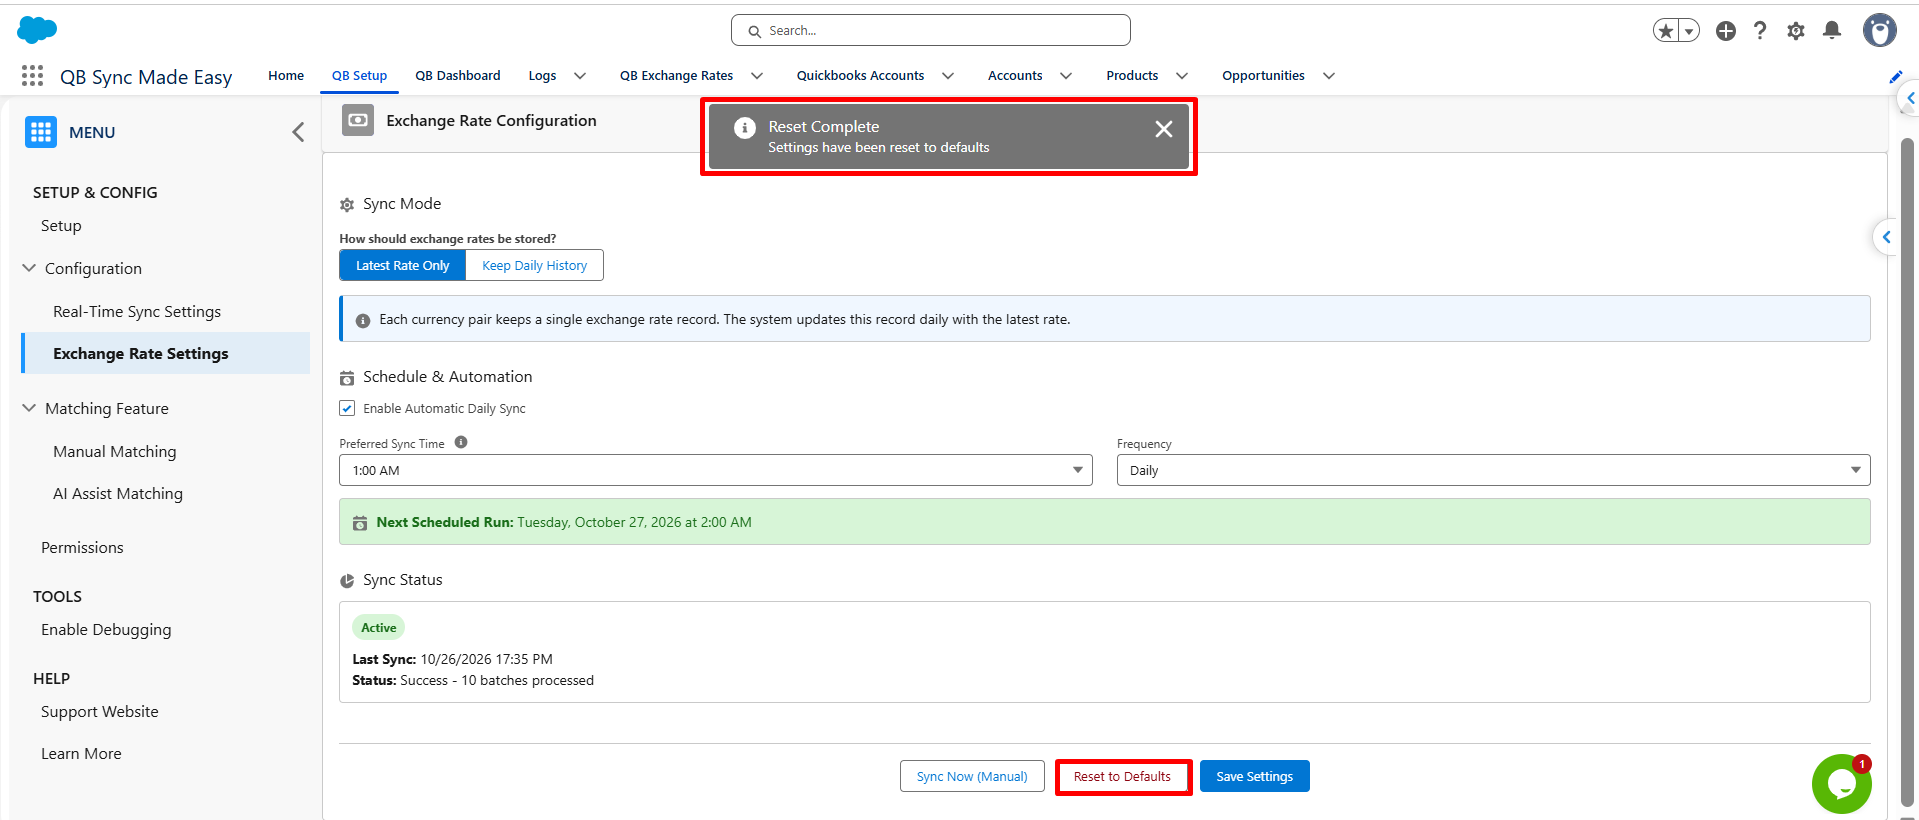
The page also provides a Reset to Defaults option to restore the default configuration.
Step 6: Check the Sync Status
Review the Sync Status section to check the last synchronization time and the displayed status.
Depending on the synchronization activity, the status may indicate Pending, Successful, or Failed. If a sync fails, review the available status information to investigate the issue.
Step 7: Verify Exchange Rate Records
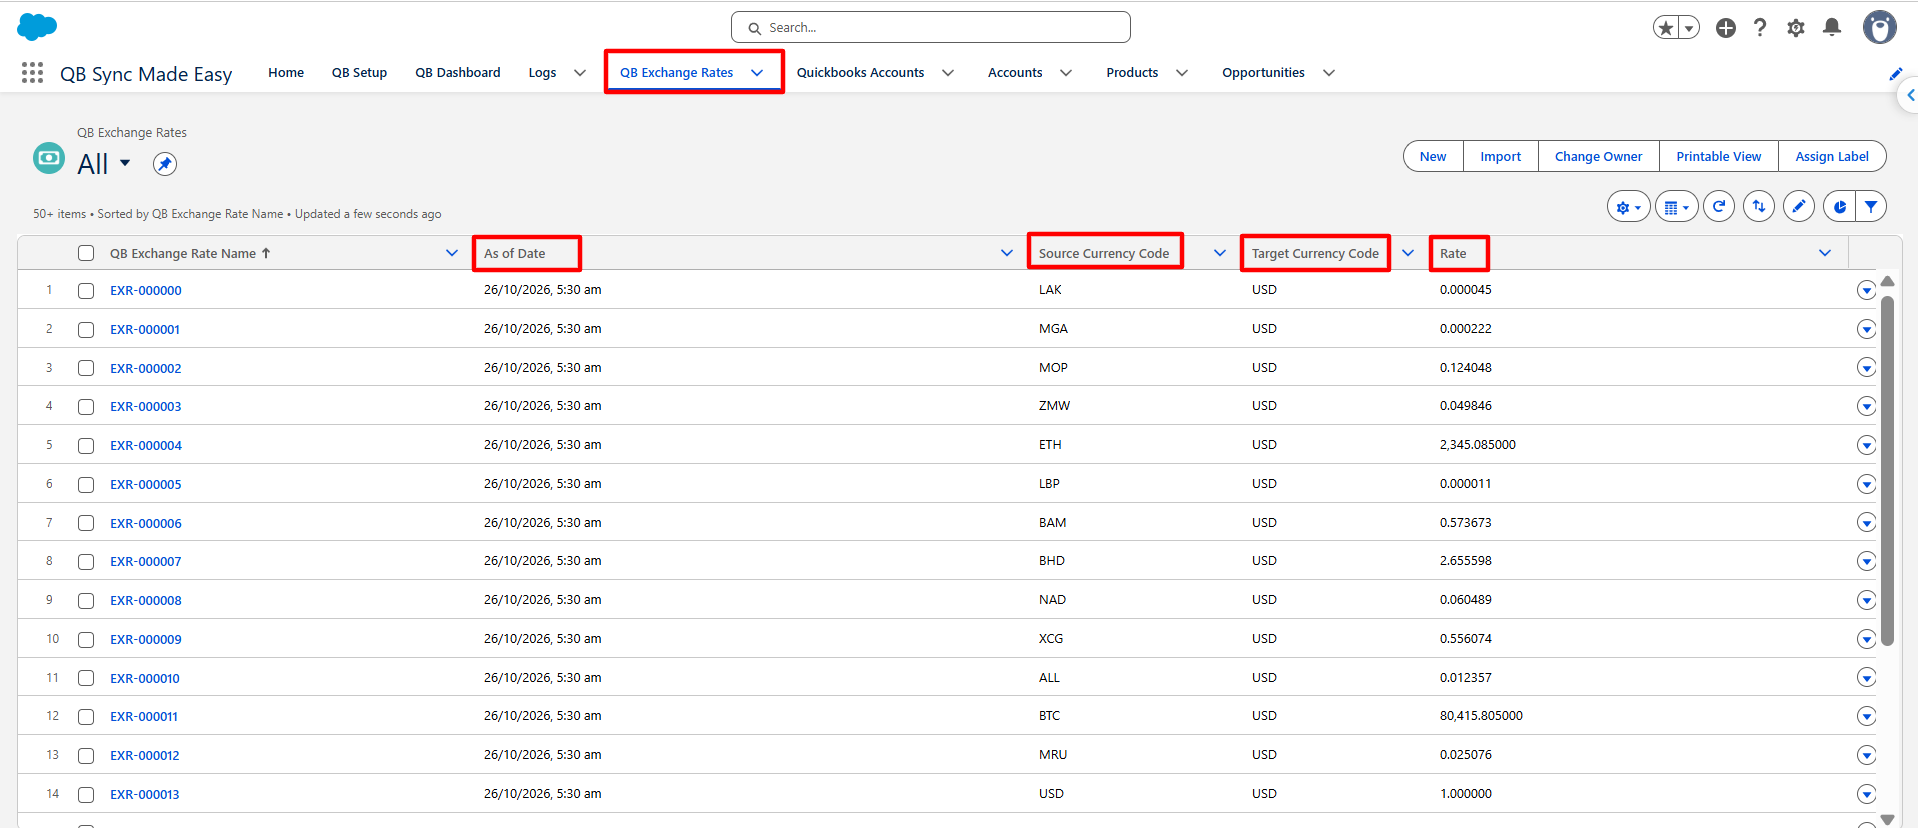
Open the QB Exchange Rates tab in the QB Sync Made Easy application.
Verify the available records, including the currency pair, As of Date, and exchange-rate value. Confirm that the records reflect the selected storage mode.
Was this article helpful?
That’s Great!
Thank you for your feedback
Sorry! We couldn't be helpful
Thank you for your feedback
Feedback sent
We appreciate your effort and will try to fix the article