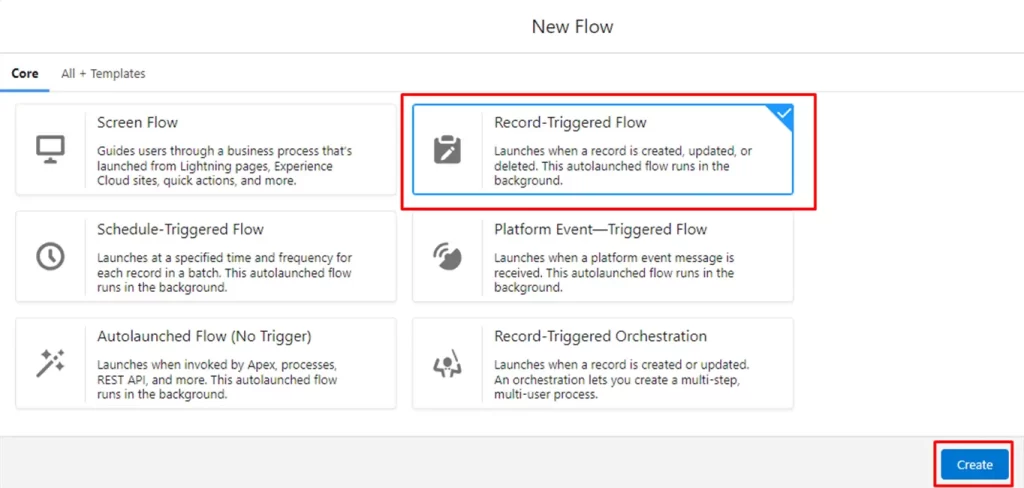
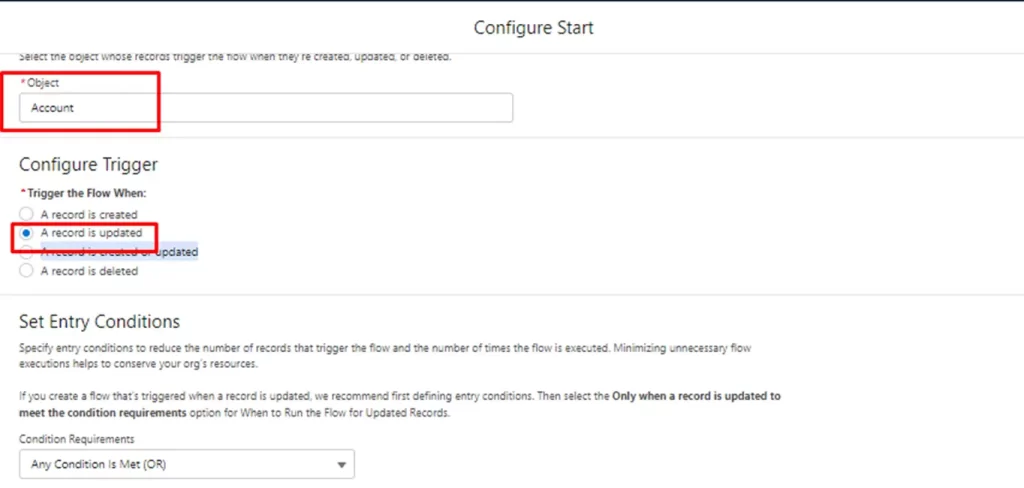
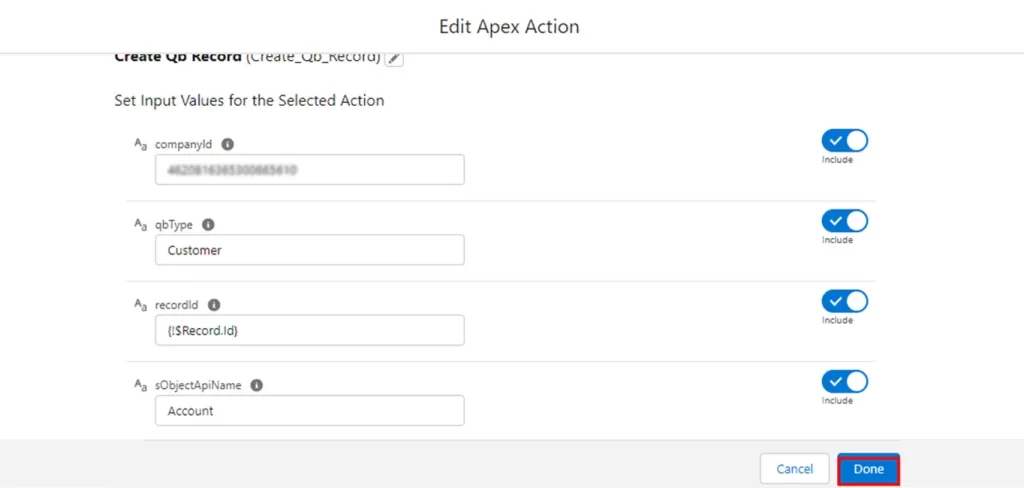
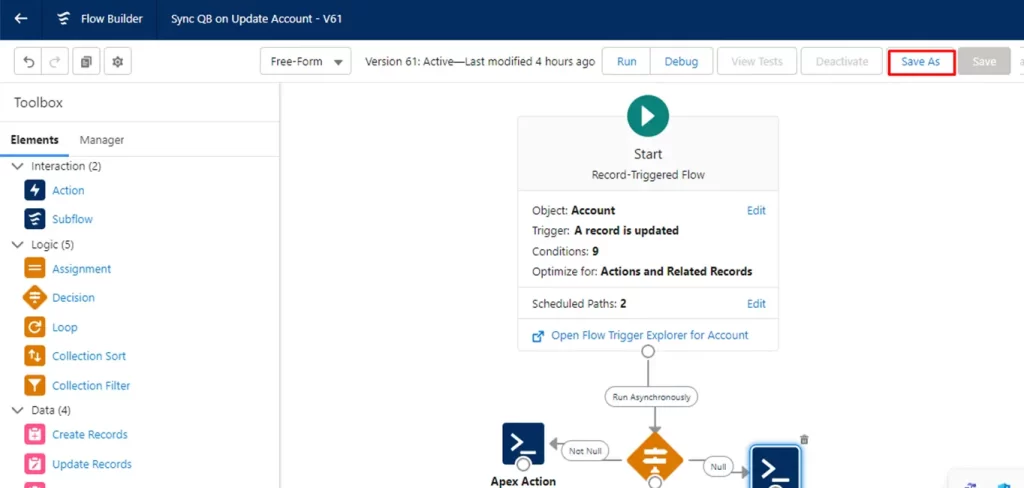
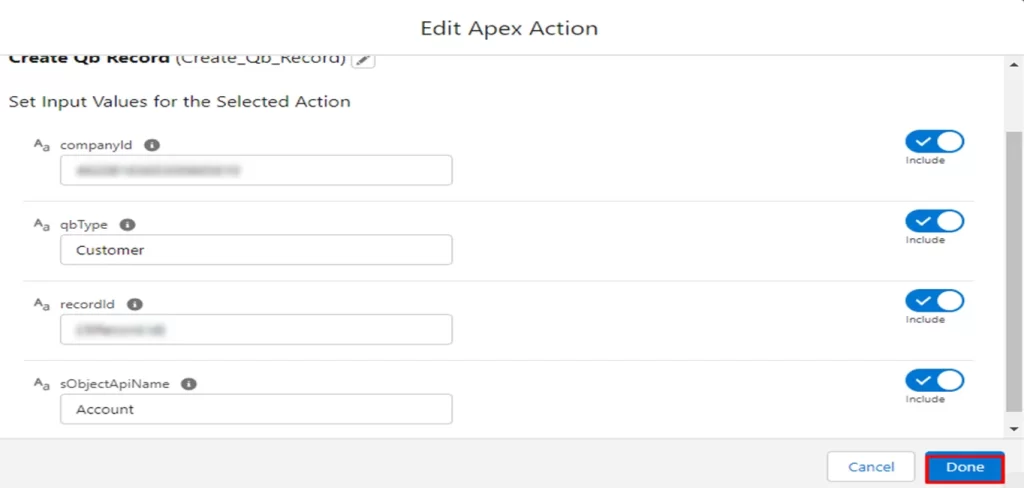
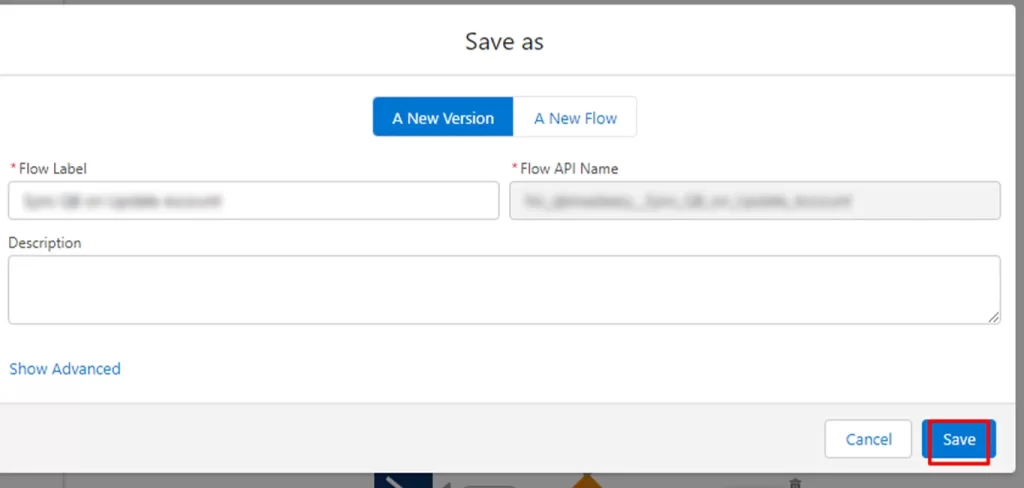
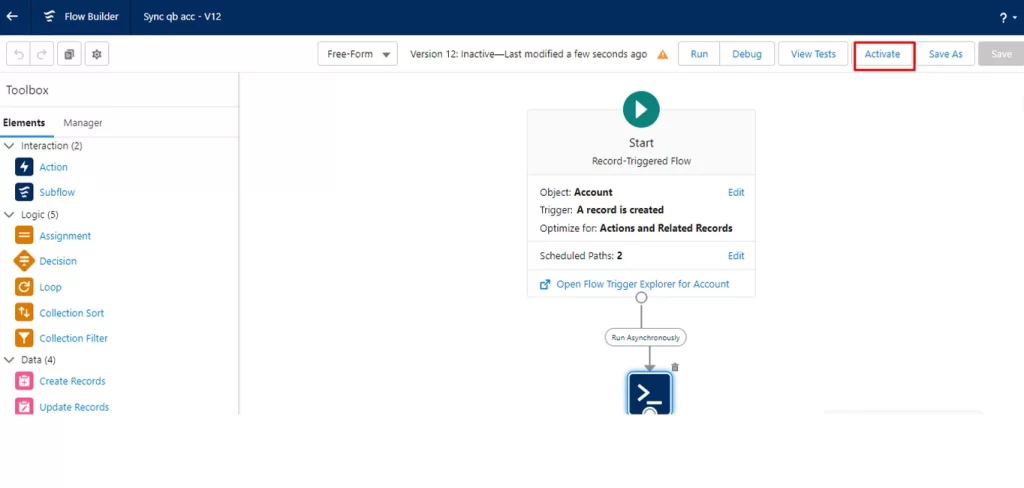
How to Sync Salesforce With QuickBooks Online Using Flow?

Syncing Salesforce with QuickBooks Online using Flow has many benefits and simplifies the bookkeeping process.

If you’re planning to sync Salesforce with QuickBooks online using Flow then this is how it is to be done: 

Before we start syncing, you need to consider the following pointers

We need to create different Flow for:

  • Creating New Record: In case you want to create a new record on Salesforce, with the help of the Flow it will automatically be reflected in your QuickBooks Online account.
  • Updating Record: Here if you want to update your old record, with this flow the record will get automatically updated in your QuickBooks Online account.
Let us Start!

Creating New Record

Firstly, create a flow on the Salesforce Object that you want to sync in QuickBooks.

For that Go to Home and search Flow

After that click on Create and click on Record Trigger Flow.

Select the object you want to sync in QuickBooks. Here we have selected Account.

Also, click on the checkbox to run the flow asynchronously and then click on done.

Now click on drag and drop Action. Add apex action to the flow named “Create Qb Record” Fill required fields in Flow then you have to create an Account
  • In Company ID: enter the QuickBooks company ID you want the record to sync
  • In QB type: enter the QuickBooks object you want to map with Salesforce’s object (Here Account)
  • In the Object API name: enter the Salesforce object you are mapping (Here Account)

Now you have to click on the Save As Button

Again click the save as page and click on the save button.

Then click on the Activate button. Now your Flow has been activated

Now whenever a new record is created on Salesforce, it automatically will be reflected on your QuickBooks online.

Flow To Update Your QuickBooks Record from Salesforce

Select the object you want to sync in QuickBooks. Here we have selected an Account and then clicked on Edit.

  • Fill in the required fields that you want in Flow.
  • Select A record is updated.
  • Also, set the condition requirement as per your requirement and click on Done

Similarly, fill up all the details as above (Flow to create a new record).

Now click on the Save As Button.

Again show the save as a page and click on the save button.

Then click on the Activate button Now your Flow has been activated.

Note: This way you can create the flow for all the objects you want to sync with QuickBooks online.

Hope by following these steps you’re easily able to sync Salesforce with QuickBooks Online Using Flow. 

Couldn't find what you were looking for? Click here to talk to our experts!