A Step-by-Step Guide to Set Up QuickBooks Project Synchronization in Salesforce

In this step-by-step guide, we will walk you through the key steps for setting up the QuickBooks Project Synchronization feature in Salesforce. With the help of this latest feature, you can seamlessly sync your data between Salesforce and QuickBooks. This way, you can ensure that your projects are up-to-date and unified across both platforms. 

Note: The overall estimated setup time is 10-15 minutes.
 

Prerequisites :

  • Please make sure your Salesforce instance has the latest version of QB Sync Made Easy package which is 1.25.
  • The latest feature is available on the Pro version, so to enable the same, please contact our support team. 
  • If you want to sync the QuickBooks project for any other platform other than Salesforce, please reach out to HIC’s support team.

About QuickBooks Project Synchronization

With the QuickBooks Project Synchronization feature, users can able to create projects in QuickBooks directly from Salesforce. Considering the fact that QuickBooks does not provide a direct API for the project object, we have built a solution for you to sync projects using LWC Button on the Record Page (Manual Synchronization).


How to Setup QuickBooks Integration in Salesforce?

Step 1: Install the Latest Version

To begin with the setup, you need to make sure that you have the latest version of QB Sync Made Easy package which is v1.25 in Salesforce.

How to do it?

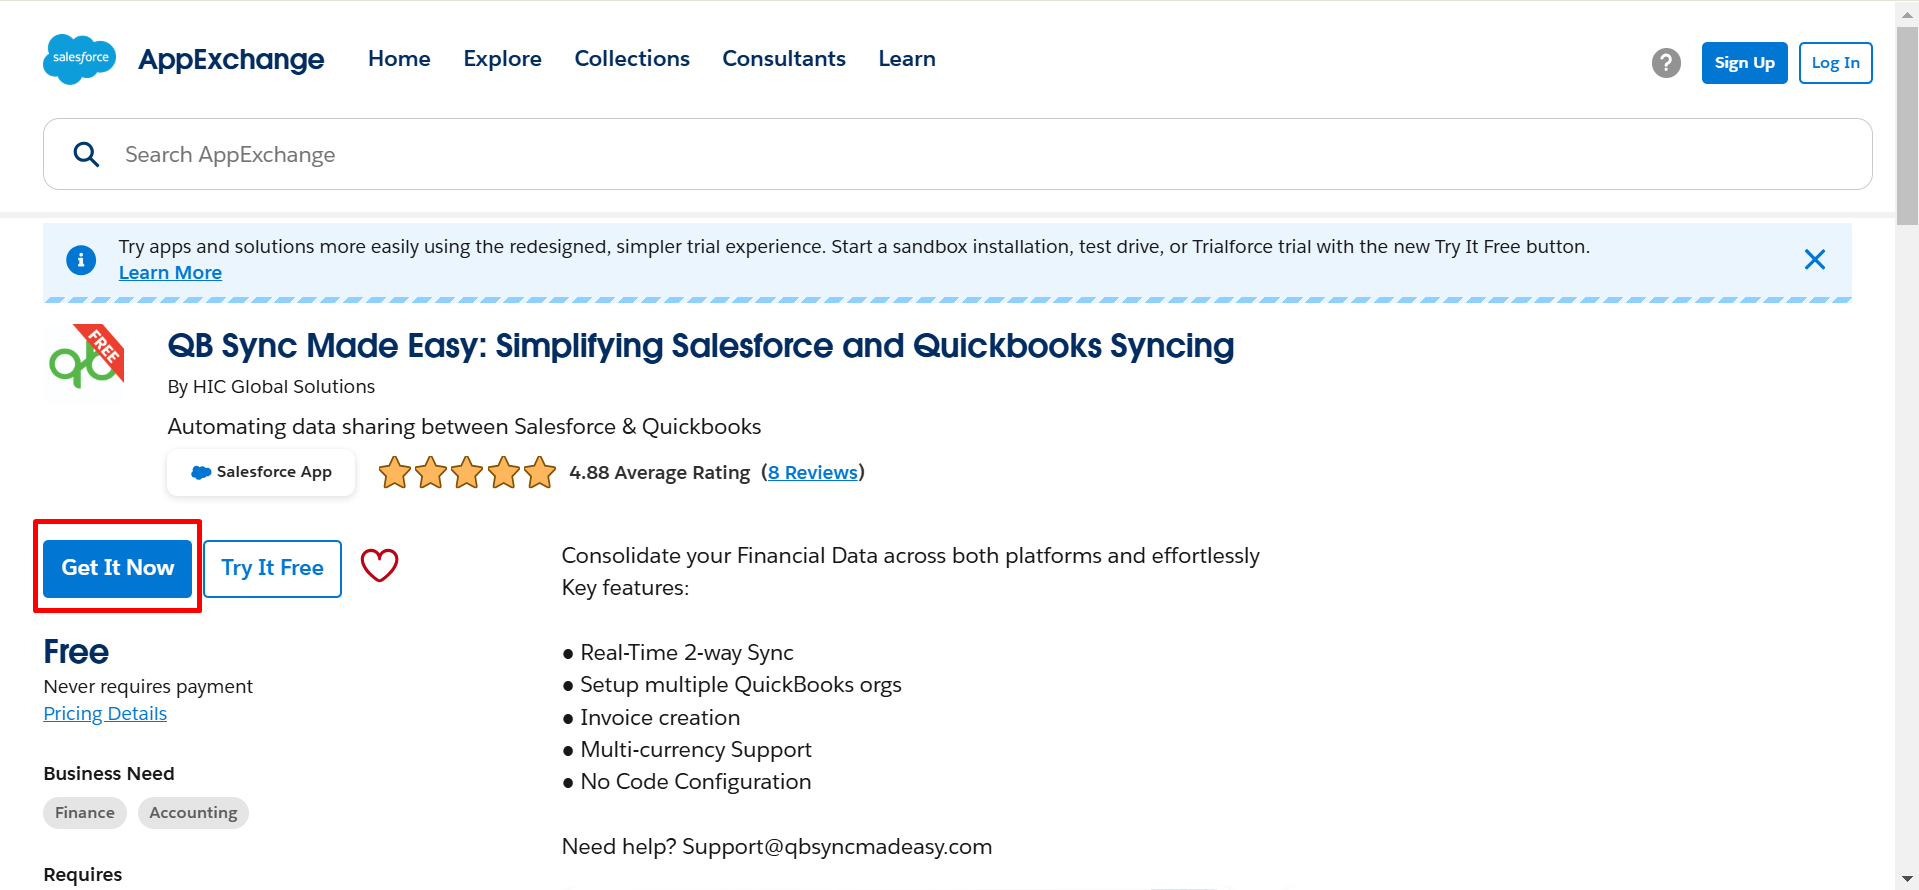
  • Go to AppExchange.
  • Type “QB Sync Made Easy” in the search bar.
  • Click on “Update” to install the latest version.

Step 2: Connect QuickBooks Company in Salesforce

After successfully installing the app, configure the QB Sync Made Easy app.

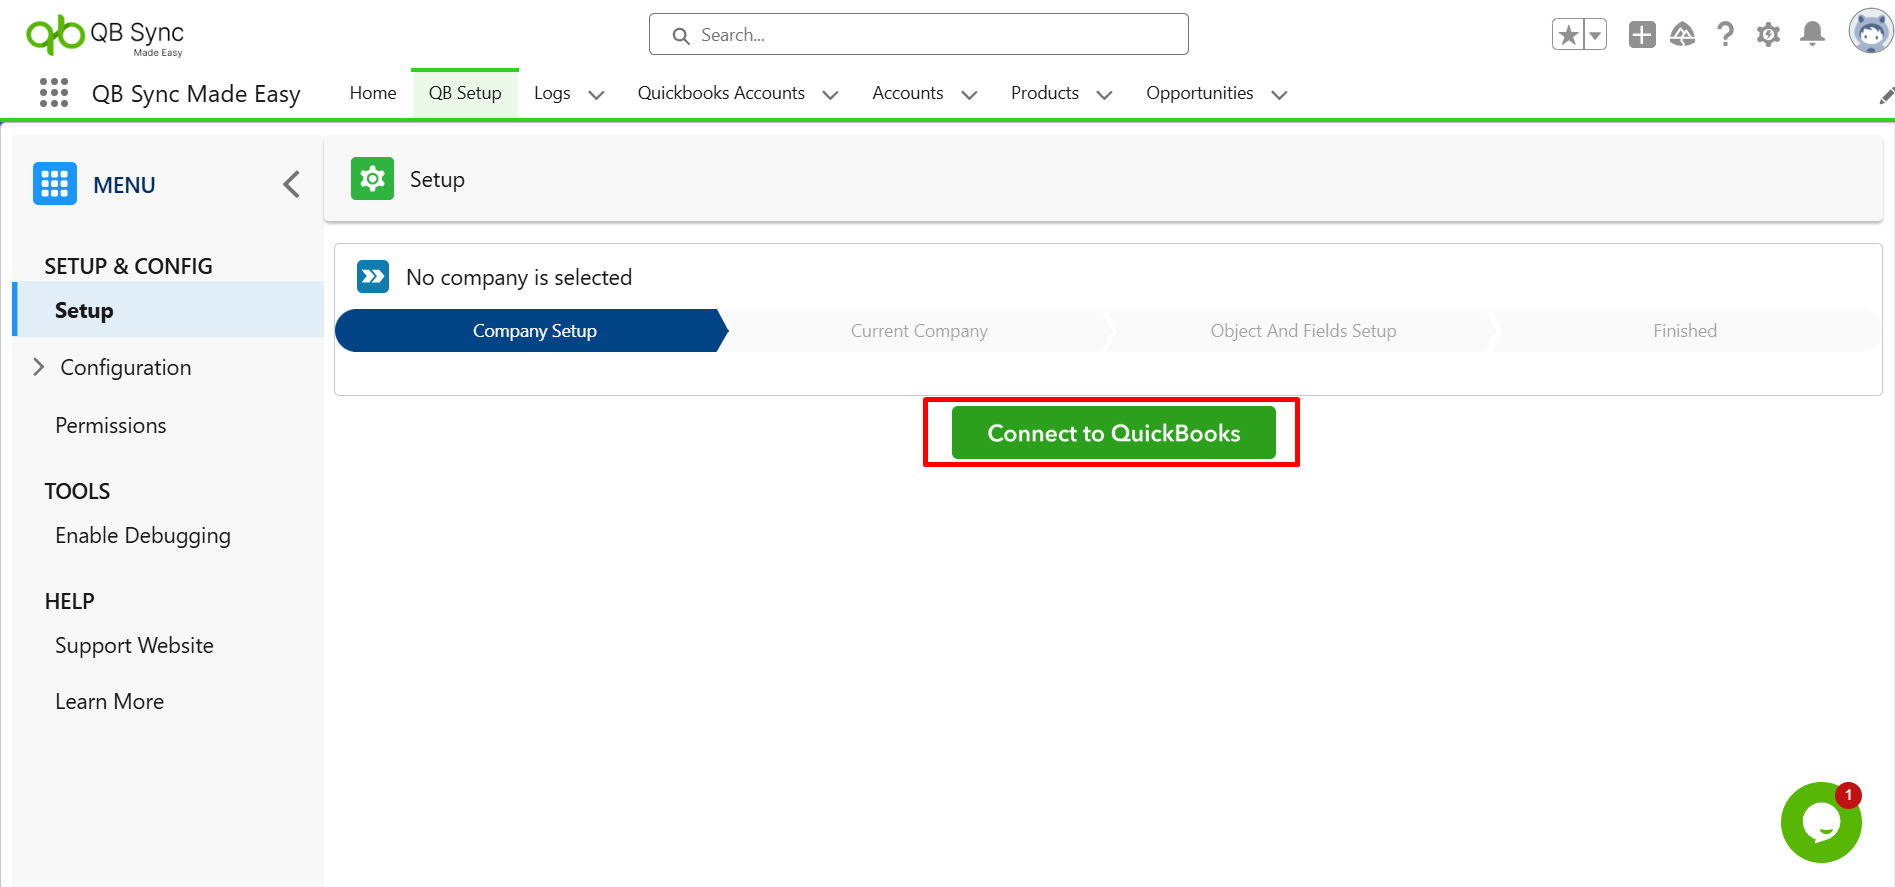
  • In the Salesforce setup, type QB Sync Made Easy in the search bar and click on the setup tab.
  • Afterward, click on “Connect to QuickBooks”, choose “Production” as the environment, and then click on the “Connect to QuickBooks” button again.
  • After completing this, you will be redirected to QuickBooks, and once the verification is done, your QuickBooks company will be directly linked to Salesforce.
  • Now, enable the QuickBooks to Salesforce connection to sync the project sync status and error messages back to Salesforce. You can do this by:
  1. Clicking on “Company Connection” on the connected QuickBooks company.
  2. Navigate from QuickBooks to Salesforce (Real-Time Sync) and click on “Connect”.

Step 3: Configure the App for QuickBooks Project Sync

Configure the Project Sync feature after successfully connecting with the QuickBooks company.

  1. In the QB Setup tab, click Setup on the connected company
  2. Click Configure Project Syncing

Step 4: Enter the Credential Details

  1. Enter your QuickBooks Username.
  2. Enter your QuickBooks Password.
  3. The verification type is preselected as an Authentication Code.
  4. Fill in the Security Key. Follow these steps to obtain it:
  • Log in to your QuickBooks Company.
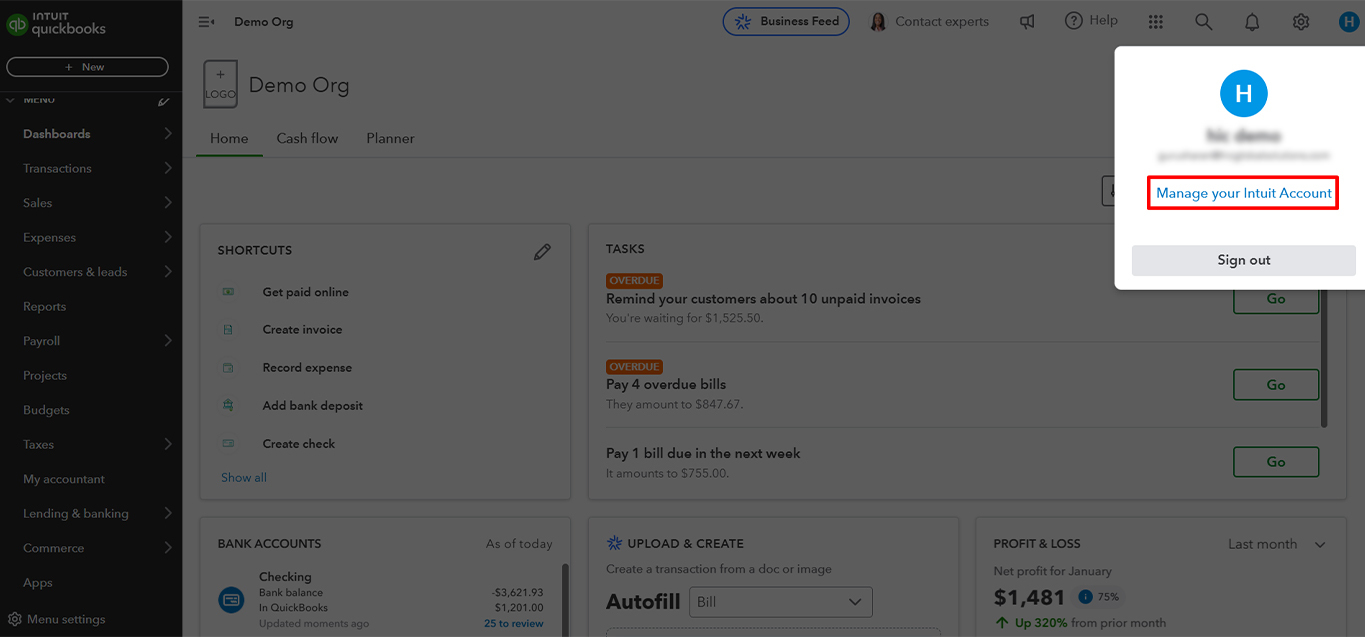
  • Click on your Profile Icon (top right corner) and select Manage your Intuit Account.
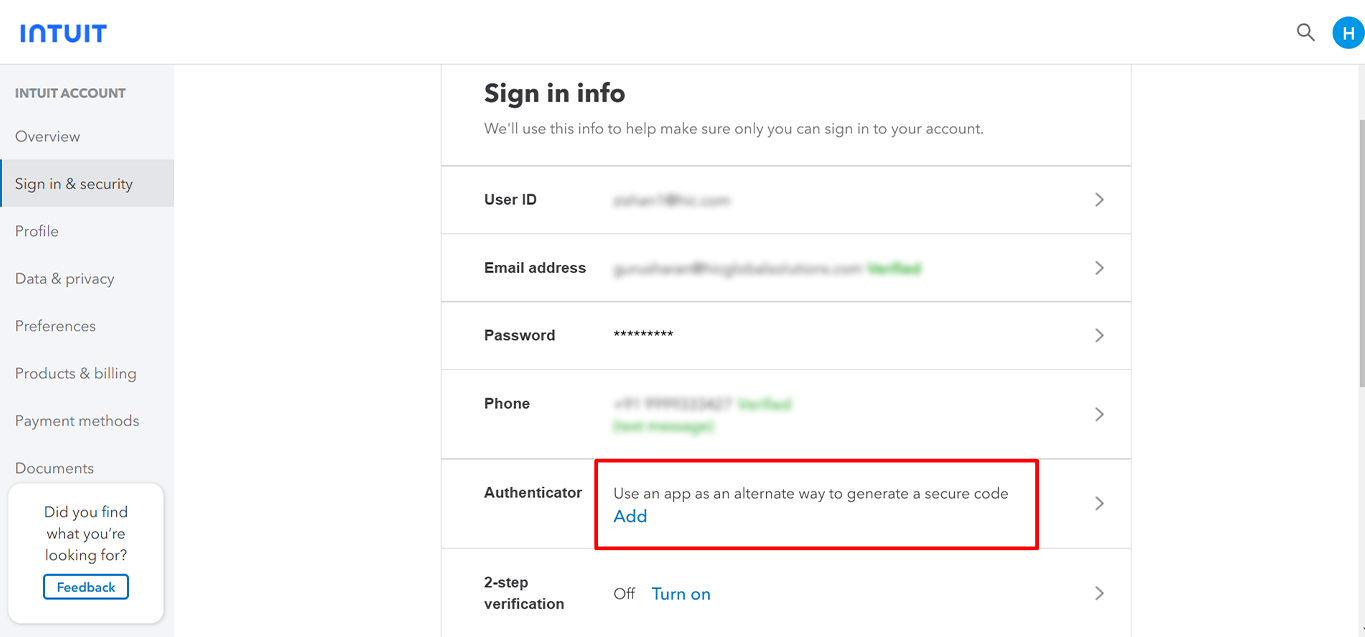
  • Click on Sign in & Security → Add under the Authenticator section.
  • If you don’t have an authenticator, download an authenticator app:
  1. Google Play Store
  2. iOS App Store
  • Click Set up Authenticator App.
  • Copy the Secret Code provided.
  • Open the Authenticator App, scan the QR code, or enter the Secret Key, then click Turn On.
  • Return to QB Sync Made Easy in Salesforce and paste the Secret Code into the Enter Security Code field (remove spaces).

Example: If your secret key is generated as shown in the screenshot below, you have to enter the security code in Salesforce like this: -A66PMEP5FNLOYU4R50MVG4EGZZAUHIOG.

  • Click Next. If everything is set up correctly, the Connection Status will be displayed. Otherwise, an error message will guide you.

Step 5: Configuring Field Mappings

  1. Click Save and Next.
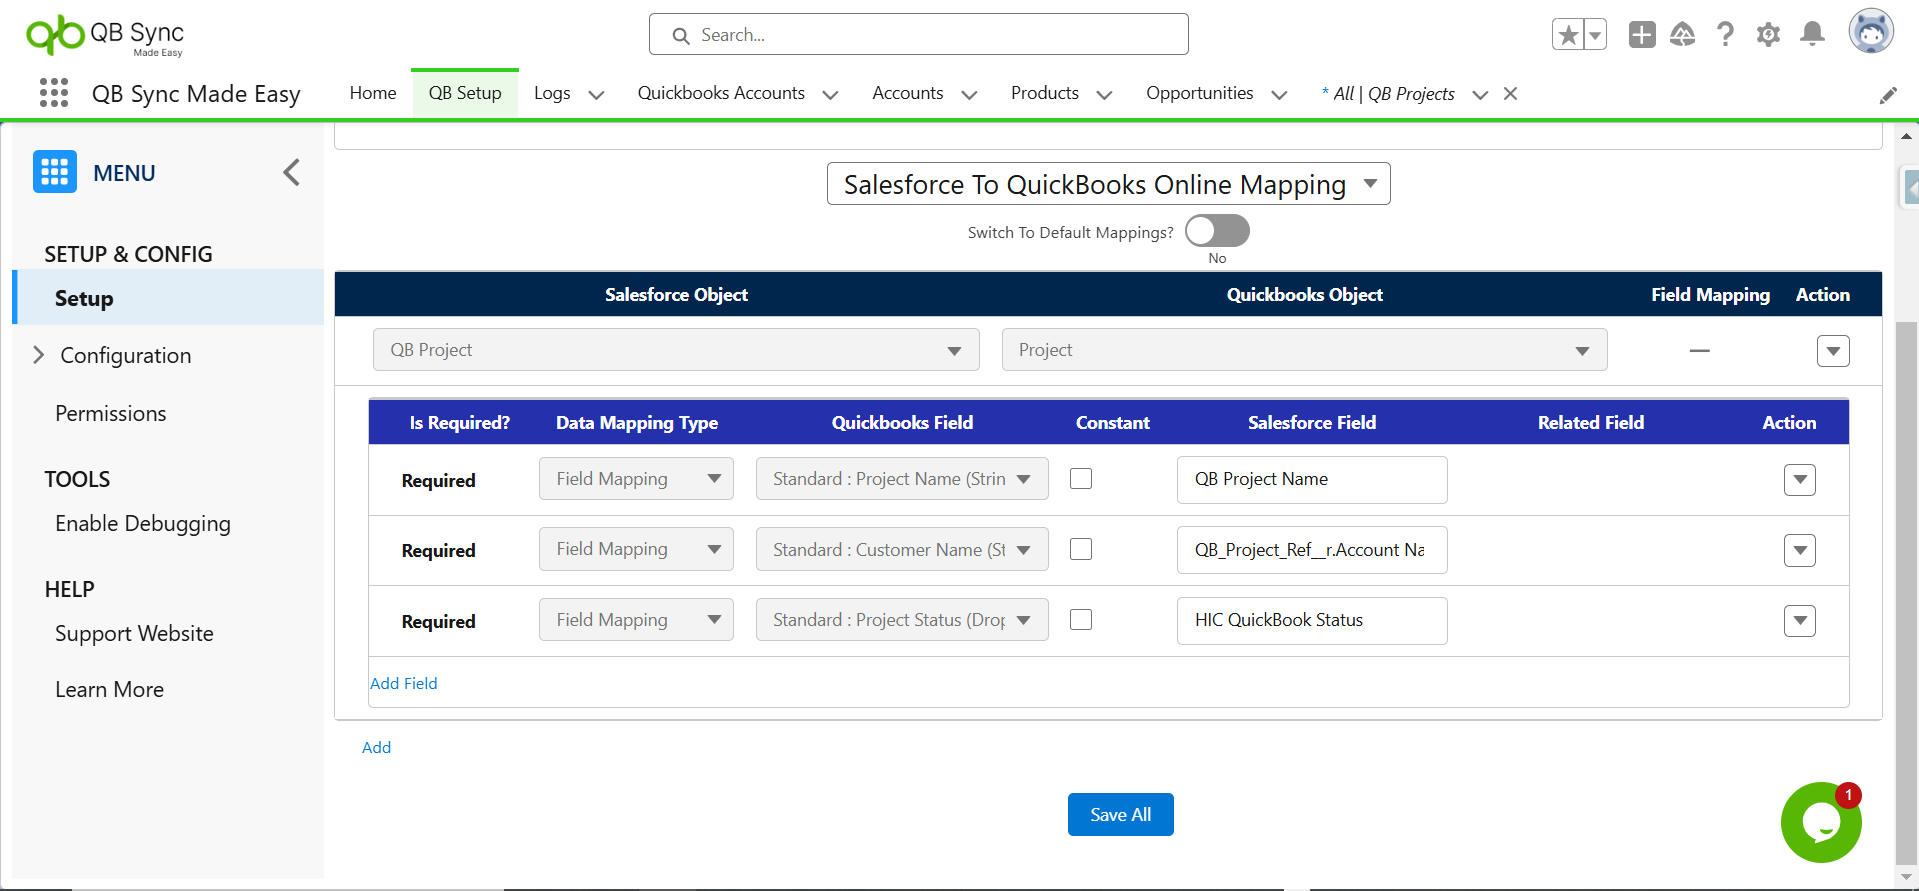
  2. Click Add and choose Salesforce Object (e.g., Account).
  3. For QuickBooks Object, select Project.
  4. Perform Field Level Mapping. Ensure that Project Name and Customer Name are mapped (required fields). Now, click on the “Save” button.
  • Congratulations! Your setup is complete.

How to Add the Sync Button to Salesforce Record Pages

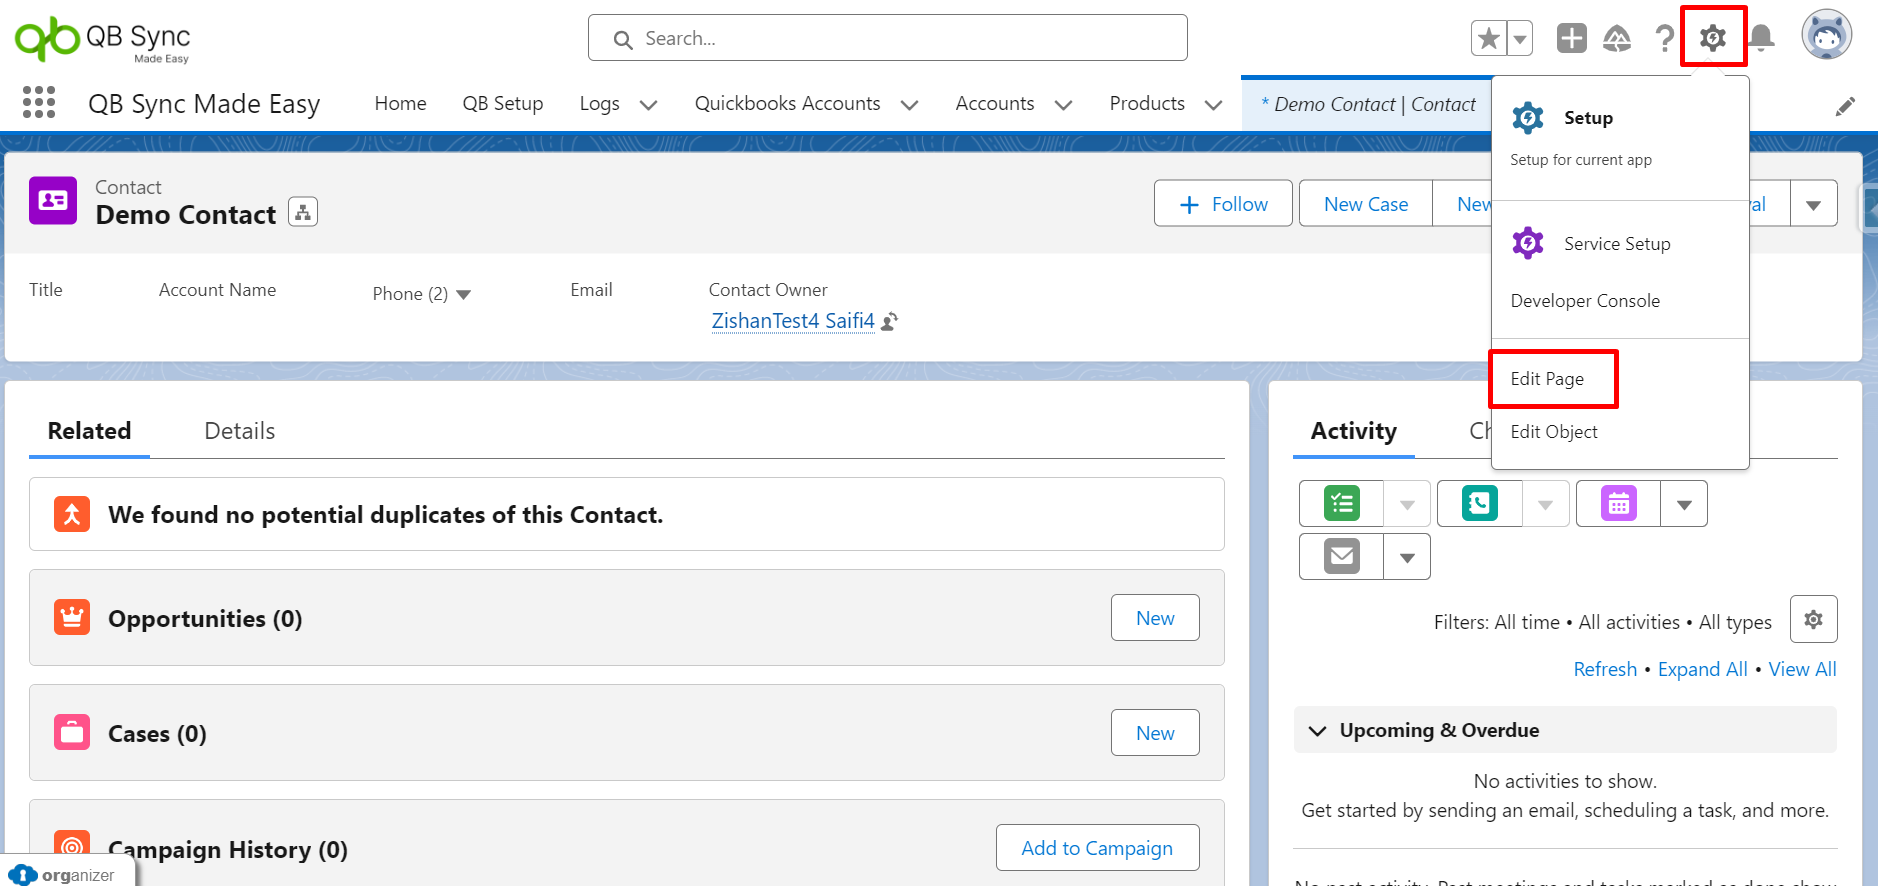
  1. Open a record page and click the Gear Icon → Edit Page.

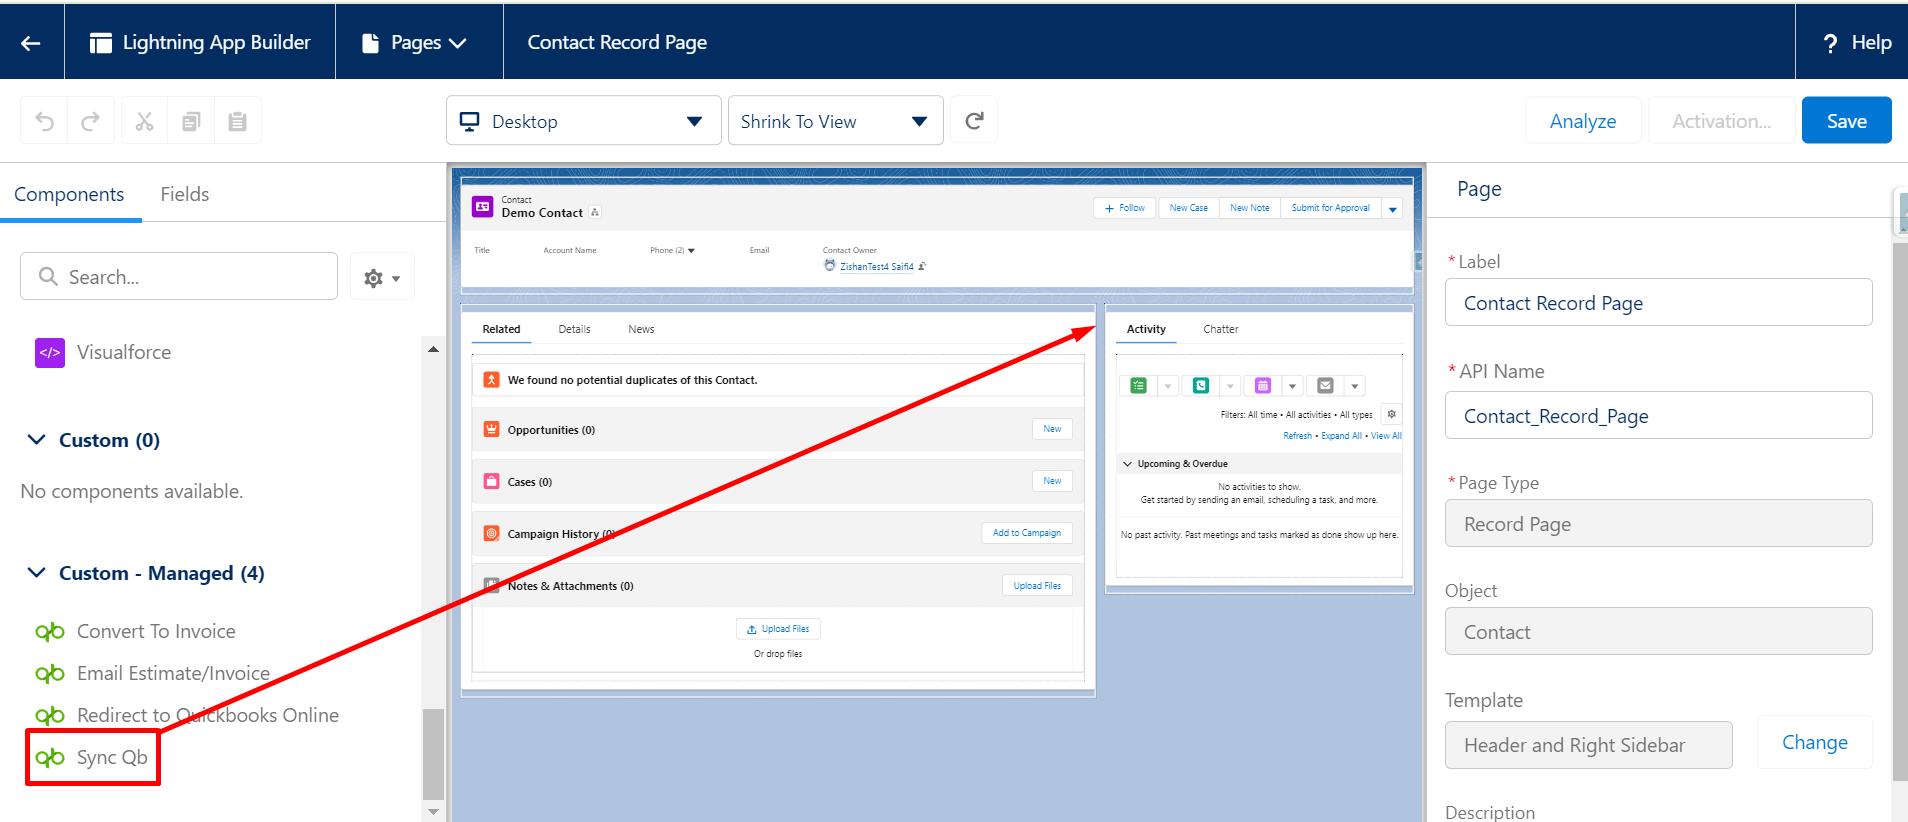
   2. From the left sidebar, drag & drop the Sync QB component onto the page.

  3. Set the attributes:

  • QuickBooks Company: Select your connected company.
  • QuickBooks Object: Choose Project.

  4. Click Save.
  5. Go to the record and click the Sync Button to sync the record to QuickBooks.

  6. Next Steps
✅ Test the feature by syncing a project manually or using automation.
✅ Contact Sales if the Pro feature is not activated.
✅ Reach out to Support if you need further assistance.

If you are unable to synchronize your QuickBooks project in Salesforce, please feel free to reach out to our support team.

Couldn't find what you were looking for? Click here to talk to our experts!