User Guide
- Installation and Permission
- Connect Quickbooks Company in Salesforce
- Configure Mapping For Salesforce to Quickbooks & vice versa.
- Quickbooks to Salesforce ‘Historical Sync’.
- Salesforce to Quickbooks
- Mapping for Account-Customer in object
- Edit page on Account Record
- Filling up Design Attributes field
- Mapping for Product-Item in the object and field setup.
- Fill the Pricebook on Record Page
- Edit Page on Product Record
- Fill Design Attributes Field
- Mapping for Opportunity-Estimate in object and field setup.
- Add the Account and Product that you have to Sync.
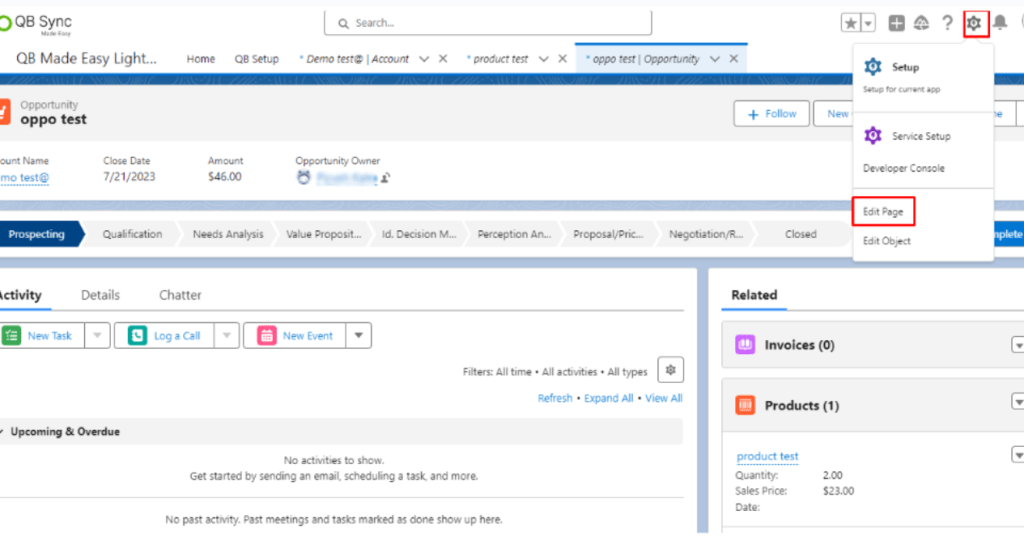
- Edit Page on Opportunity Record
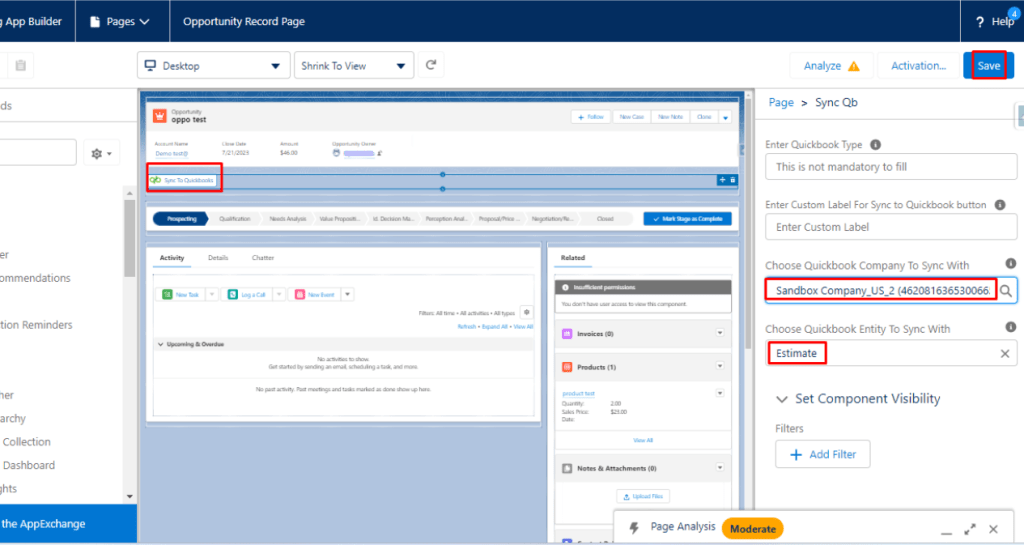
- Filling the Required Design Attributes
- Sending Estimate to an Email From Salesforce.
- Convert Estimate to Invoice From Salesforce.
- Quickbooks To Salesforce Real-time Sync.
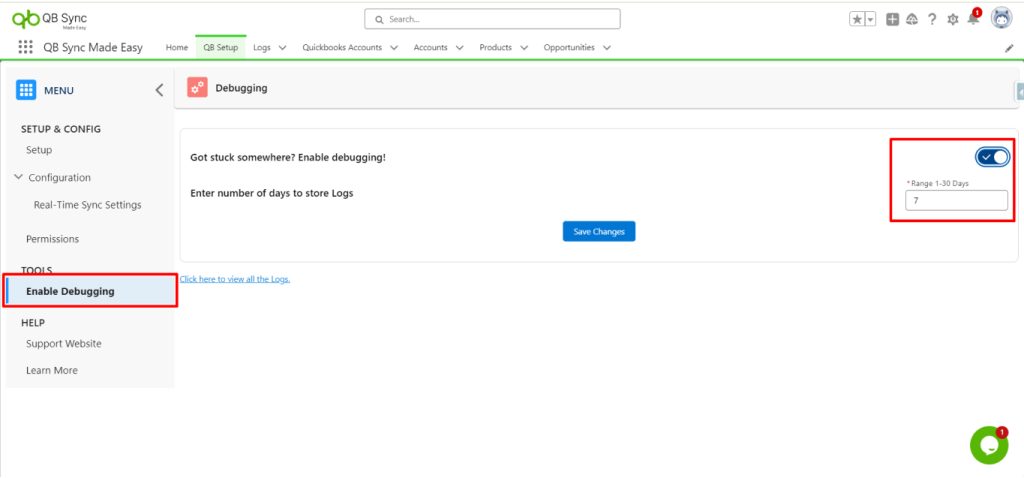
- Enable Debug Log
- Support Website
Installation and Permission
Step 2 : After logging into Salesforce from your account, you will see the installation screen, Something like this. Here, click on Install for All Users.
You will now see that the QB Sync Made Easy app is Installing for All Users
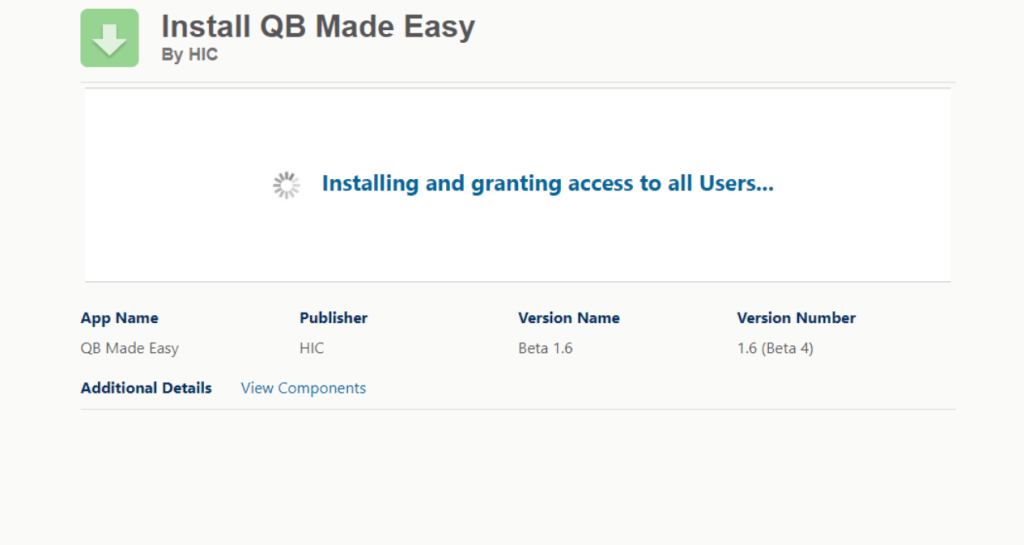
Step 3 : Now the QB Sync Made Easy app installed in salesforce.
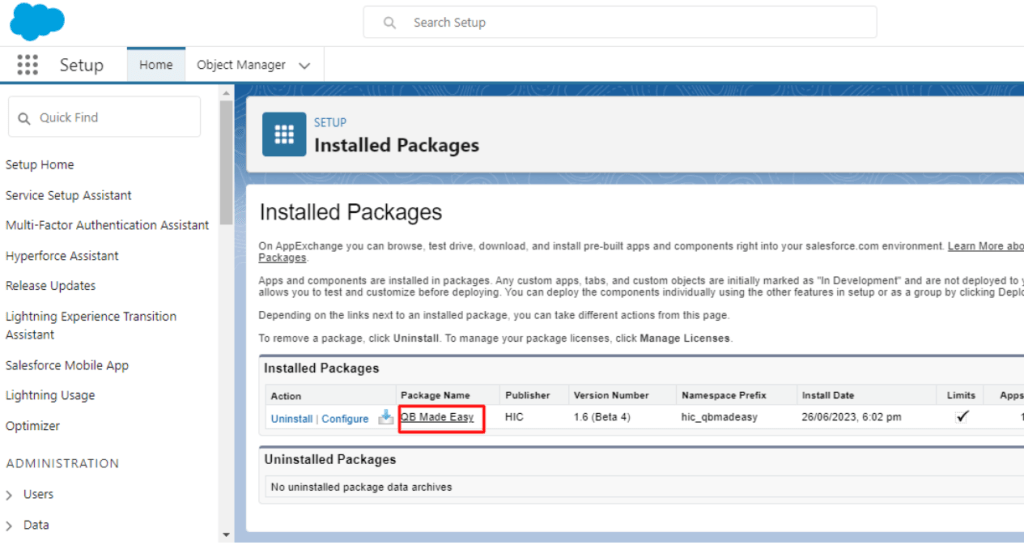
Step 4 : After installing the QB Sync Made Easy app the Home page will appear as shown and search the Users.
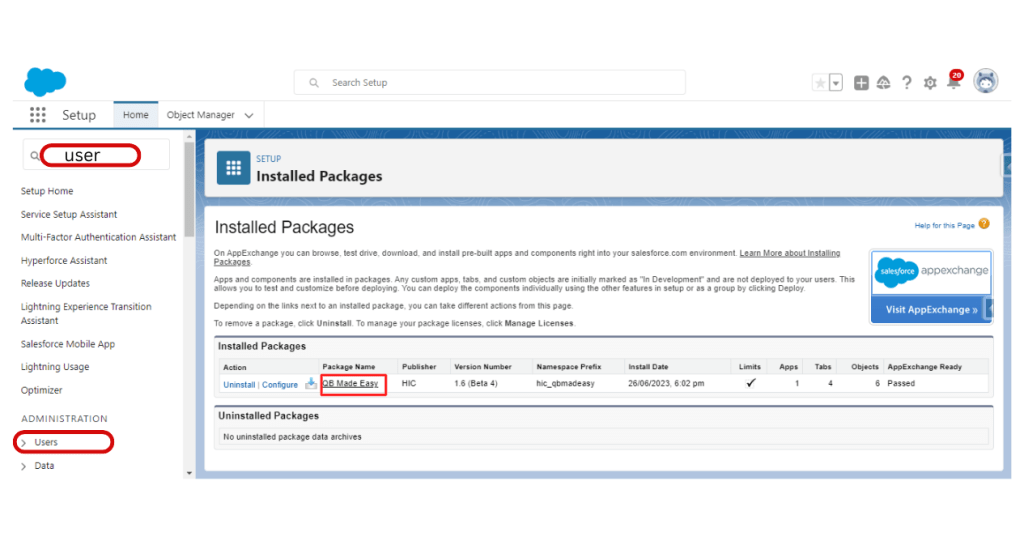
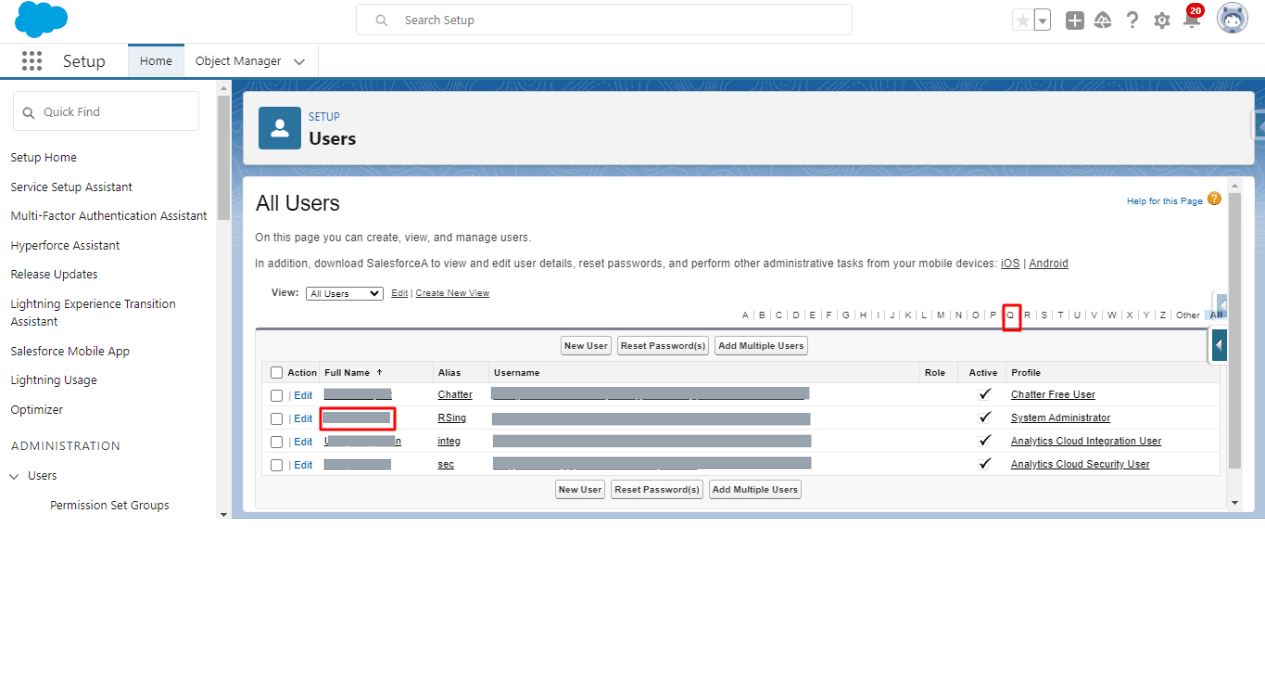
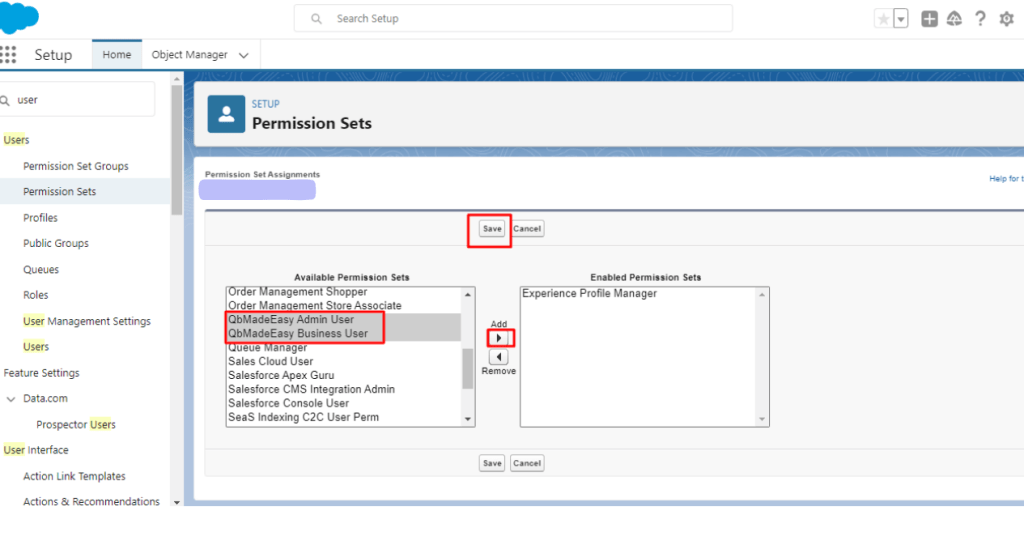
Step 5 : Go to Users and Check the Permission set.
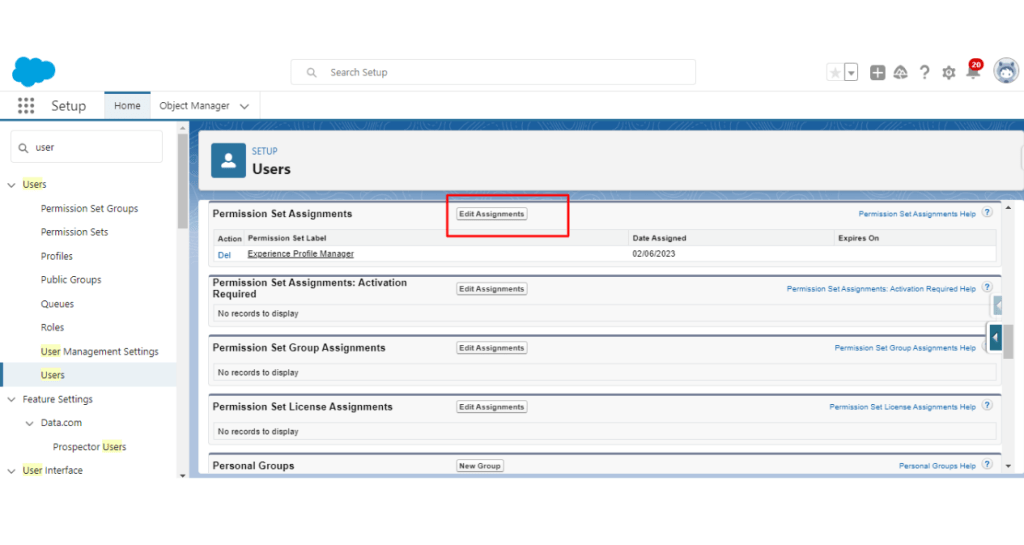
Step 6 : Then Assign the Permission Sets (QB Made Easy admin user & business user).
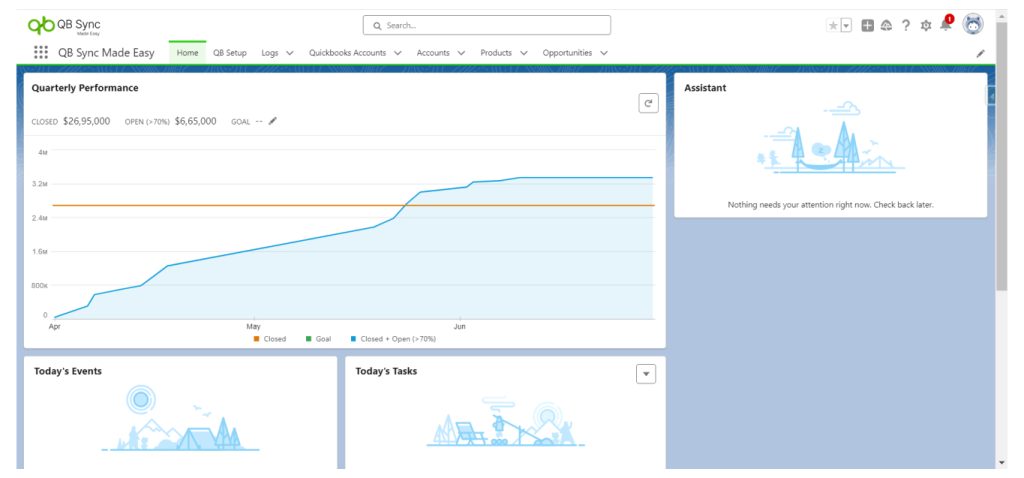
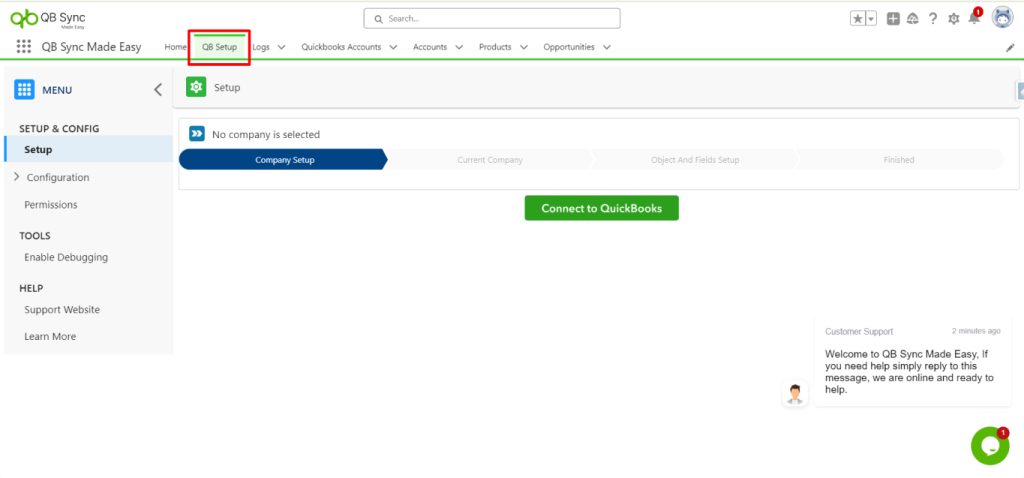
Step 7 : After Assigning the permission sets , Open the QB Sync Made Easy App from App Launcher after that you should be on the Homepage of the app. From there click on the QB Setup.
Connect Quickbooks Company in Salesforce
Step 8 : After clicking on the QB Setup page click on the Connect to Quickbooks.
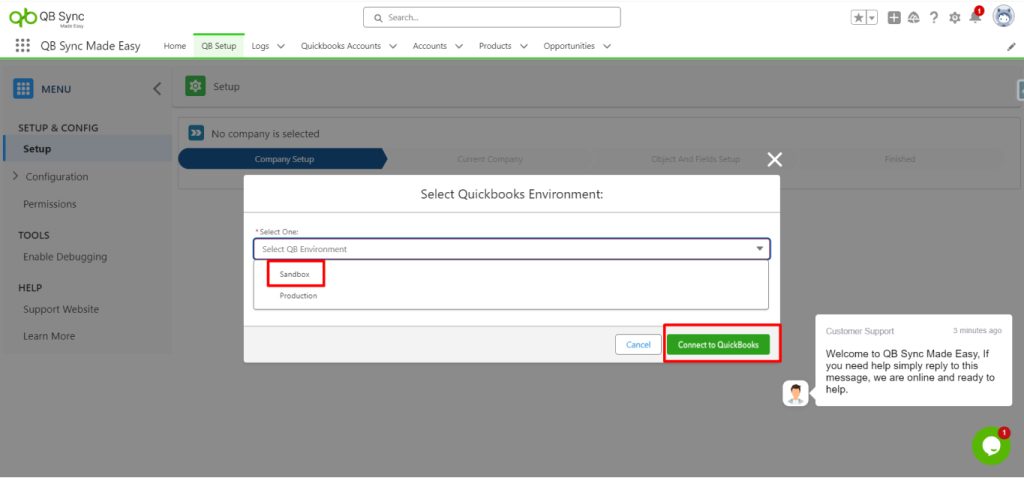
Step 9 : After clicking on Connect to Quickbooks, Choose the Quickbooks Environment (Sandbox/Production) then click on Connect to Quickbooks button.
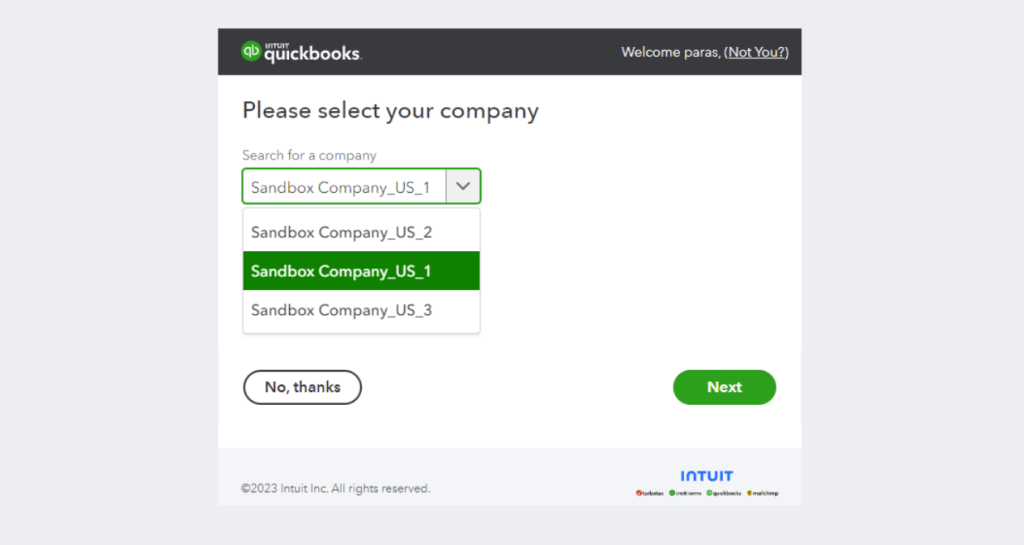
Step 10 : After that select the Company and then click on the next button.

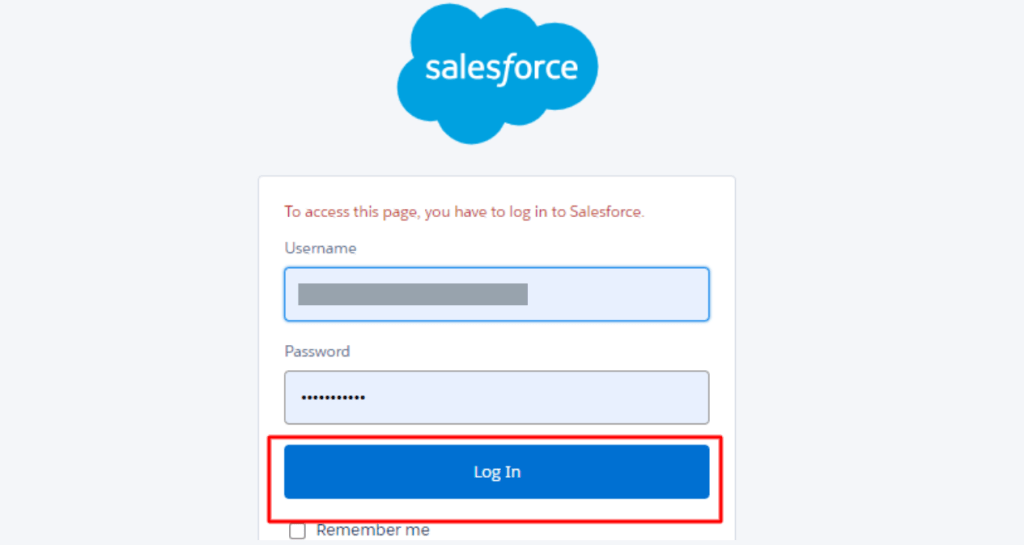
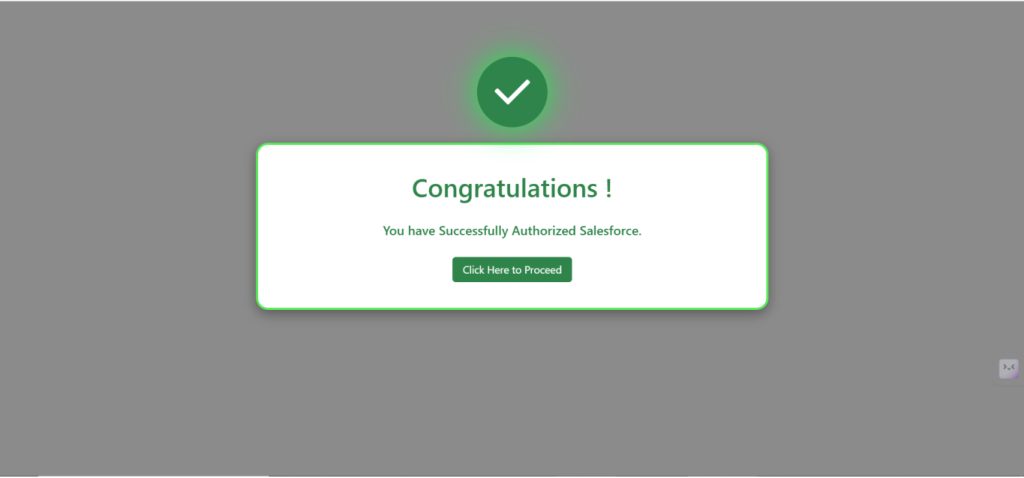
Step 12 : You have to log in to the Salesforce Account then you will see the Message that the company has successfully connected. Then you click on the click here to Proceed Button.
Step 13 : Now, click on the Setup button, and you will be taken to the company setup page where you can
Select Pricebook
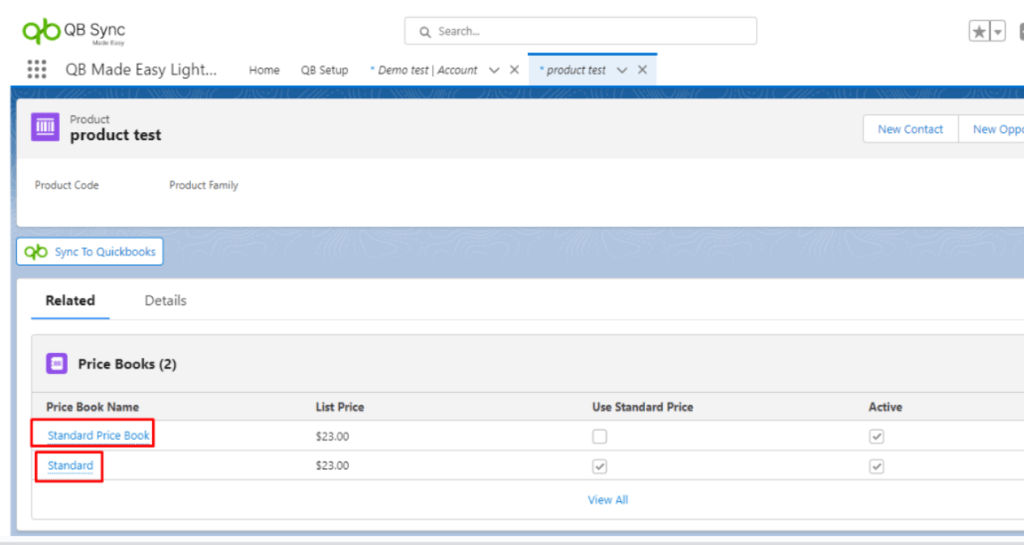
Users can create price-book entries in both the standard price book and the custom price book selected in the company setup.
If you select the standard price book, the price book entry record will be exclusively created there. It’s important to note that both your standard and custom price book will only be available for selection in the company setup if it is active.
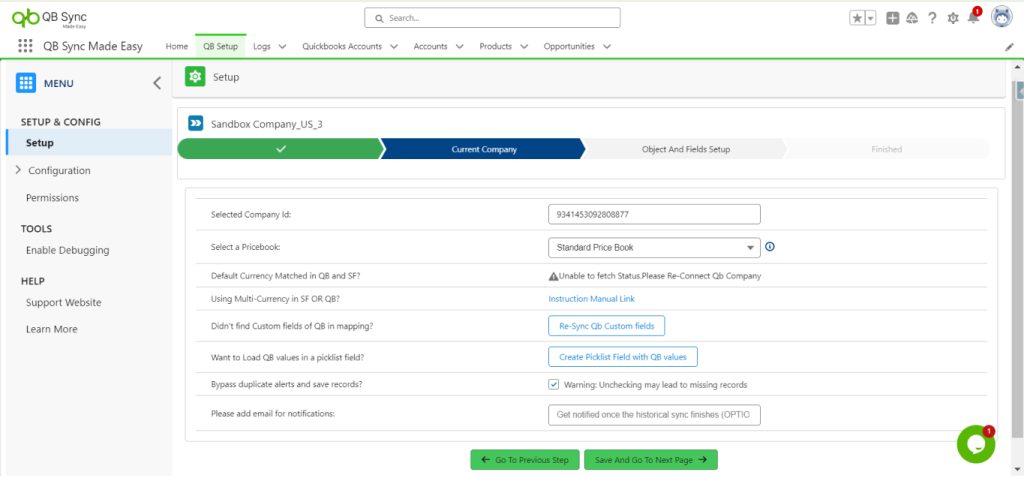
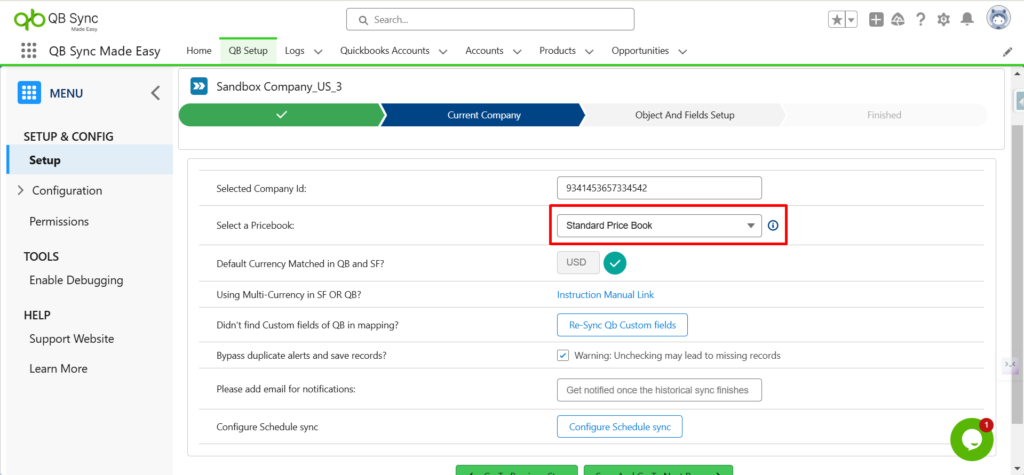
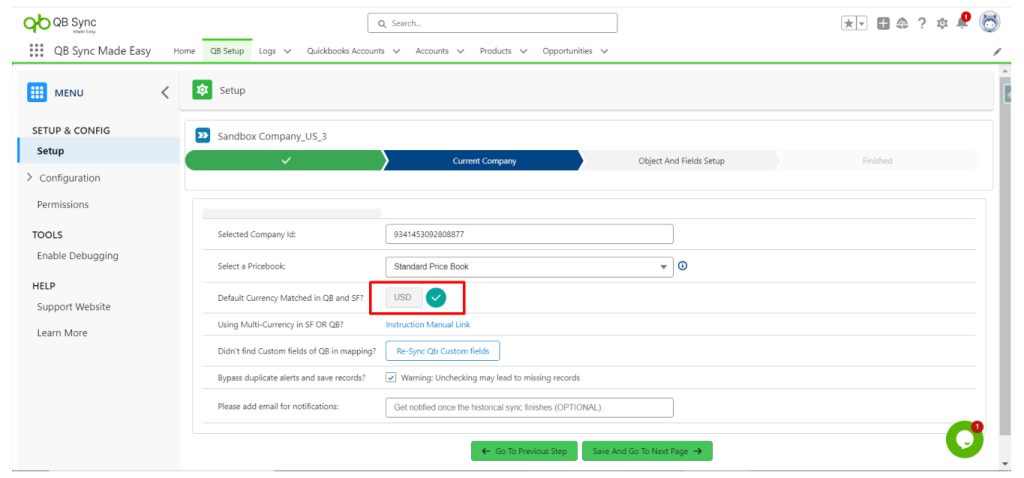
Check your default currency settings
With the app support currency settings, you can check if your default currency of QB Online matches with that of Salesforce and vice -versa. In case, it does not match, an error message will be displayed prompting you to adjust changes to avoid the mismatch.
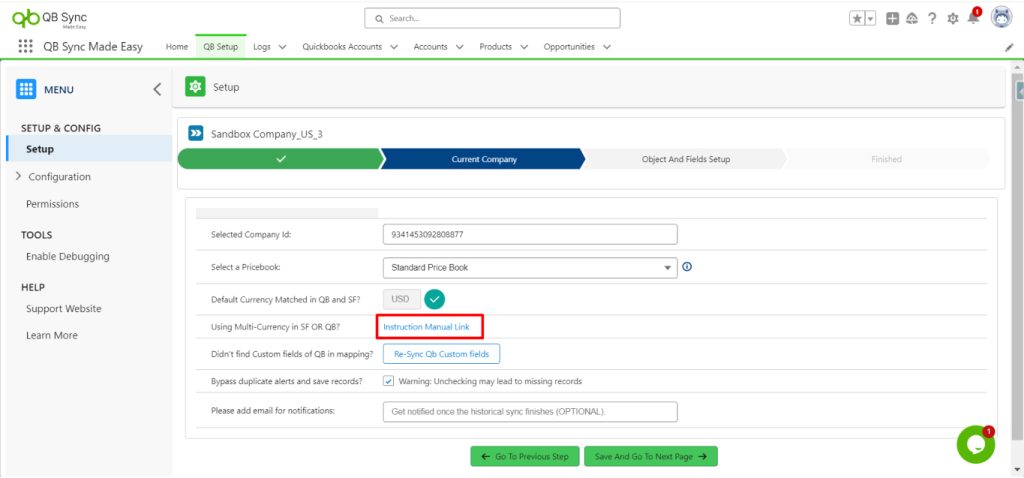
Set up the multicurrency feature
If multicurrency is enabled in your Salesforce org, you can do the required mapping to leverage the feature. The instruction link is attached to the setup page for easy navigation.
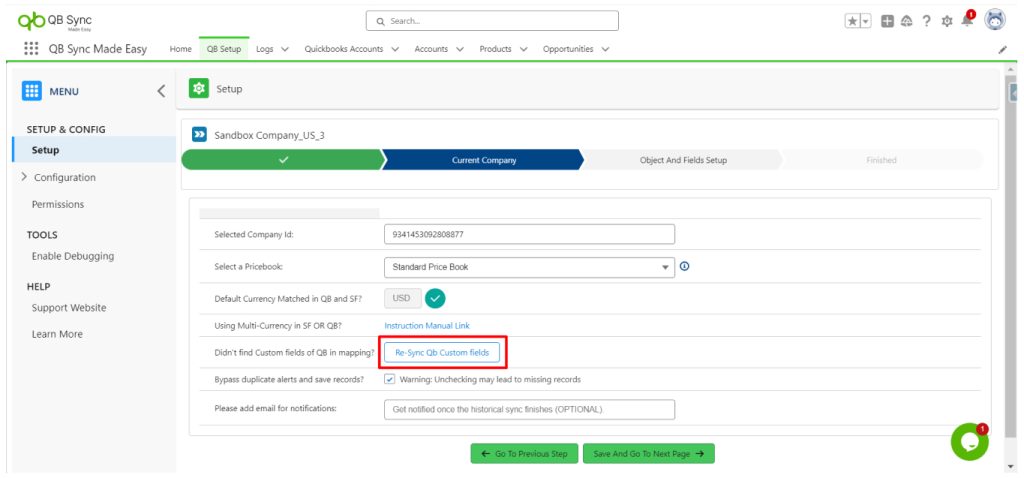
Create QB custom fields
If you’ve created custom fields before connecting QuickBooks with the app, they will automatically appear in the mapping section after connection.
For custom fields created after the initial connection, you can easily resync them by navigating to the company setup. Click on “Re-Sync QB Fields”, refresh, and your custom fields will seamlessly appear in the mapping options.
It’s crucial to be aware of certain limitations associated with QuickBooks custom fields. We recommend reviewing the QuickBooks document before utilizing QuickBooks custom fields.
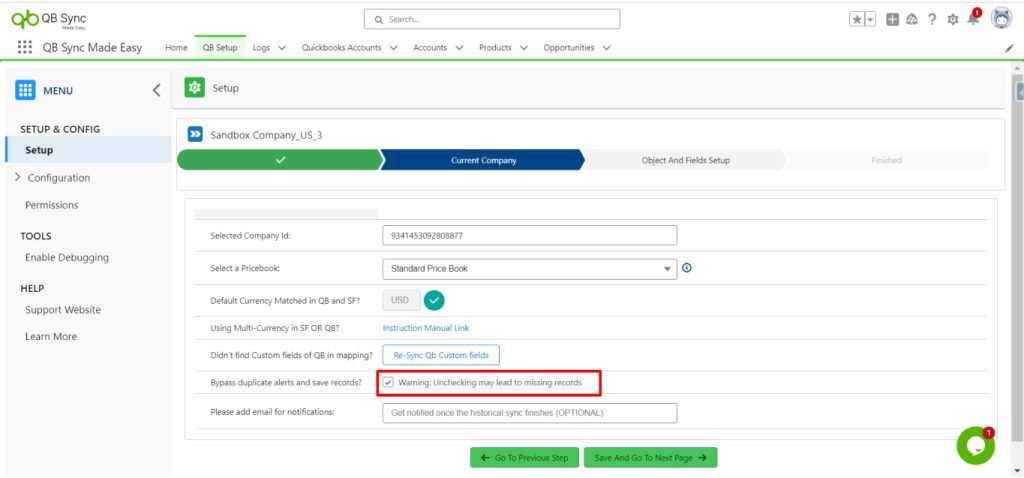
Bypass duplicate alerts and save records
Select the checkbox if you want to allow record insertion when a duplicate rule is active in Salesforce.
Visit the company setup page to find the checkbox allowing this option, which is checked by default. If the action on the duplicate rule is set to block, records will not be created, regardless of the user’s choice. In such cases, if you need to import all data from QuickBooks, deactivate the duplicate rule preventing record insertion and proceed with the import through our app.
Add Emails if you want to be notified after the Historical sync has been Completed.
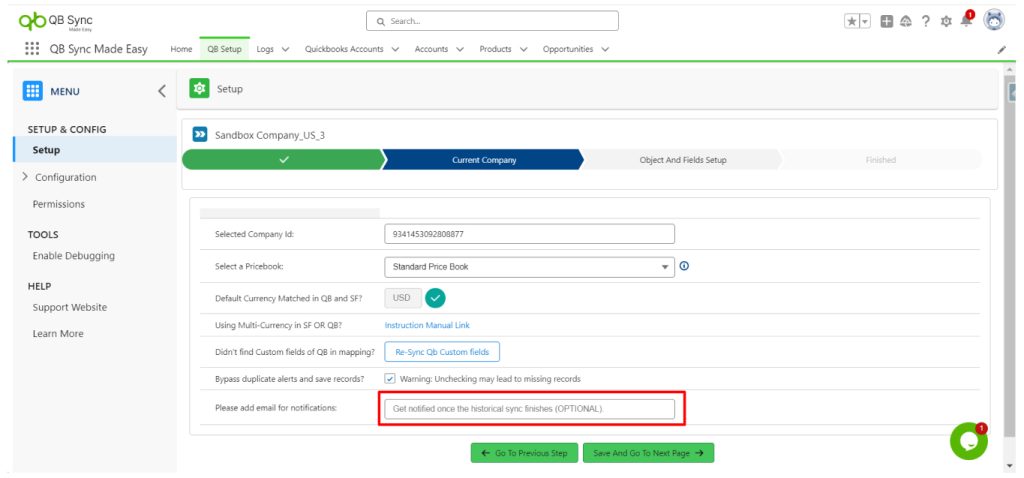
After you have set up the page as per your requirement, click on Save and Go to Next Page
Configure Mapping For Salesforce to Quickbooks & vice versa.
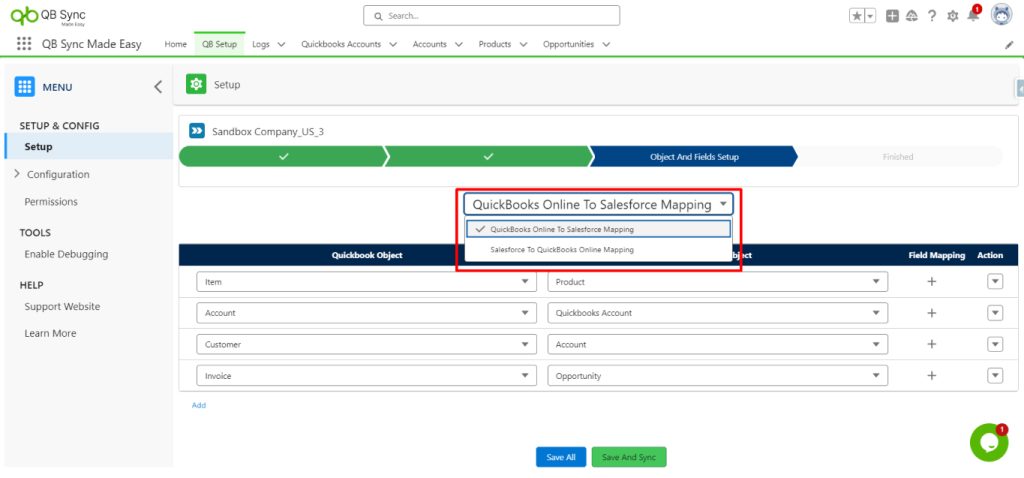
Quickbooks to Salesforce ‘Historical Sync’.
Step 15 : For this, we have to choose the Quickbooks to Salesforce in the combo box. After that we have to choose the objects that we want to sync then we choose the fields of those objects.
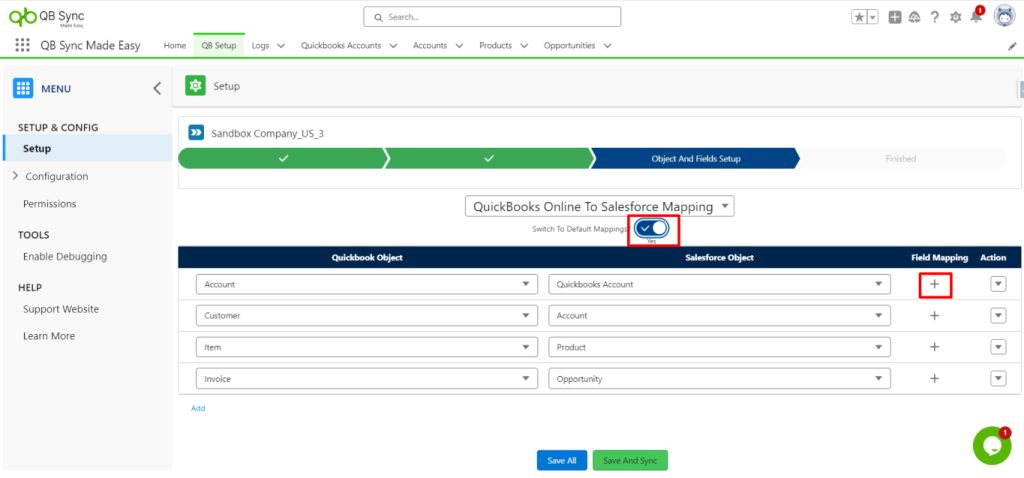
Step 16 : We can also load the Default mappings For (Customer, Item, Invoice and Account) with Salesforce’s Account,Product2,Opportuniy and Quickbooks Account(custom object in Salesforce) respectively.
Note : So during historical sync order of mapping is important.Before clicking “save and sync button” we can drag and drop the mapping row in the order in which we want sync to start.So for eg if we have mapped for account customer and opportunity-invoice then we need to make sure that mapping of account-customer is above the opportunity-invoice as account id would be required to create opportunity.
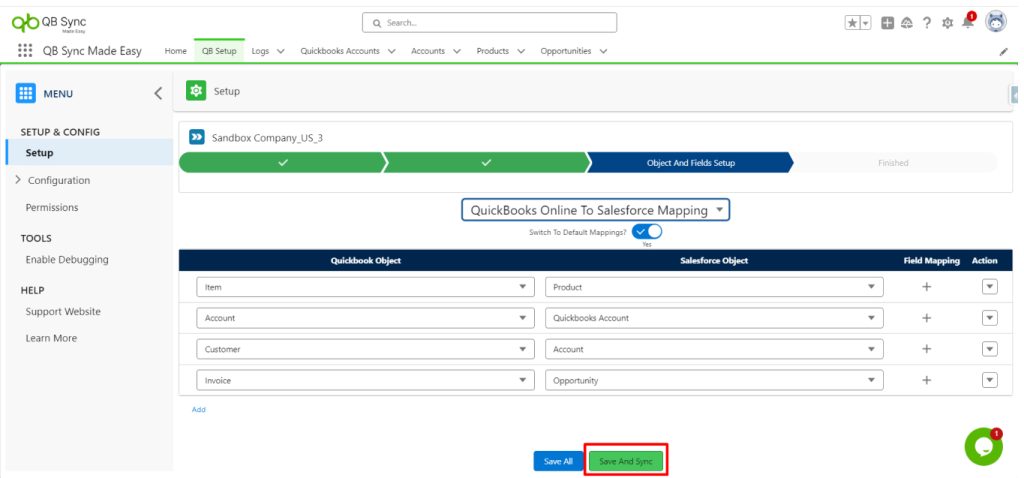
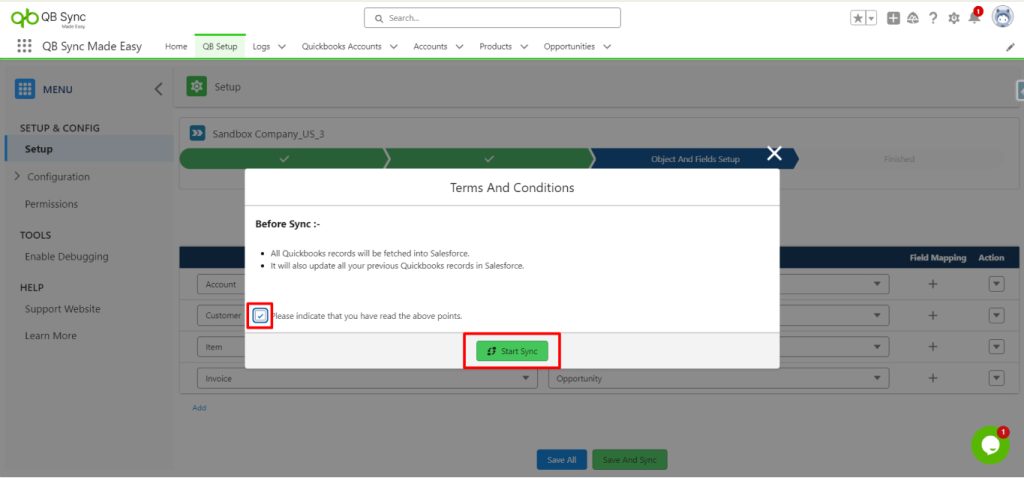
Step 17 : After that click on the save and sync button then a Modal will Popup then you can Sync.
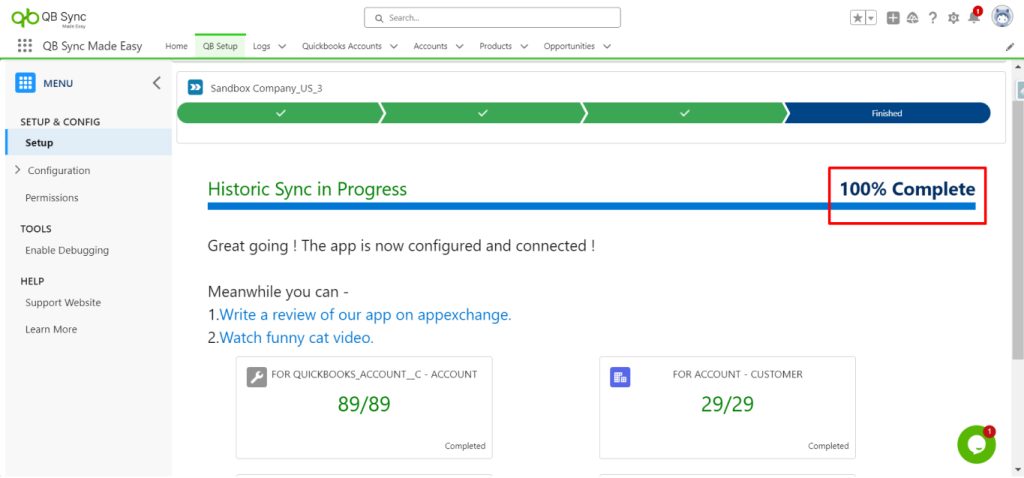
Step 18 : Here you can see the status of Sync.
Salesforce to Quickbooks
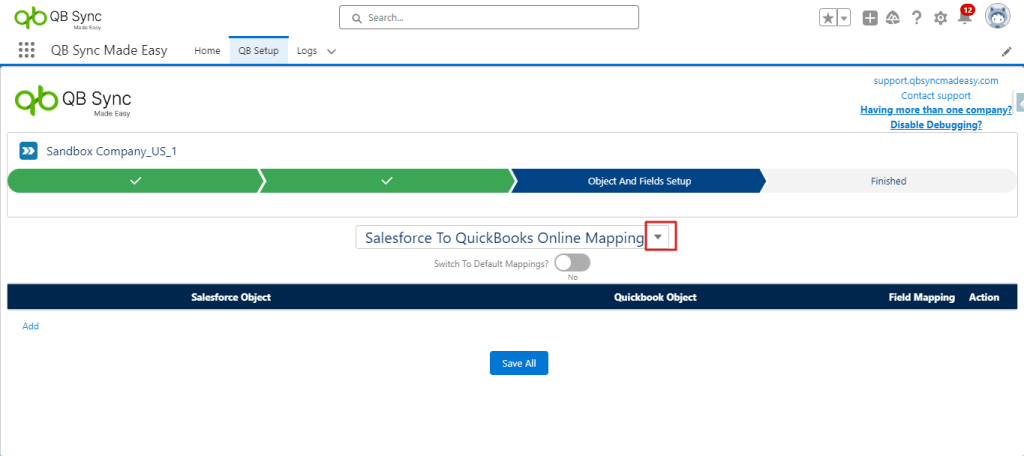
Step 19 : For Salesforce to Quickbooks Mapping Go to the Object And Field Setup Page.
Step 20 : Then you can do the Mapping same as above and click on the save button.
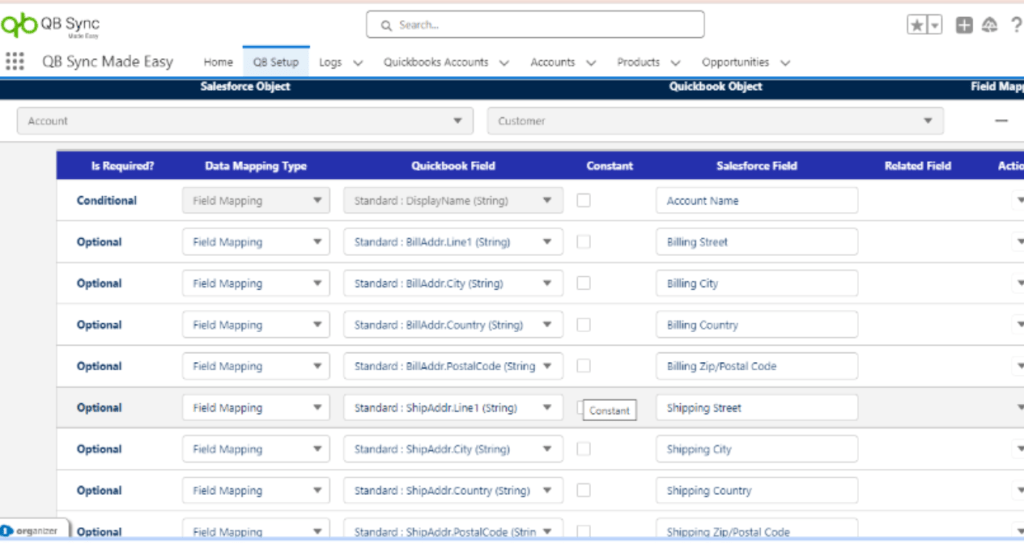
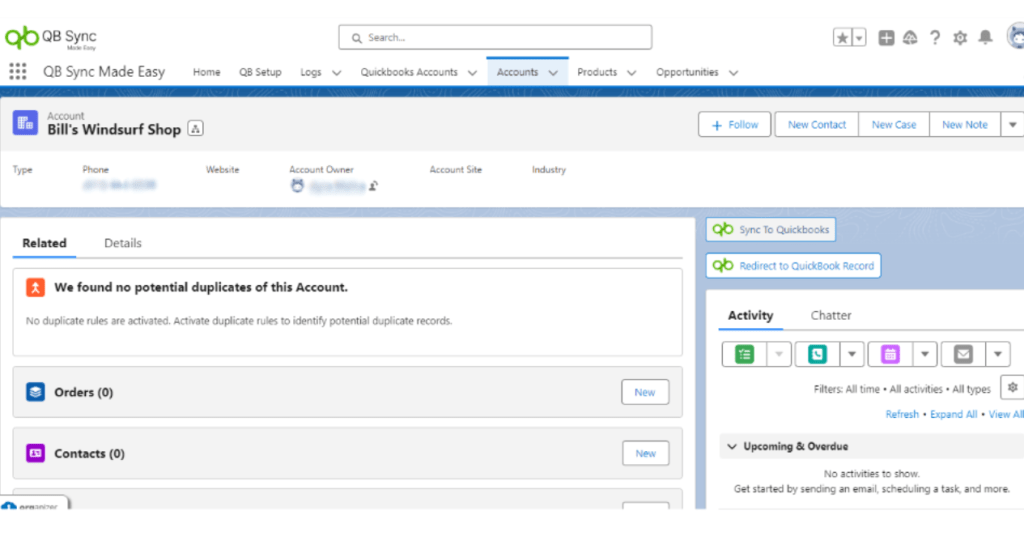
Step 21 : Now we will show how to sync the Salesforce Account with a Quickbooks customer.
Mapping for Account-Customer in object
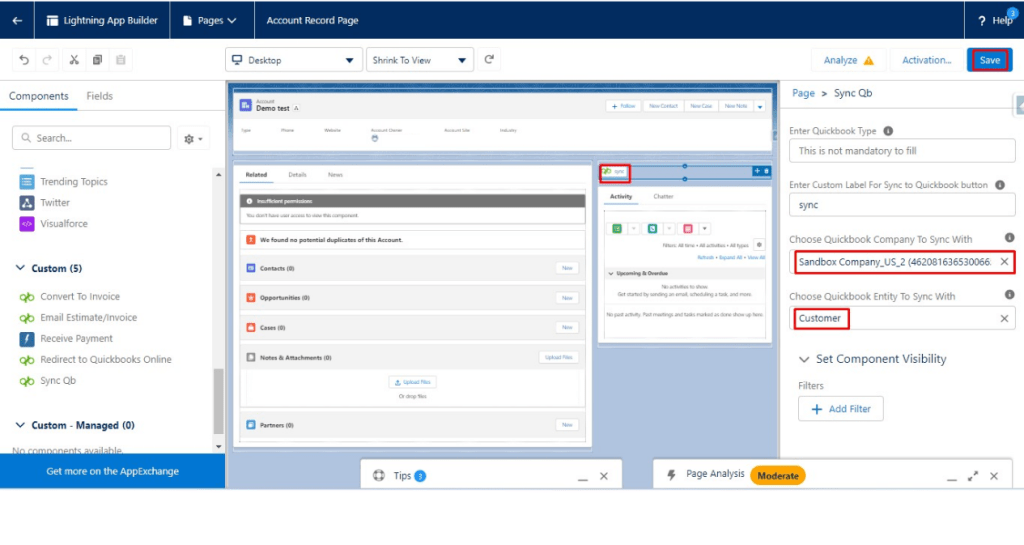
Edit page on Account Record
Filling up Design Attributes field
- In choosing Quickbooks Company Id Design attribute Select the company Id that you want to sync with(Mapping is required).
- Choose the Quickbooks entity Design attribute to Select and sync with.
Note: These two Design Attributes are required to sync.
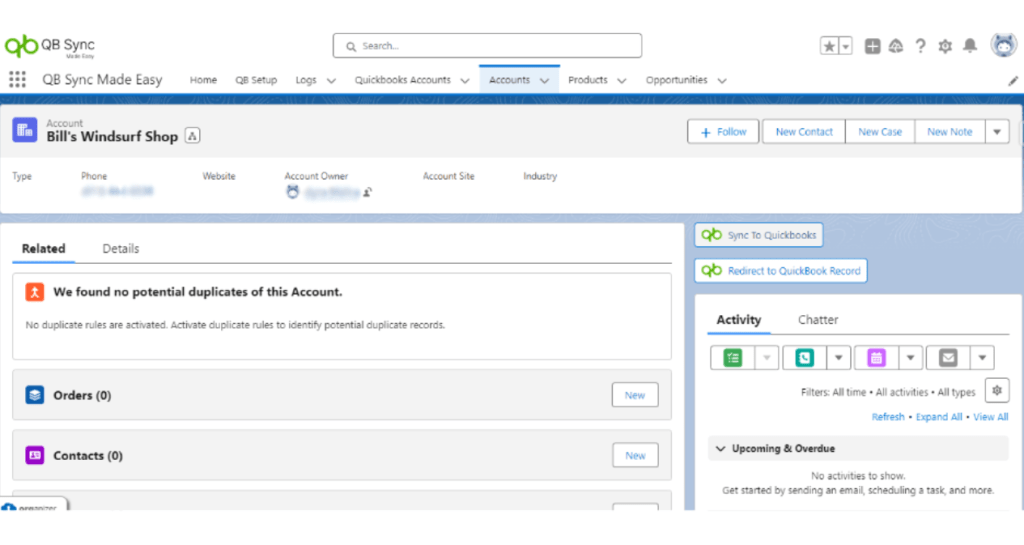
- Now you can Go to the Record and click on the Sync button to Sync that Record in the quickbooks.
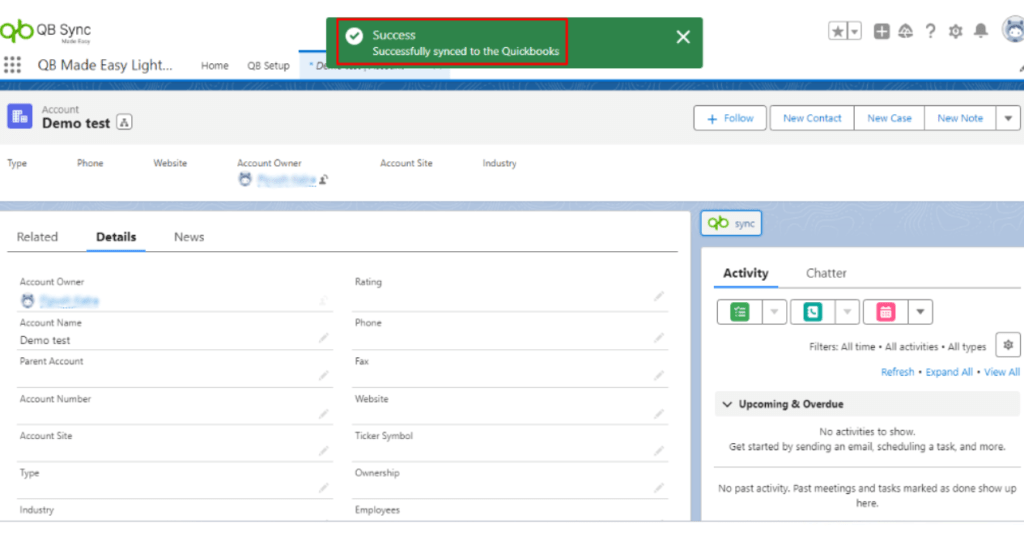
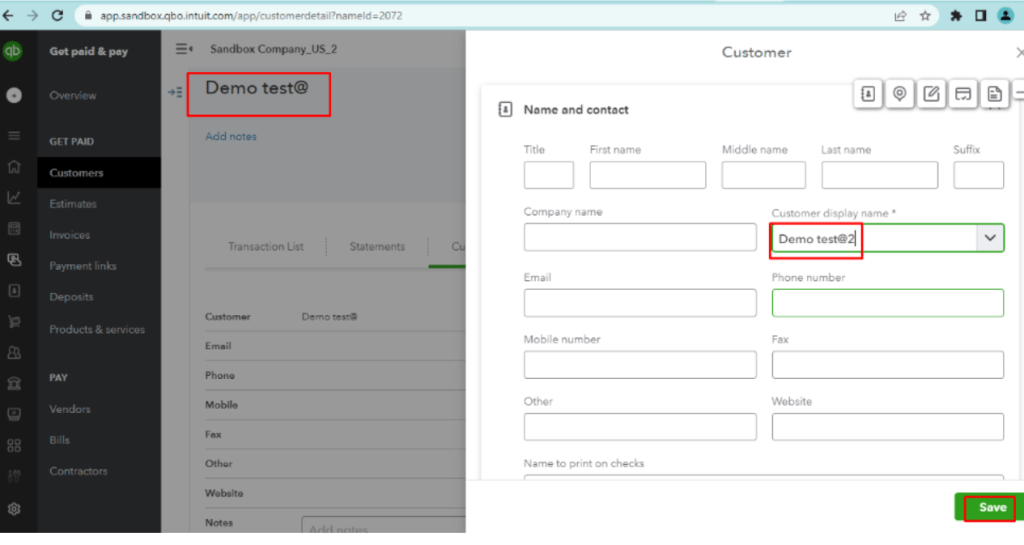
Step 22 : After you have synced the Record, Go to Quickbooks Online and check for the record.
Note: You can also add the QB Redirect Button to Redirect into that Quickbooks Record.
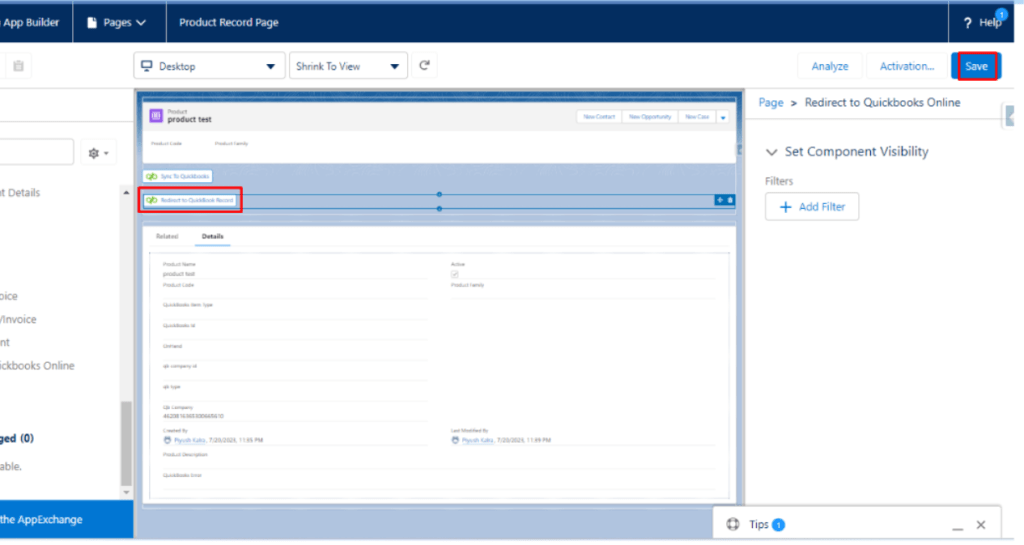
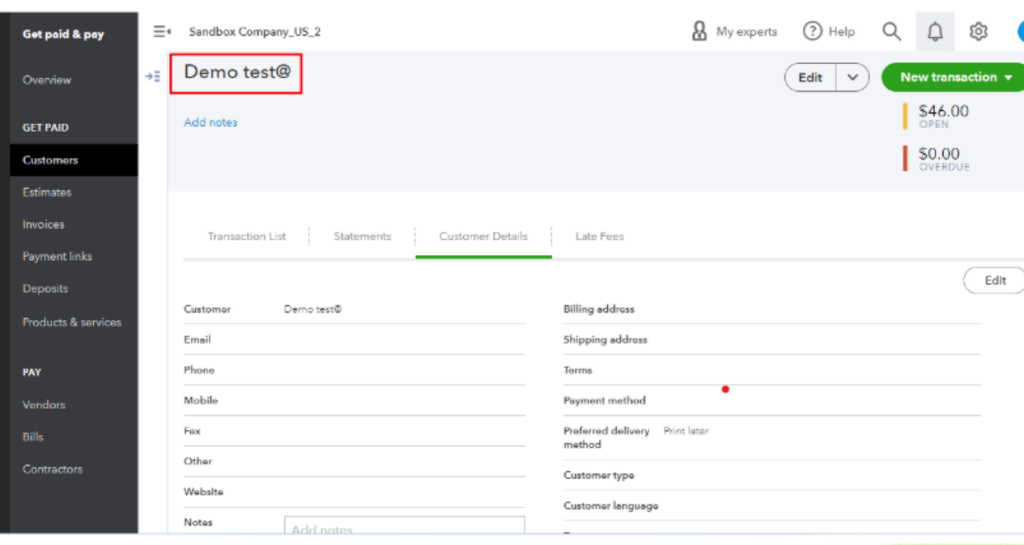
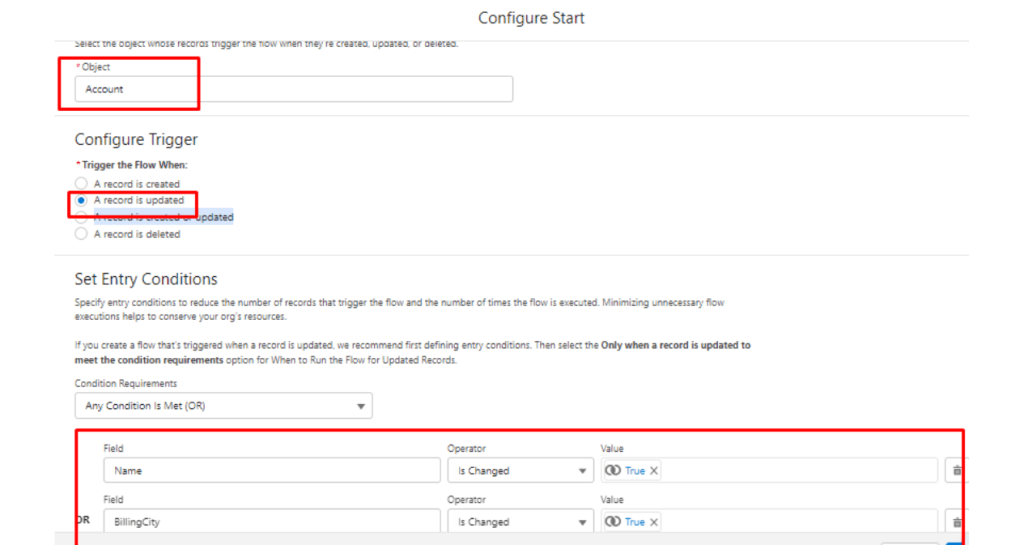
Note : You can also Sync record with the help of Record Triggered Flows.
1. Create Flow on the Salesforce Object that you want to sync in quickbooks .
Go to the home and search the Flows:
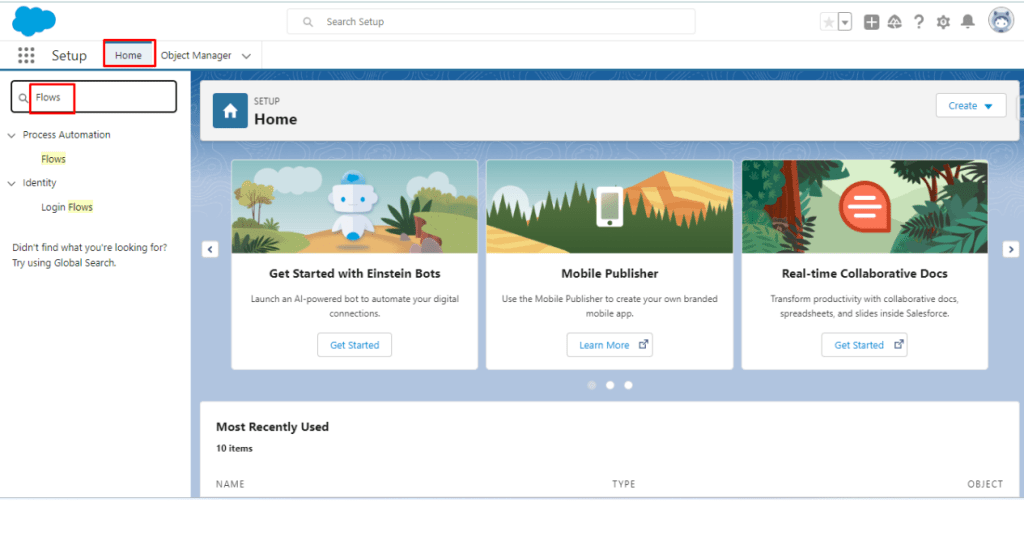
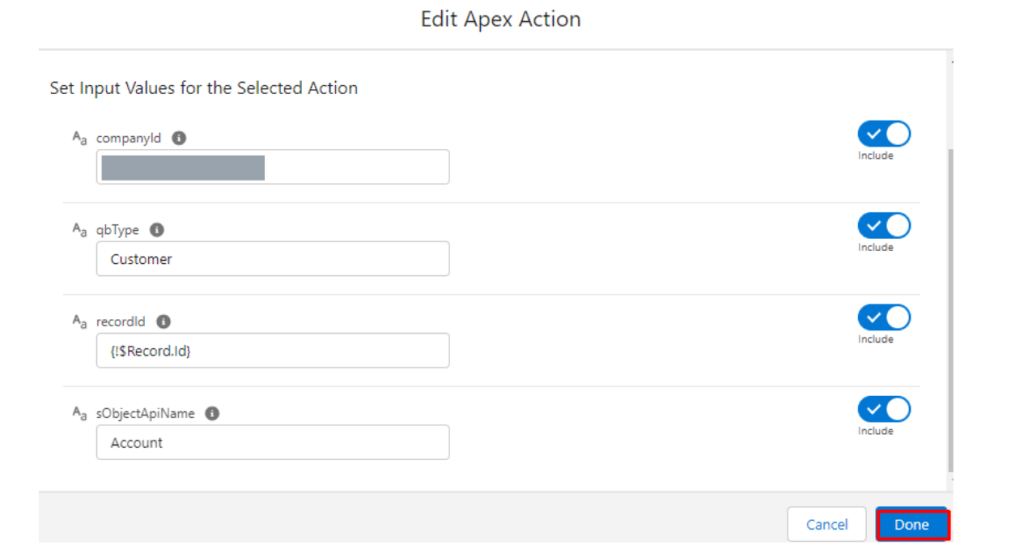
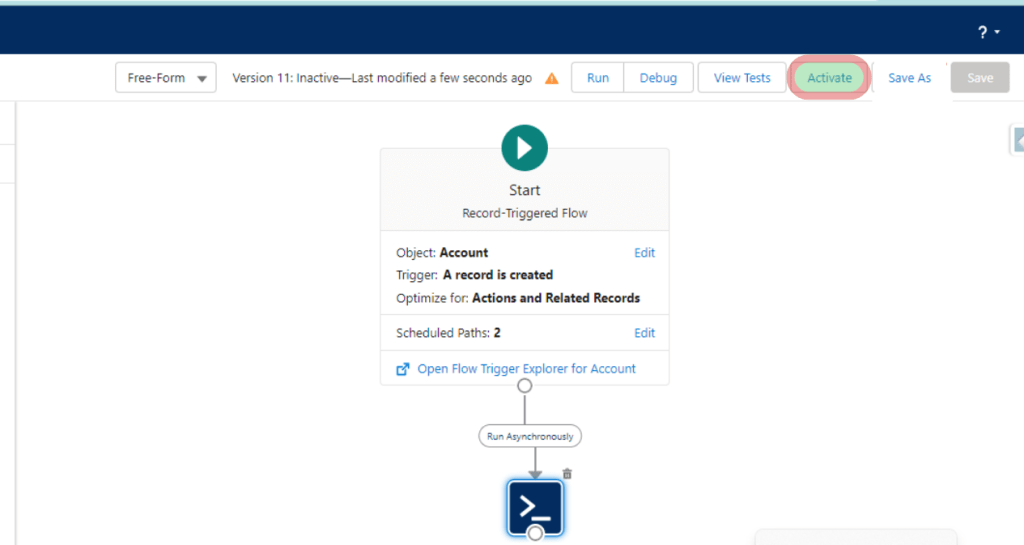
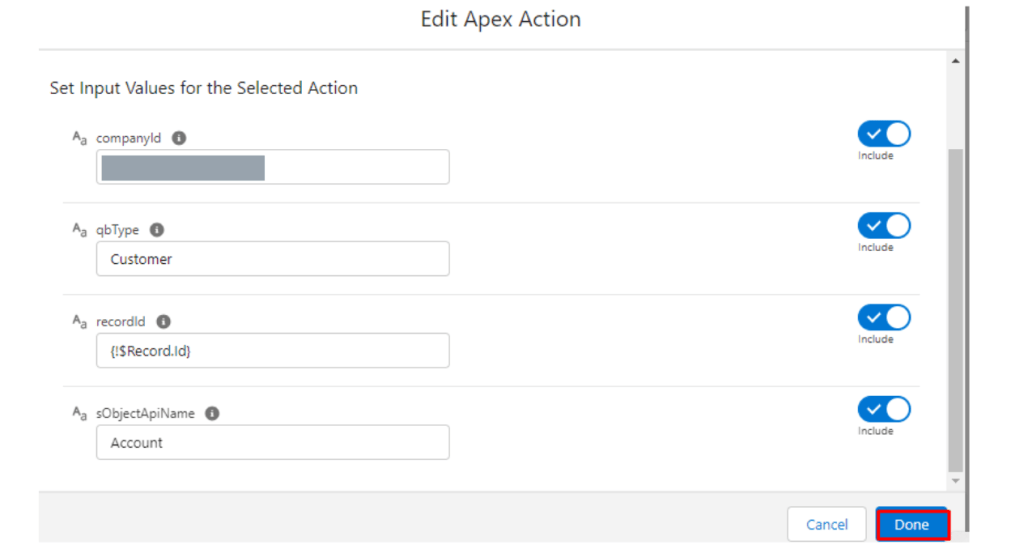
Then you have Choose the (QBSyncMadeasy) : Create Customer on Account Creation) and click on the Apex Action Fill required fields in Flow then you have to create an Account.
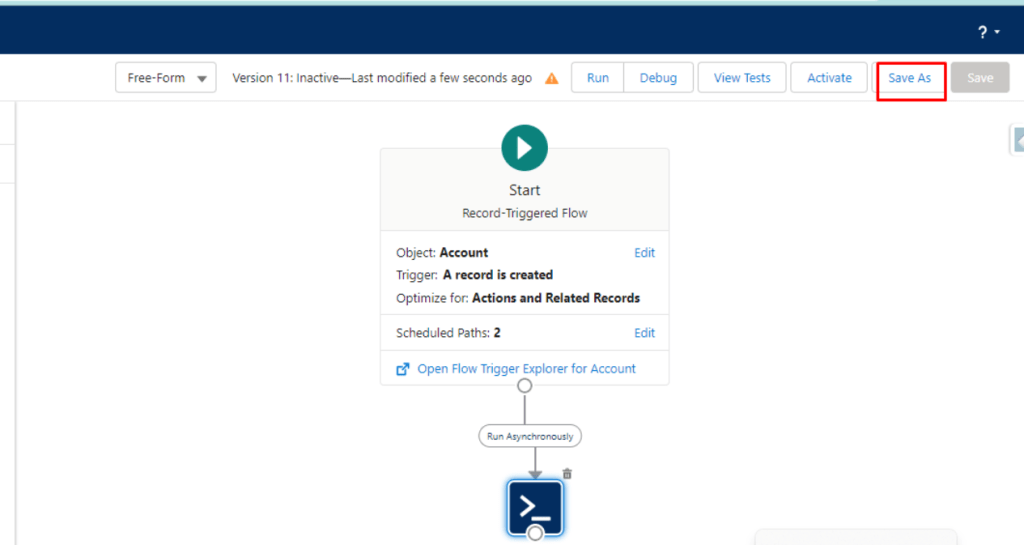
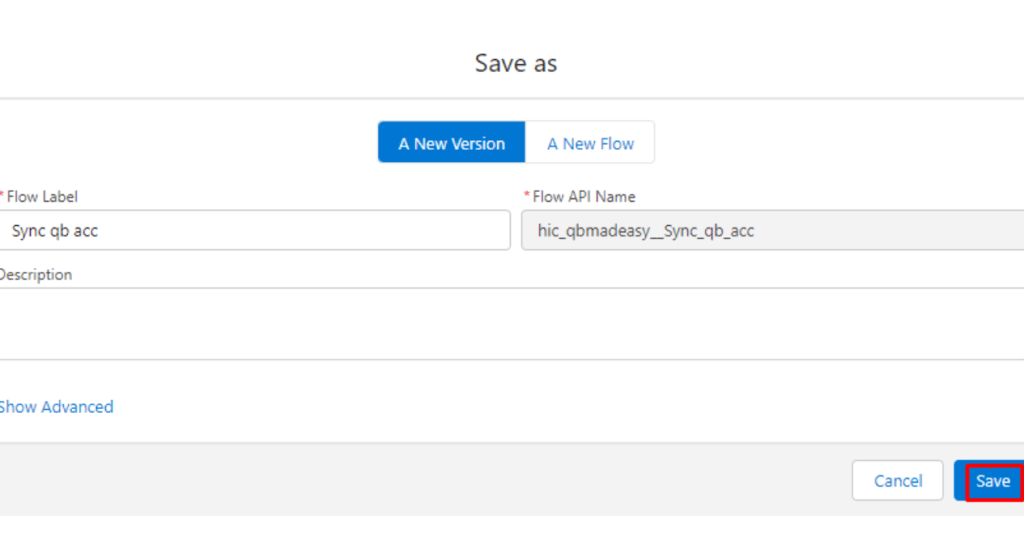
Then you have to click on the Save As Button again show the
save as page and click on the save button then click on the
Activate button Now your Flow has been activated
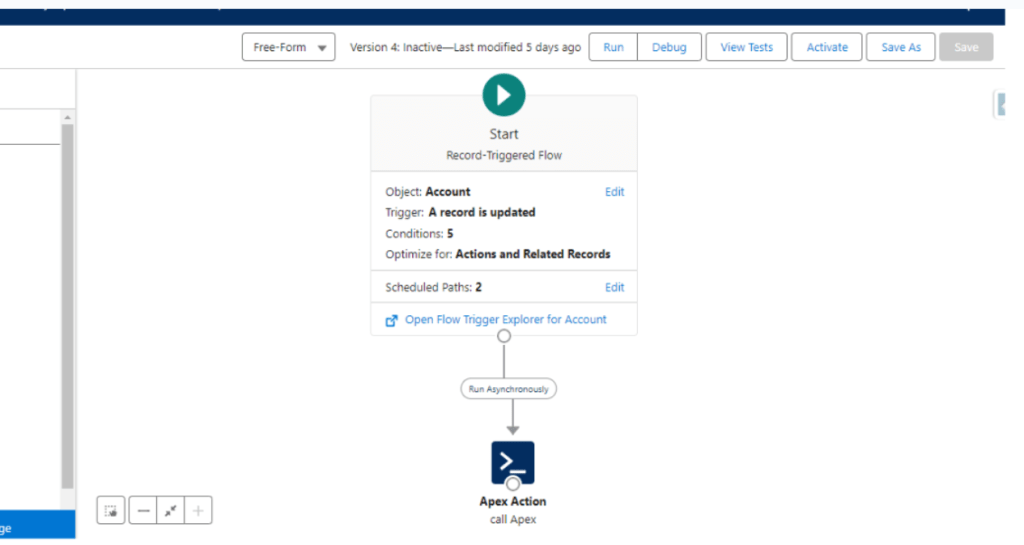
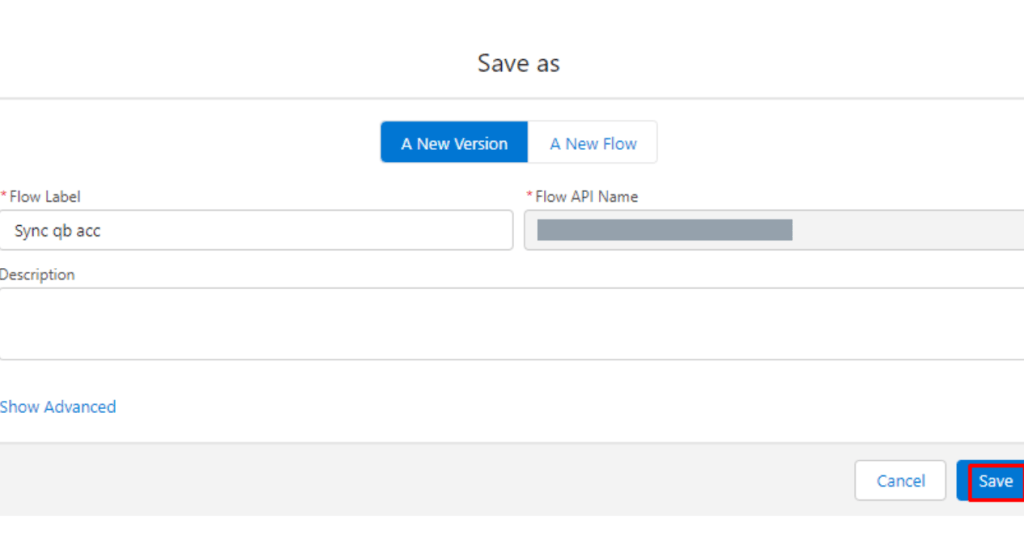
If you have to update the account you choose (QBSyncMadeasy: Update Customer on Account Updation) and click on the Edit and fill the required Fields that you want in Flow.Then you have to click on the Apex Action (Create QB Record) Fill the required fields then you have to Update the account.
Note: User can replicate the flow to create flows with other objects according to their needs
Mapping for Product-Item in the object and field setup.
Fill the Pricebook on Record Page
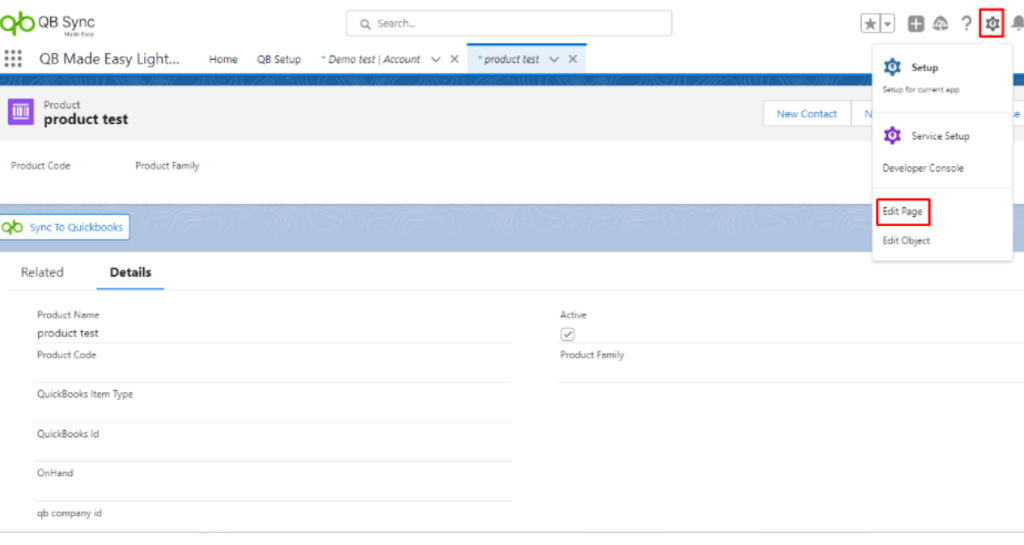
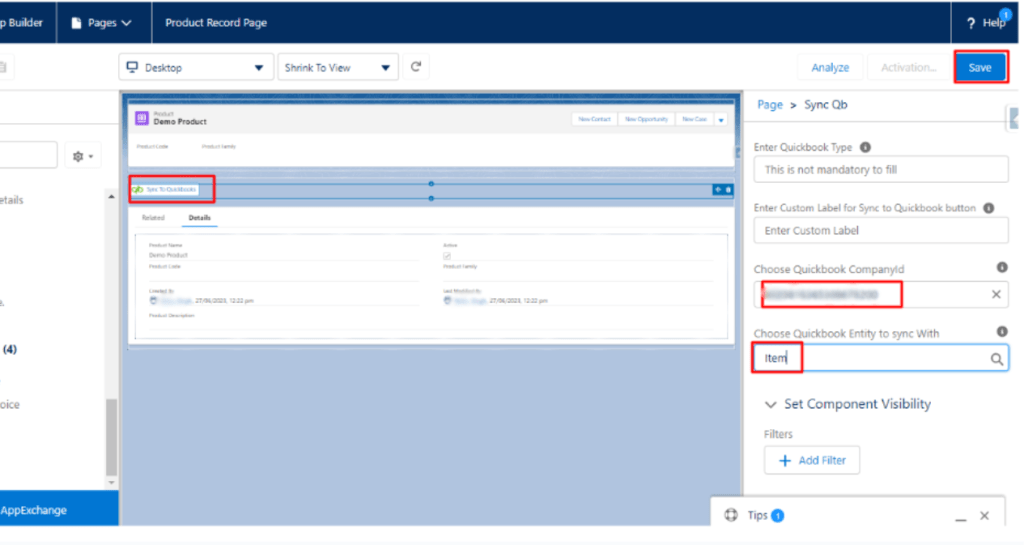
Edit Page on Product Record
Fill Design Attributes Field
- In choosing Quickbooks Company Id Design attribute, Select the company Id that you want to sync with (Mapping is required).
- Choose the Quickbooks entity Design attribute to Select and sync with.
Note: User can replicate the flow to create flows with other objects according to their needs
- Now you can Go to the Record and click on the Sync QB button to Sync that Record in the Quickbooks.
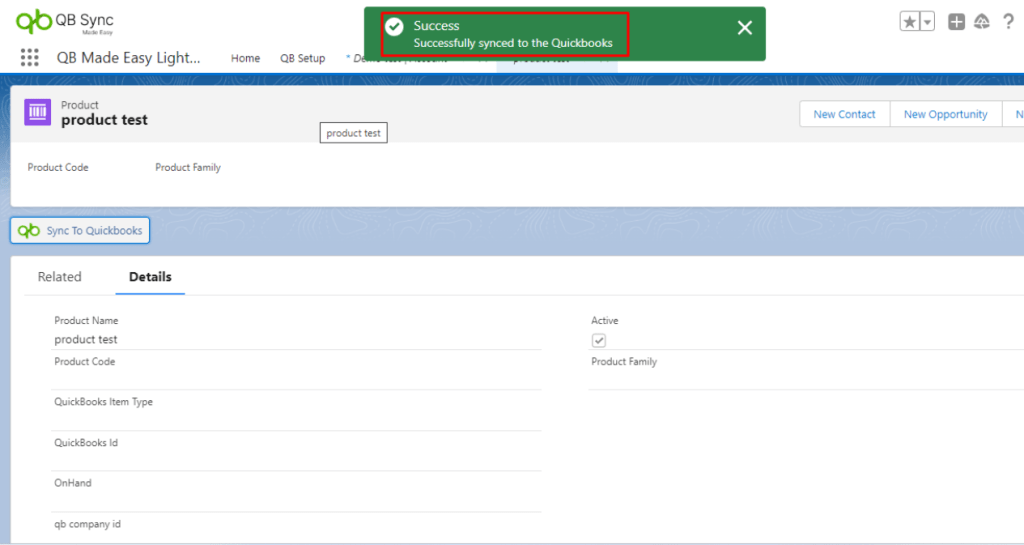
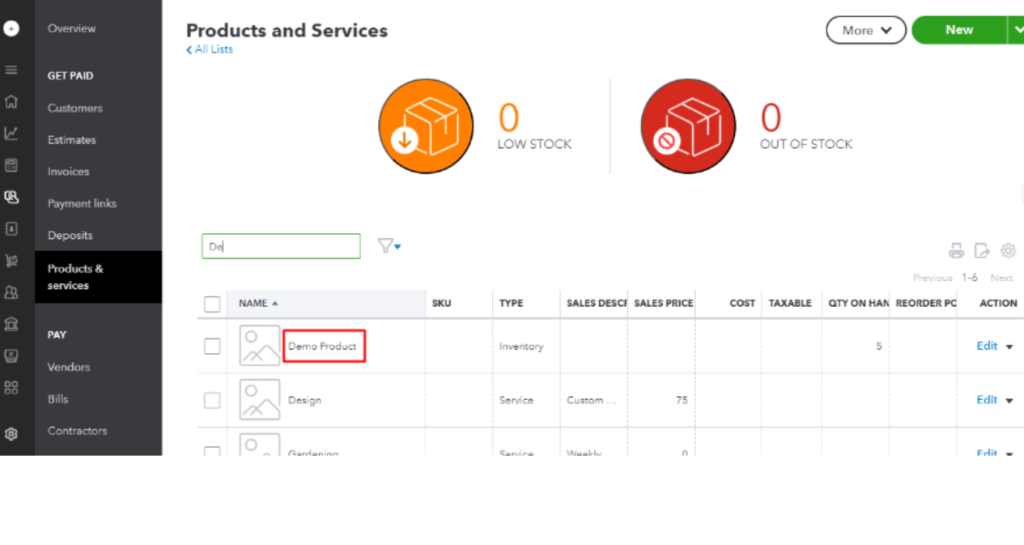
Step 23 : After you have synced the Record, Go to Quickbooks Online and check for the record.
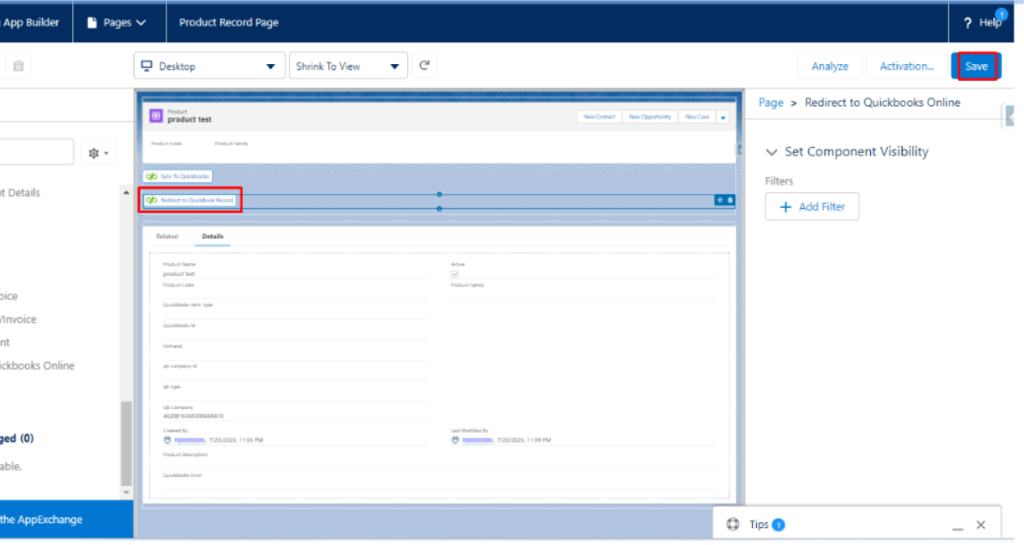
Note: You can also add the QB Redirect Button to Redirect into that Quickbooks Record
Mapping for Opportunity-Estimate in object and field setup.
Add the Account and Product that you have to Sync.
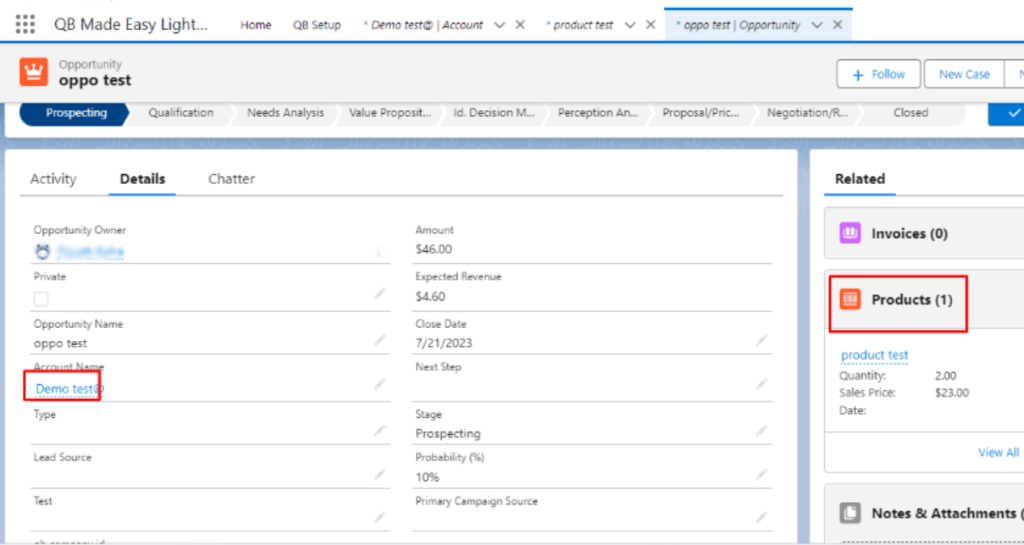
Edit Page on Opportunity Record
Filling the Required Design Attributes
- In choosing Quickbooks Company Id Design attribute Select the company Id that you want to sync with (Mapping is required)
- Choose the Quickbooks entity Design attribute to Select and sync with.
Note: These two Design Attributes are required to sync
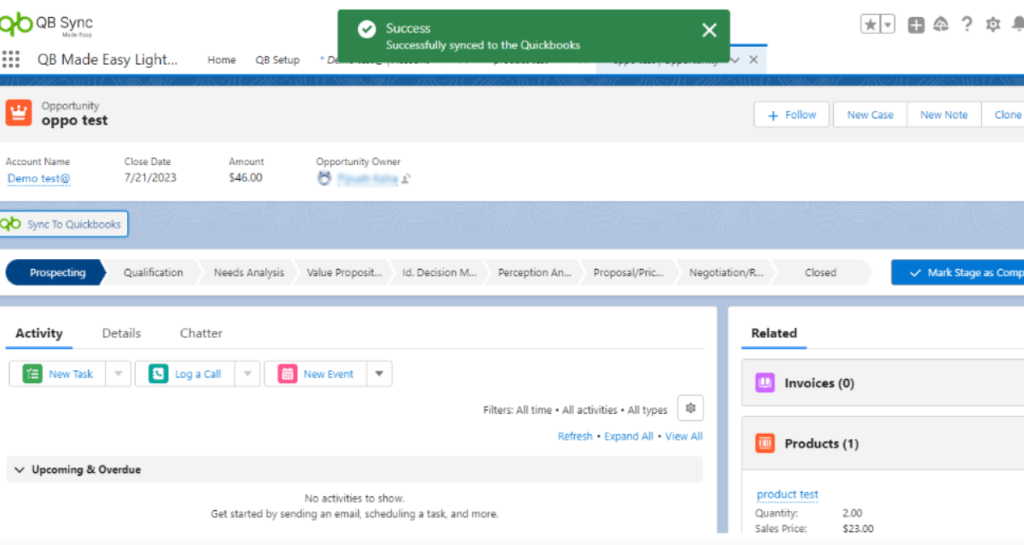
Step 24 : After you have synced the Record, Go to Quickbooks Online and check for the record.
Note: You can also add the QB Redirect Button to Redirect into that Quickbooks Record.
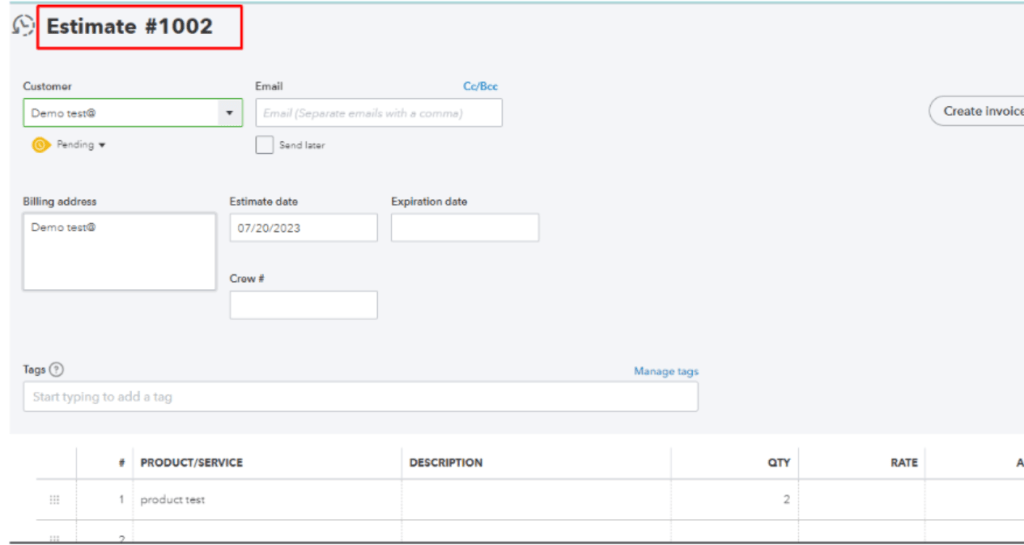
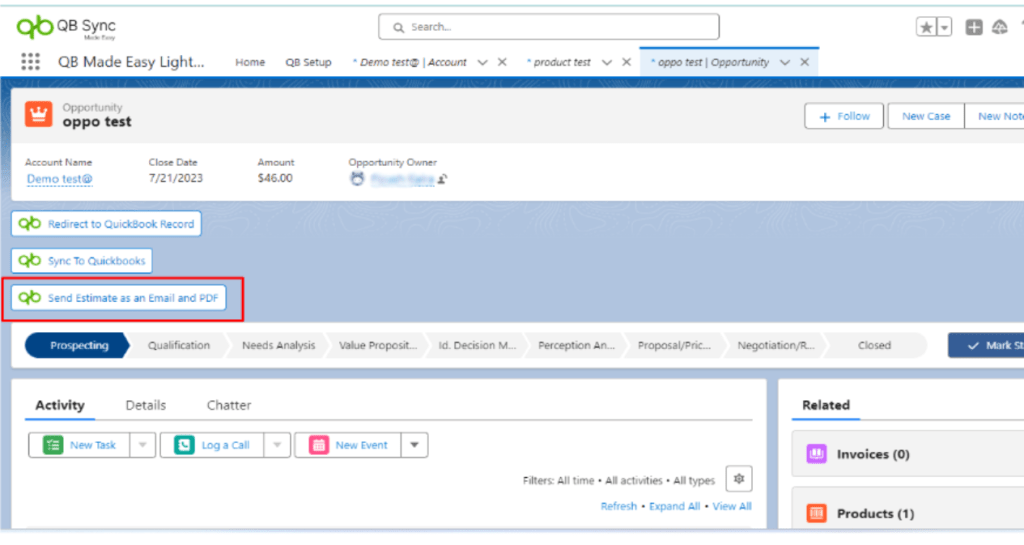
Sending Estimate to an Email From Salesforce.
Step 25 : Add the button to a record page(Which is Synced with quickbooks Estimate).
Step 26 : The model will pop up here you can fill in the Email and Click on the Send button to send that Estimate as a pdf to the Email.
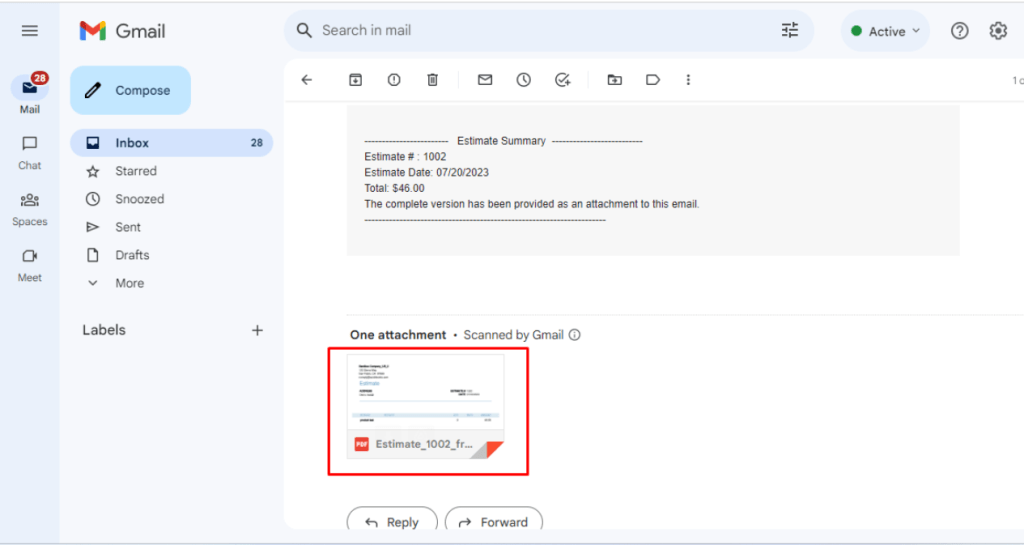
Convert Estimate to Invoice From Salesforce.
First, we have to add the button and click Then your Invoice has Created.
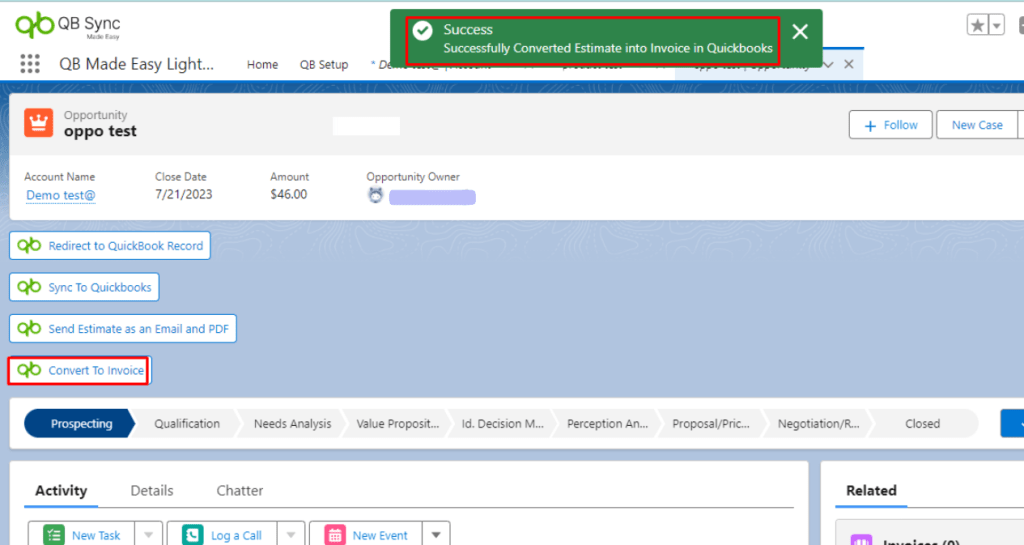
Step 27 : Now Go to the App launcher and Search for the Invoice then you have to See your Invoice.
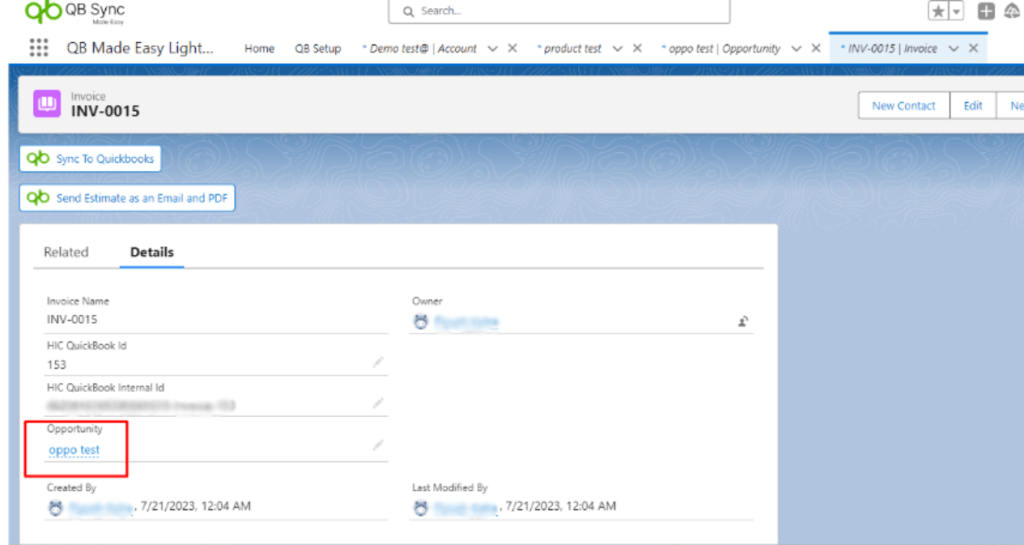
Quickbooks To Salesforce Real-time Sync.
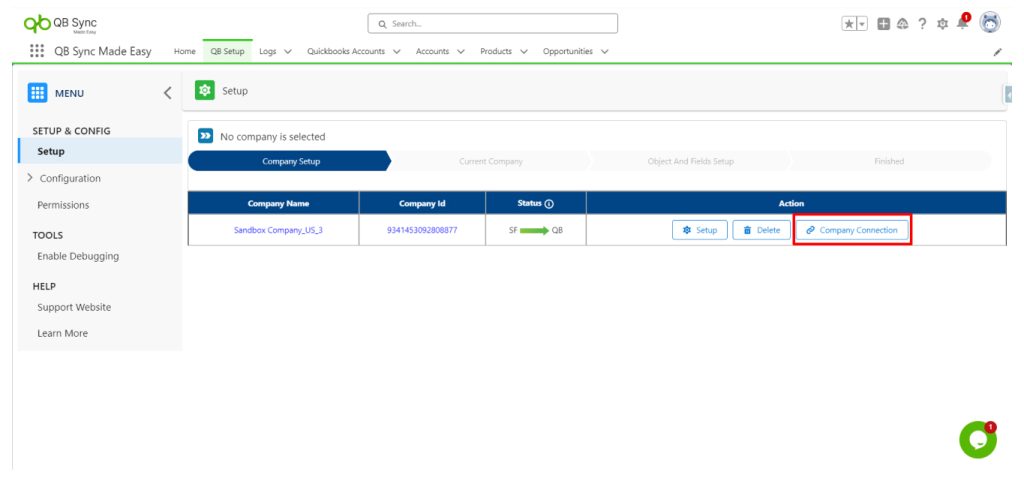
Step 28 : Go to the QBSetup and add a company if it is not added. After adding a company click on the Company connection.
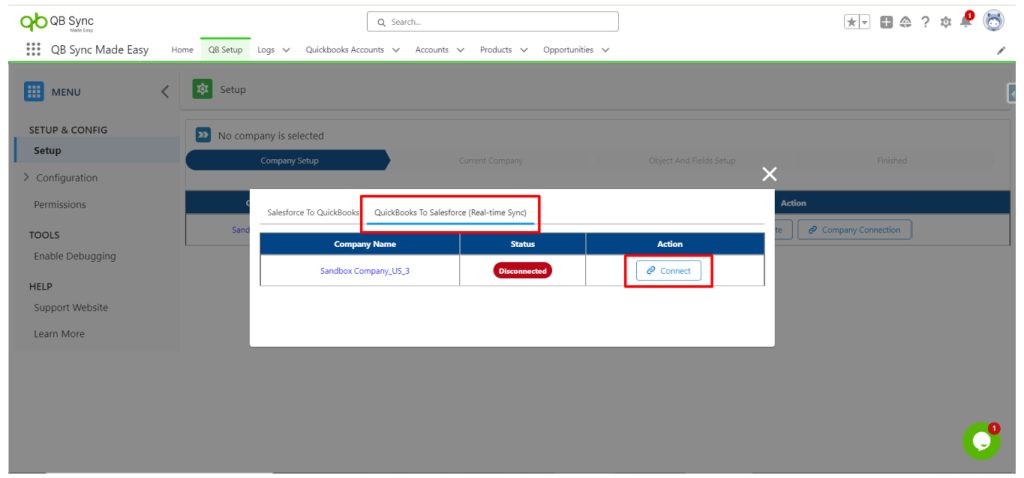
Step 29 : Then, you have to log in to the same Salesforce Account that you want to connect to.


Step 30 : Now just go to configuration and select the objects for which you want to turn on Realtime Sync
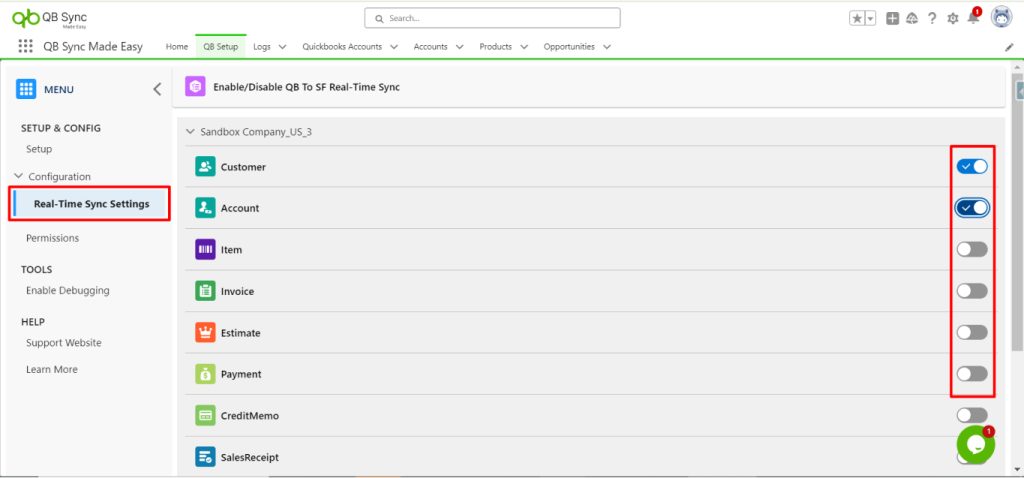
Step 31 : Now just create a Record in the Quickbooks and Check in the Salesforce.
Enable Debug Log
Support Website
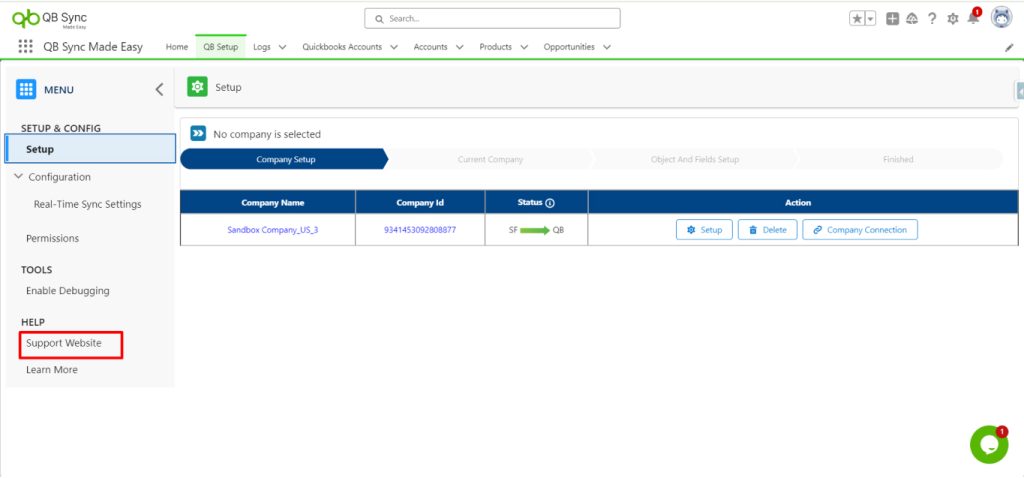
With this link user can visit Support center where he can access Documents like User Manual , Release Notes and FAQ’s.
